A PERSONAL ASIDE TO THE GAMING COMMUNITYIn Memoriam: Respected and Well-Liked Gamer, John Popiden, Passes Away SuddenlyThis has been a very sad winter for the wargaming community. Dr. John R. Popiden, associate dean of Loyola Marymount University’s Bellarmine College of Liberal Arts and associate professor of theological studies, passed away on Saturday, November 28, of a heart attack. John was only 60 years old. He leaves behind a wife, Jan, and two sons, John Jr. and James. His sudden passing is a tragic loss to his family, and to his many friends, students, and academic colleagues around the country.  John was a familiar fixture in wargaming circles, and a regular attendee at the WBC Convention for many years. However, his interest in military conflict-related issues was more than a recreational past time; it was also his primary focus in the area of religious academic studies. Professor Popiden wrote extensively for scholarly journals about the Catholic perspective on the ethics and morality of war, and on the theological doctrine of the “just war.” The unexpected death of this respected scholar, devoted family man, and amiable wargamer is a blow to all of us within the gaming community who had the privilege, over the years, of knowing John through his enthusiastic pursuit of our shared hobby. Dr. Popiden — he held a PhD in Theology from Notre Dame — was well-liked and well-respected in gaming circles; he was also a fierce competitor, particularly in the realm of the Avalon Hill classics. In short, John was an amiable and helpful presence at conventions, an accomplished player, and a very tough tournament opponent who, in 2008, won his second WBC AFRIKA KORPS title by beating Bert Schoose in the tournament finals. His unexpected passing is a terrible shock, and he will be sorely missed. Dr. Popiden will be laid to rest at 11:00 am on December 7th at Sacred Heart Chapel in Los Angeles, CA. For those who would like to honor John’s memory, Dr. Popiden’s family asks that donations be made to Loyola Marymount University in the name of the John R. Popiden Memorial Fund, c/o Alma Vorst, 1 LMU Drive, Suite 2800, Los Angeles, CA 90045-2659. GDW, THE RUSSO-JAPANESE WAR (1976)
THE RUSSO-JAPANESE WAR is a strategic-level simulation of the land and sea war, at the beginning of the Twentieth Century, between the Empire of Japan and Tsarist Russia for control of Manchuria. This early offering from Game Designers’ Workshop (GDW) is actually composed of two separate games: PORT ARTHUR and TSUSHIMA. Each of these titles can be played independently, or they can be combined to simulate the whole land and sea campaign that directly comprised the Russo-Japanese War, 1904-05. THE RUSSO-JAPANESE WAR was designed by Marc William Miller and published by Game Designers’ Workshop in 1976.
HISTORICAL BACKGROUND On 27 May, 1905, forty-five Russian warships, after completing an extraordinary 18,000 nautical mile voyage all the way from their regular station in the Baltic Sea, through the Atlantic and — because they were denied passage through the Suez Canal — all the way around Africa and into the Pacific, finally entered the Tsushima Strait between Korea and the Japanese Home Islands. The Russian fleet that steamed all the way from the Baltic to the Pacific was commanded by Admiral Zinovy Rozhestvensky and included seven battleships and six armored cruisers. On 27 May, 1905, forty-five Russian warships, after completing an extraordinary 18,000 nautical mile voyage all the way from their regular station in the Baltic Sea, through the Atlantic and — because they were denied passage through the Suez Canal — all the way around Africa and into the Pacific, finally entered the Tsushima Strait between Korea and the Japanese Home Islands. The Russian fleet that steamed all the way from the Baltic to the Pacific was commanded by Admiral Zinovy Rozhestvensky and included seven battleships and six armored cruisers. Unfortunately for Admiral Rozhestvensky, his magnificent feat of seamanship had not gone unnoticed; spies had alerted Tokyo as soon as the Russian fleet got under way. Thus, the Tsarist armada's ultimate arrival was anticipated for almost the whole of its voyage; and when the Russian fleet finally sailed into the Pacific battle area, the Japanese navy was lying in wait. Rozhestvensky’s Baltic fleet was on a course for the Russian port of Vladivostok when it was intercepted by a powerful Japanese fleet, under the command of Admiral Heihachiro Togo. Although Rozhestvensky wished to avoid an immediate engagement after his long and wearing sea voyage, Admiral Togo had other plans. By late afternoon, a major battle had developed as Togo’s battleships began to pound the retreating Russian ships at long range. The accurate Japanese fire was devastating. Within a matter of hours, four of the Russian battleships had been sunk and a fifth severely damaged. Admiral Togo’s fleet, which was both faster and better armed than that of his Russian adversary, suffered no losses during this initial clash. Indicative of the unevenness of the struggle between the two forces was the fate of the Russian Battleship, Borodino, which after being struck in one of its powder magazines, exploded and sank within minutes taking all hands with her to the bottom. Fading light brought no relief to the hard-pressed Russians; instead, as daylight faded on the 27th, the Japanese continued to aggressively press their attacks with destroyers and torpedo boats. By the time night fell on the following day, May 28th, all but twelve of the Russian ships had been sunk, captured, or run aground. Admiral Togo’s total losses were limited to only three torpedo boats. The Russian defeat was crushing; even Admiral Rozhestvensky was wounded in the course of the battle and taken prisoner by the Japanese. The Battle of Tsushima Strait, besides ending in a decisive victory for the Japanese Navy, was an historic clash for several other reasons. It had been the greatest naval battle since Trafalgar, almost a century before; and it had also been the only major naval action to ever be fought between pre-dreadnaught battleships. In addition, the lop-sided outcome of the battle — although a humiliating and strategic reversal for the Tsar — was, at least, instrumental in finally bringing the Russians to the peace table. ASnd thus it was that the Russo-Japanese War formally ended with the acceptance, by both sides, of peace terms proposed by the American President, Theodore Roosevelt, in December 1905. DESCRIPTION THE RUSSO-JAPANESE WAR simulates the Russo-Japanese War on both land and sea. The land game, PORT ARTHUR, is a strategic treatment of the war, with special emphasis on the logistical problems confronting both armies. The naval game, TSUSHIMA, centers on the individual capital ships and flotillas that featured so prominently in the final outcome of the war. THE RUSSO-JAPANESE WAR is a comprehensive simulation of the major strategic factors that influenced the battle for Manchuria. However, for those players who want to focus exclusively on either the land or naval portions of the campaign, either the land or the naval game can be played independently. THE RUSSO-JAPANESE WAR simulates the Russo-Japanese War on both land and sea. The land game, PORT ARTHUR, is a strategic treatment of the war, with special emphasis on the logistical problems confronting both armies. The naval game, TSUSHIMA, centers on the individual capital ships and flotillas that featured so prominently in the final outcome of the war. THE RUSSO-JAPANESE WAR is a comprehensive simulation of the major strategic factors that influenced the battle for Manchuria. However, for those players who want to focus exclusively on either the land or naval portions of the campaign, either the land or the naval game can be played independently. PORT ARTHUR  This game is a division-level simulation of the Japanese land campaign to seize control of Manchuria from Imperial Russia. The game covers the decisive period — from February, 1904 through December, 1905 — during which the outcome of the Japanese land campaign was decided. The PORT ARTHUR game map covers Manchuria from Port Arthur to Mukden; this was the primary battle area over which the contesting armies maneuvered and fought. PORT ARTHUR is played in monthly game turns each of which is divided into a Japanese and a Russian player turn. The Japanese player is always the first to act. Each seven-step game turn proceeds in the following order: Japanese Movement Phase; Japanese Combat Phase; Japanese Supply Determination and Reinforcement Phase; Russian Movement Phase; Russian Combat Phase; Russian Supply Determination and Reinforcement Phase; and the joint Terminal Phase. This game is a division-level simulation of the Japanese land campaign to seize control of Manchuria from Imperial Russia. The game covers the decisive period — from February, 1904 through December, 1905 — during which the outcome of the Japanese land campaign was decided. The PORT ARTHUR game map covers Manchuria from Port Arthur to Mukden; this was the primary battle area over which the contesting armies maneuvered and fought. PORT ARTHUR is played in monthly game turns each of which is divided into a Japanese and a Russian player turn. The Japanese player is always the first to act. Each seven-step game turn proceeds in the following order: Japanese Movement Phase; Japanese Combat Phase; Japanese Supply Determination and Reinforcement Phase; Russian Movement Phase; Russian Combat Phase; Russian Supply Determination and Reinforcement Phase; and the joint Terminal Phase.  Supply, as it did in the historical campaign, plays a critical role in PORT ARTHUR; for this reason, the rules governing the determination of supply status for both sides are both detailed and comparatively complicated. Both sides may use one of two types of supply: Intrinsic Supply, which is drawn from specific geographical sites (e.g. Mukden), and is never expended; and Supply Counters, which are expended when used to support an attack. Supply effects are fairly draconian, if straight forward: “supplied” units operate using their face combat values; “unsupplied” units may not attack at all. In addition, unsupplied artillery units defend with a “0” defense strength and the phasing player receives a +2 die roll modification (DRM) when attacking any unsupplied non-artillery units. Besides combat, supply may also be used to repair damaged combat units. Interestingly, supply status does not affect movement, but “seasons” do. Thus, the movement allowances of all units vary according to the different seasons of the year. All infantry-type units exert a zone of control (ZOC). Zones of control, however, do not extend into town or rough terrain hexes, nor across rivers. In addition, ZOCs are “rigid”: a phasing unit must halt when entering an enemy ZOC, and may move no farther during that game turn. In a subsequent player turn, a phasing unit may either exit an enemy ZOC without penalty, or it may move directly from one ZOC to another, expending its full movement allowance. Stacking of combat units is limited to five units per hex, and no more than two units in a stack may be divisions. Combat is resolved using an “odds differential” Combat Results Table (CRT), but there are two different CRTs: a regular Combat Results Table, and a Siege Fire Results Table. Combat losses are assessed in terms of “hits” and “rout” results. Each hit degrades the combat power of the affected unit, and three hits results in its elimination. “Rout” results require all units in the defending stack to take one hit and retreat four hexes. Terrain Effects are relatively uncomplicated. As might be expected, both rivers and rough terrain slow movement. On the other hand, roads and railroads accelerate movement significantly: phasing units pay one-half movement point to move along roads, and one-fifth movement point to move by rail. Supply, as it did in the historical campaign, plays a critical role in PORT ARTHUR; for this reason, the rules governing the determination of supply status for both sides are both detailed and comparatively complicated. Both sides may use one of two types of supply: Intrinsic Supply, which is drawn from specific geographical sites (e.g. Mukden), and is never expended; and Supply Counters, which are expended when used to support an attack. Supply effects are fairly draconian, if straight forward: “supplied” units operate using their face combat values; “unsupplied” units may not attack at all. In addition, unsupplied artillery units defend with a “0” defense strength and the phasing player receives a +2 die roll modification (DRM) when attacking any unsupplied non-artillery units. Besides combat, supply may also be used to repair damaged combat units. Interestingly, supply status does not affect movement, but “seasons” do. Thus, the movement allowances of all units vary according to the different seasons of the year. All infantry-type units exert a zone of control (ZOC). Zones of control, however, do not extend into town or rough terrain hexes, nor across rivers. In addition, ZOCs are “rigid”: a phasing unit must halt when entering an enemy ZOC, and may move no farther during that game turn. In a subsequent player turn, a phasing unit may either exit an enemy ZOC without penalty, or it may move directly from one ZOC to another, expending its full movement allowance. Stacking of combat units is limited to five units per hex, and no more than two units in a stack may be divisions. Combat is resolved using an “odds differential” Combat Results Table (CRT), but there are two different CRTs: a regular Combat Results Table, and a Siege Fire Results Table. Combat losses are assessed in terms of “hits” and “rout” results. Each hit degrades the combat power of the affected unit, and three hits results in its elimination. “Rout” results require all units in the defending stack to take one hit and retreat four hexes. Terrain Effects are relatively uncomplicated. As might be expected, both rivers and rough terrain slow movement. On the other hand, roads and railroads accelerate movement significantly: phasing units pay one-half movement point to move along roads, and one-fifth movement point to move by rail.  Victory, not surprisingly, is determined on the basis of control of geographical objectives. The Japanese goal, as it was historically, is to capture Mukden and Port Arthur and the rail line that connects them. Different levels of victory are possible, however, depending on how close the Japanese player actually comes to achieving this strategic goal. In the case of stalemate, players also have the choice of playing for an “Optional” victory. This situation may occur if the game bogs down, and neither player is in a position to attain a conventional win. Victory, not surprisingly, is determined on the basis of control of geographical objectives. The Japanese goal, as it was historically, is to capture Mukden and Port Arthur and the rail line that connects them. Different levels of victory are possible, however, depending on how close the Japanese player actually comes to achieving this strategic goal. In the case of stalemate, players also have the choice of playing for an “Optional” victory. This situation may occur if the game bogs down, and neither player is in a position to attain a conventional win. PORT ARTHUR offers only the twenty-three turn Historical Game. There are no “Optional” rules. TSUSHIMA  This is the companion game to PORT ARTHUR and covers the naval war between Japan and Russia, the outcome of which was critical to the success of the Japanese land campaign in Manchuria. The naval game map represents the sea areas immediately surrounding Manchuria and the Japanese Islands. TSUSHIMA is played in monthly game turns each of which is comprised of seven turn segments. The first six turn segments simulate naval operations and are each procedurally identical. The Japanese player is always the first player. Each of the six naval segments proceeds as follows: Japanese Movement Phase; Japanese Spotting and Combat Phase; Russian Movement Phase; Russian Spotting and Combat Phase. At the conclusion of the sixth naval segment, the game turn ends with the joint Terminal Phase. This is the companion game to PORT ARTHUR and covers the naval war between Japan and Russia, the outcome of which was critical to the success of the Japanese land campaign in Manchuria. The naval game map represents the sea areas immediately surrounding Manchuria and the Japanese Islands. TSUSHIMA is played in monthly game turns each of which is comprised of seven turn segments. The first six turn segments simulate naval operations and are each procedurally identical. The Japanese player is always the first player. Each of the six naval segments proceeds as follows: Japanese Movement Phase; Japanese Spotting and Combat Phase; Russian Movement Phase; Russian Spotting and Combat Phase. At the conclusion of the sixth naval segment, the game turn ends with the joint Terminal Phase.Because TSUSHIMA is a naval simulation, a number of familiar land combat concepts do not appear in the game. Supply, for example, is not a factor because of the scale and time frame of the game. However, in its place, Ports and Ship Repairs do have a direct effect on both navies’ operations during the course of play. Movement rules are simple, but important; just one example of movement restrictions: before either players’ fleets leave port, individual ships must be assigned to “Divisions,” each of which can range in size from three to six ships. Terrain rules are also quite simple. Because there are essentially only three types of terrain — land, sea, and partial sea hexes — the effects of different terrain types are minimal. However, terrain is not completely irrelevant: naval units that enter “partial sea” hexes do run a small risk of “running aground.”  The Spotting and Combat Rules for TSUSHIMA, as is typical of many naval board games, are very reminiscent of those governing naval miniatures. They are also both very detailed and quite richly textured, and, for this reason, the following description of naval combat operations represents only a brief overview of the various steps that players must follow in the course of the game. Combat, as is typical of many naval games that attempt to simulate both strategic and tactical operations, only becomes possible when enemy fleets occupy the same hex. Thus, ships maneuver on the regular hexagonal (strategic) game map until they enter a hex containing enemy vessels. When opposing fleets intercept each other, they may attempt, during the appropriate player phase, to spot the enemy ships located in their current hex. If spotting is successful, the two opposing fleets — much like surface combat in TAHGC’s MIDWAY — are both removed from the strategic map and are placed on the TSUSHIMA “Battle Board.” Ships transferred to the “Battle Board” must initially be placed in their starting divisions, and the top ship counter in each “divisional” stack is considered to be the “lead” ship for that division: a designation, by the way, that is important because of its effect on the speed and maneuver options of the entire division. Once the two enemy fleets have been deployed on the opposite ends of the “Battle Board,” combat begins. The Spotting and Combat Rules for TSUSHIMA, as is typical of many naval board games, are very reminiscent of those governing naval miniatures. They are also both very detailed and quite richly textured, and, for this reason, the following description of naval combat operations represents only a brief overview of the various steps that players must follow in the course of the game. Combat, as is typical of many naval games that attempt to simulate both strategic and tactical operations, only becomes possible when enemy fleets occupy the same hex. Thus, ships maneuver on the regular hexagonal (strategic) game map until they enter a hex containing enemy vessels. When opposing fleets intercept each other, they may attempt, during the appropriate player phase, to spot the enemy ships located in their current hex. If spotting is successful, the two opposing fleets — much like surface combat in TAHGC’s MIDWAY — are both removed from the strategic map and are placed on the TSUSHIMA “Battle Board.” Ships transferred to the “Battle Board” must initially be placed in their starting divisions, and the top ship counter in each “divisional” stack is considered to be the “lead” ship for that division: a designation, by the way, that is important because of its effect on the speed and maneuver options of the entire division. Once the two enemy fleets have been deployed on the opposite ends of the “Battle Board,” combat begins. Interestingly, combat procedures, although carefully structured, are conducted in a more-or-less open-ended sequence of firing and movement rounds until one or the other of the opposing fleets is either destroyed or retreats (attempts “flight”) from the action. All combat is considered to be simultaneous. Naval combat is resolved using “odds differential” Combat Results Tables (CRTs), of which there are two: a regular Naval Gunfire Table, and a Torpedo Table. Combat losses are assessed in terms of “hits” and “sunk” results. Each hit degrades the combat power and movement capability of the affected unit, and three hits results in its elimination (sinking). Destroyer and Torpedo Boat counters are an exception: hits affect the combat power of these units, but not their movement. Merchant fleets are sunk when they receive a single hit. Interestingly, combat procedures, although carefully structured, are conducted in a more-or-less open-ended sequence of firing and movement rounds until one or the other of the opposing fleets is either destroyed or retreats (attempts “flight”) from the action. All combat is considered to be simultaneous. Naval combat is resolved using “odds differential” Combat Results Tables (CRTs), of which there are two: a regular Naval Gunfire Table, and a Torpedo Table. Combat losses are assessed in terms of “hits” and “sunk” results. Each hit degrades the combat power and movement capability of the affected unit, and three hits results in its elimination (sinking). Destroyer and Torpedo Boat counters are an exception: hits affect the combat power of these units, but not their movement. Merchant fleets are sunk when they receive a single hit. In addition to the basic rules covering movement, stacking, spotting, and combat, TSUSHIMA also includes detailed rules to simulate Morale, ship Repairs, Ports, Mines, and even Special Ship Types. And to add further to the (historically justified) woes of the Russian player, there is also a First Turn Surprise rule that severely restricts the actions of the Tsar’s fleet during the first two naval phases of the campaign game. There are no “Optional” rules.  TSUSHIMA, besides the twenty-three turn historical campaign game, also offers four shorter scenarios that permit the players both to familiarize themselves with the game system, and to examine different phases of the naval war. These scenarios (or mini-games) are: The Battle of Port Arthur (all action takes place on the “Battle Board”); The Destruction of the Variag at Chemulpo (all action on the “Battle Board”); The Battle of Round Island (up to 3 game turns); and The Battle of Tsushima (up to 3 game turns). TSUSHIMA, besides the twenty-three turn historical campaign game, also offers four shorter scenarios that permit the players both to familiarize themselves with the game system, and to examine different phases of the naval war. These scenarios (or mini-games) are: The Battle of Port Arthur (all action takes place on the “Battle Board”); The Destruction of the Variag at Chemulpo (all action on the “Battle Board”); The Battle of Round Island (up to 3 game turns); and The Battle of Tsushima (up to 3 game turns). Victory in the campaign game is determined both by “Control of the Sea” and by the cumulative damage inflicted on the opposing fleet at the conclusion of the game. In the case of the shorter mini-games, victory conditions vary and are specific to the situation outlined in each scenario. A PERSONAL OBSERVATIONIn THE RUSSO-JAPANESE WAR, players will quickly find that, as was the case historically, Russian naval sorties are exceedingly rare. But some sort of naval action is virtually guaranteed: first because the vulnerability of the Japanese sea borne supply lines makes raiding attractive (the “Control of the Sea” issue); and second, because of the preordained arrival of the Russian Baltic Fleet. The importance of the Japanese sea supply lanes underscores a critical factor in THE RUSSO-JAPANESE WAR: in the land battle for Manchuria, it is often much more economical and effective to put enemy units out of supply, than it is to actually fight them. Toe-to-toe combat can be expensive, and, whether successful or not, always consumes precious supplies. Interestingly, the strategic balance between the two belligerents is much closer than it first appears. Although the Russian player is at a distinct disadvantage, both in terms of his naval combat power and in the command and control of his naval and ground forces, his position is far from hopeless. The Japanese player has problems of his own: Japanese forces must steadily advance, and they must capture Port Arthur and Mukden, if they are to have any chance of matching the original outcome of the campaign. Moreover, as long as Port Arthur is under Russian control, the Tsar’s navy remains a dangerous threat to Japanese operations. For this reason, and others, the historical Japanese victory is far from a foregone conclusion.All things considered, the pair of simulations that make up THE RUSSO-JAPANESE WAR are two of the better games to come from Marc Miller: one of the “boys from Normal” who, in all honesty, has never been among my favorite designers at GDW. Unlike some of Mr. Miller’s other creations — AGINCOURT and the Seelöwe invasion game from THEIR FINEST HOUR come immediately to mind — the rules for THE RUSSO-JAPANESE WAR, while a little obtuse, are not incomprehensible; an observation that I make advisedly. Most new players will still find that more than one reading of the game rules is helpful before beginning play. Graphically, the game components are crude but neither ambiguous nor outright ugly. And continuing in this vein of “damning with faint praise,” the land and sea games actually mesh together fairly well, and the two titles are both interesting and enjoyable enough to be worth playing as separate “stand-alone” games. That being said, THE RUSSO-JAPANESE WAR is not without its more serious faults. The supply rules for PORT ARTHUR, although plausible from an historical standpoint, are cumbersome; and players must take pains not to mix up supply counters with “hit” markers particularly in densely-stacked situations such as arise during the siege of Port Arthur. The main problem with the land game, however, is not rooted in the land supply rules, but in those rules that pertain to the Japanese sea lanes. During the early post-invasion phase of the game, if the Japanese lose “Control of the Seas,” the land game can easily go off the rails and even turn into an inconclusive stalemate. Historically this may be accurate, but a Russian player with “hot dice” can still create real problems for the Japanese land campaign. The sea counterpart to the land game, TSUSHIMA, offers very few genuine surprises and is pretty-much standard fare for simulations of naval operations on this scale. There is a certain amount of “limited intelligence” baked into the game, but not so much as to seriously slow play. Of course, unless a player is a masochist, it is clearly more fun to command the Japanese Fleet in TSUSHIMA; so opponents eager to direct the Tsar’s outclassed naval forces are usually hard to find. I have personally found that, in dealing with this problem, bribes are often useful. To be fair, of course, this is hardly the fault of the game; particularly, in light of the historical outcome of the Battle of the Tsushima Strait. Sadly for the Russophiles amongst us, in the vast majority of TSUSHIMA naval match-ups, the Russian Navy will have a very tough time of it; on the other hand, they had a tough time of it, historically, so this aspect of the naval simulation really isn’t a surprise. Design Characteristics (PORT ARTHUR):
Game Components (PORT ARTHUR):
Design Characteristics (TSUSHIMA):
Game Components (TSUSHIMA):
SPI, AUSTERLITZ (1973)
AUSTERLITZ: The Battle of the Three Emperors, 2 Dec 1805 is a grand tactical (brigade) level simulation of the climactic clash between the French Army, under Napoleon, and the Austrian and Russian Armies, commanded by Tsar Alexander I, on 2 December, 1805. This game was packaged using two different formats: the original Tombstone-style white box edition; and later, in the more familiar plastic flat-pack version featured here. AUSTERLITZ was designed by John Michael Young, and published in 1973 by Simulations Publications, Incorporated (SPI).
HISTORICAL BACKGROUNDAt 8:00 am on 2 December 1805, near the small Moravian hamlet of Austerlitz, the 85,000 soldiers of the army of the Third Coalition pushed forward in a determined attack against the 67,000 Frenchmen of Napoleon’s Grand Armée. This combined army of Russian and Austrian troops, commanded by Tsar Alexander I, had massed almost half of its strength in four large columns on the Allied left wing, and now these columns began to advance towards the southern section of the French line. The close-packed coalition battalions, because of the fog and broken ground to their front, quickly became intermingled and confused as they closed on the French ranks to their front. None-the-less, some of the advancing and disordered Russo-Austrian formations covered the intervening distance between the two armies quickly, and soon they emerged from the wispy morning mist to smash into Napoleon’s weak right flank near the villages of Telnitz and Sokolnitz. The Allied plan was simple: break the French right and then drive west to cut Napoleon off from both supplies and reinforcements. The fog lifts at Austerlitz to reveal the full fury of the battle. The fog lifts at Austerlitz to reveal the full fury of the battle.Across the fog and smoke-shrouded battlefield, Napoleon watched, with satisfaction, the distant enemy columns as they formed on the coalition left and then began their advance towards his weak right flank. Napoleon had reason to be pleased: the Tsar’s soldiers were attacking exactly how and where he wanted them to. The French Emperor had been animated, but in good spirits throughout the morning. A courier had arrived, during the night, with reassuring news from one of his best and most reliable commanders. In this latest dispatch, Marshal Davout promised Napoleon that his hard-marching IIIrd Corps would soon arrive on the field to reinforce the intentionally-weakened French right, just as the emperor had intended. Now, Napoleon had only to sit patiently by until the troops on the Russo-Austrian left had advanced a little farther into his carefully prepared trap. As he waited for the coalition columns to march unknowingly towards their ruin, the French Emperor’s confidence was buoyed by his absolute faith in two things: the élan and courage of his battle-hardened soldiers, and the arrogance and stupidity of his adversaries. The Coalition columns did not falter, and once the Allied troops had gained the ground around Telnitz, a general mêlée quickly escalated on the French right. Despite the fog-induced confusion among the coalition ranks, the winter battle seemed to begin well for the attackers. As anticipated, the outnumbered French troops steadily gave ground in the face of the powerful Allied assault, and the officers and nobles commanding the Russo-Austrian Army grew increasingly confident that their attack would indeed break the French flank and sever Napoleon’s communications with Vienna. But all was not as it seemed. Even as the Allied advance appeared to be gaining momentum, the 7,000 French troops of Marshal Davout’s IIIrd Corps, after having force-marched a distance of some seventy miles to reach the battlefield, arrived on Napoleon’s threatened flank just in time to reinforce the wavering French line. The Russo-Austrian commanders, now fixated on pressing forward with their assault, began to strip more and more troops away from the coalition center around the Pratzen Heights in order to reinforce the faltering coalition attack. It was a fatal mistake.  Napoleon surveys his retreating foe from the Pratzen Heights. Napoleon surveys his retreating foe from the Pratzen Heights.At about 9:00am Napoleon finally unleashed the fresh battalions that he had been holding in reserve. These troops had hitherto been concealed from Allied eyes by the morning mist. Now, they were unseen no longer. Suddenly charging up from the fog-shrouded hollows just below the heights, yelling French soldiers and horsemen crashed into the Coalition center and, after a sharp action, pushed the stunned defenders off of the high ground. Even the heavens seemed to smile on the French effort; as Napoleon’s attack drove the coalition troops from the crest of the Pratzen Heights, the “Sun of Austerlitz” finally broke through the haze and began to shine down on the desperate, bloody contest below. The battle would continue with bitter fighting all through the day and well into the evening, but the Allied position was doomed. The French Emperor, for all intents and purposes, had won the day with a single masterful stroke, and all this before the morning had even passed. In fact, this victory — Napoleon’s greatest military triumph — had been assured as soon as French troops had surged up and over the Pratzen Heights and, by so doing, had split the Russo-Austrian army in two. DESCRIPTION AUSTERLITZ: The Battle of the Three Emperors, 2 Dec 1805 is a brigade-level simulation — based loosely on the NAPOLEON AT WATERLOO Game System — of the decisive battle, in winter 1805, that ended the War of the Third Coalition. The French victory over Tsar Alexander’s army at Austerlitz dashed any prospect for the Third Coalition to continue the fight against France and, thereby, brought Napoleon’s brilliant 1805 campaign against Austria and Russia to a successful close. AUSTERLITZ: The Battle of the Three Emperors, 2 Dec 1805 is a brigade-level simulation — based loosely on the NAPOLEON AT WATERLOO Game System — of the decisive battle, in winter 1805, that ended the War of the Third Coalition. The French victory over Tsar Alexander’s army at Austerlitz dashed any prospect for the Third Coalition to continue the fight against France and, thereby, brought Napoleon’s brilliant 1805 campaign against Austria and Russia to a successful close. The differently colored game counters represent the historical units from the three national armies — those of France, Russia, and Austria — that actually participated in the fighting. The game map is an oddly flattened-out — the famous Pratzen Heights, for example, virtually disappear — primitive (even for SPI) two-color rendition of the terrain in that region of Moravia over which the battle was waged. To reduce set-up time, the locations of all starting units are printed on the game map. In addition, because AUSTERLITZ uses one of the most accessible, popular, and successful game systems ever devised, its basic mechanics of play are both intuitively logical and extremely easy to learn for players of virtually any experience level.  AUSTERLITZ is played in game turns, each of which is composed of an Allied (Austro-Russian) player turn followed by French player turn. Each player turn follows the same sequence, and is divided into two phases: the Movement Phase; and the Combat Phase. The stacking rules are relatively simple, but interesting. Friendly units may move through or stack with other friendly units without paying any movement penalty. However, the composition of friendly stacks is limited depending on the nationality of the phasing units. The French player may stack up to three units in a single hex, but only so long as the total combat strength of the stack does not exceed fifteen combat factors; the Allied (coalition) player may stack an unlimited number of units together, but the final strength of the combined stack cannot exceed ten combat factors. Units, when defending in a stack, combine their combat factors and are treated as a single unified strength. Individual units in an attacking stack, however, may attack the same or different target hexes during the combat phase. AUSTERLITZ is played in game turns, each of which is composed of an Allied (Austro-Russian) player turn followed by French player turn. Each player turn follows the same sequence, and is divided into two phases: the Movement Phase; and the Combat Phase. The stacking rules are relatively simple, but interesting. Friendly units may move through or stack with other friendly units without paying any movement penalty. However, the composition of friendly stacks is limited depending on the nationality of the phasing units. The French player may stack up to three units in a single hex, but only so long as the total combat strength of the stack does not exceed fifteen combat factors; the Allied (coalition) player may stack an unlimited number of units together, but the final strength of the combined stack cannot exceed ten combat factors. Units, when defending in a stack, combine their combat factors and are treated as a single unified strength. Individual units in an attacking stack, however, may attack the same or different target hexes during the combat phase.  All units possess a zone of control (ZOC), and all units must expend one additional movement point to enter an enemy ZOC. In addition, ZOCs are both “rigid” and “sticky” for infantry and artillery units; that is: infantry and artillery units must halt upon entering an enemy ZOC, and may not exit an enemy ZOC voluntarily, but only as a result of combat. Cavalry is an important exception: these units may voluntarily leave an enemy ZOC by expending two additional movement points and may even, if they possess sufficient movement factors to do so, move directly from one enemy ZOC to another. In addition, units may not retreat into an enemy controlled hex whether as a result of an AR or DR result, even if that hex is occupied by a friendly unit. Terrain effects on movement, because this battle was fought in winter, are relatively benign: swamp and knoll hexes cost two movement points to enter, and frozen “unbridged” stream hexes cost one additional movement point to cross. Also, as might be expected, certain types of terrain multiply the combat strength of occupying units when being attacked; this multiple can be from two to four times the defending units’ basic combat strength. All units possess a zone of control (ZOC), and all units must expend one additional movement point to enter an enemy ZOC. In addition, ZOCs are both “rigid” and “sticky” for infantry and artillery units; that is: infantry and artillery units must halt upon entering an enemy ZOC, and may not exit an enemy ZOC voluntarily, but only as a result of combat. Cavalry is an important exception: these units may voluntarily leave an enemy ZOC by expending two additional movement points and may even, if they possess sufficient movement factors to do so, move directly from one enemy ZOC to another. In addition, units may not retreat into an enemy controlled hex whether as a result of an AR or DR result, even if that hex is occupied by a friendly unit. Terrain effects on movement, because this battle was fought in winter, are relatively benign: swamp and knoll hexes cost two movement points to enter, and frozen “unbridged” stream hexes cost one additional movement point to cross. Also, as might be expected, certain types of terrain multiply the combat strength of occupying units when being attacked; this multiple can be from two to four times the defending units’ basic combat strength.  Combat in AUSTERLITZ is mandatory between adjacent opposing units. All adjacent enemy units must be attacked, and all friendly units in an enemy ZOC must participate in some form of combat. Attacks, however, can take one of two forms: direct (adjacent) attacks; and artillery bombardment (ranged) attacks. Thus, while all adjacent enemy units must be attacked during the active player’s combat phase, artillery units may either attack adjacent enemy brigades normally, or they may attack opposing units that are two hexes distant using “bombardment” instead of conventional assault. This combat flexibility dramatically increases the usefulness of artillery units in this game system: they can attack independently, soak-off, or increase the odds of a friendly attack — all through bombardment — against non-adjacent enemy units. Moreover, they need not attack an adjacent opposing brigade so long as they are bombarding another enemy unit (within their two-hex range), and some other friendly unit or units satisfy the attack requirement against any enemy units next to the friendly artillery. The possible outcomes for all types of combat tend to fall into one of three categories: Retreats, Exchanges, and Eliminations. All battles, in AUSTERLITZ, are resolved using a single “odds differential” Combat Results Table (CRT). And, as is typical with games based on the NAW Game System, the distribution of combat results tends to favor retreats except at higher odds. For example, the distribution of combat outcomes for a four-to-one attack in AUSTERLITZ is identical to those of three-to-one on the Avalon Hill classic CRT. This means that, for a player to achieve offensive momentum and a favorable rate of attrition, he must consistently attack and carefully time his advances after successful individual battles so as to achieve surrounded attacks against enemy units. Combat in AUSTERLITZ is mandatory between adjacent opposing units. All adjacent enemy units must be attacked, and all friendly units in an enemy ZOC must participate in some form of combat. Attacks, however, can take one of two forms: direct (adjacent) attacks; and artillery bombardment (ranged) attacks. Thus, while all adjacent enemy units must be attacked during the active player’s combat phase, artillery units may either attack adjacent enemy brigades normally, or they may attack opposing units that are two hexes distant using “bombardment” instead of conventional assault. This combat flexibility dramatically increases the usefulness of artillery units in this game system: they can attack independently, soak-off, or increase the odds of a friendly attack — all through bombardment — against non-adjacent enemy units. Moreover, they need not attack an adjacent opposing brigade so long as they are bombarding another enemy unit (within their two-hex range), and some other friendly unit or units satisfy the attack requirement against any enemy units next to the friendly artillery. The possible outcomes for all types of combat tend to fall into one of three categories: Retreats, Exchanges, and Eliminations. All battles, in AUSTERLITZ, are resolved using a single “odds differential” Combat Results Table (CRT). And, as is typical with games based on the NAW Game System, the distribution of combat results tends to favor retreats except at higher odds. For example, the distribution of combat outcomes for a four-to-one attack in AUSTERLITZ is identical to those of three-to-one on the Avalon Hill classic CRT. This means that, for a player to achieve offensive momentum and a favorable rate of attrition, he must consistently attack and carefully time his advances after successful individual battles so as to achieve surrounded attacks against enemy units.Although AUSTERLITZ is a comparatively simple game, Morale figures prominently in its play, and especially in its final outcome. Both the Grande Armée and the army of the Third Coalition begin the game with a 70 point Demoralization threshold. As soon as one army loses seventy or more combat strength points, then that side immediately becomes demoralized; and once this happens, the opposing army can no longer become demoralized, whatever its eventual losses. The effects of Demoralization are devastating to the affected side. Demoralized units are halved both in movement and in combat, and, more damaging still, they lose their ZOC for the remainder of the game. Victory, in AUSTERLITZ, is determined on the basis of accumulated victory points tallied at the end of the match. These victory points can be acquired either by exiting the battlefield from certain hexes on the eastern and western edges of the game map, or by destroying enemy combat factors. Of the two, destruction of enemy units is by far the most promising path to victory for both armies. In essence, the goal of each side is to inflict sufficient casualties on the other to cause the Demoralization of the opposing force. Once this goal has been accomplished, victory is virtually guaranteed. Each game turn represents one hour of real time, and a complete game is thirteen turns long. AUSTERLITZ offers players only the Historical Scenario; there are no optional rules. A PERSONAL OBSERVATIONAfter thirty-six years, John Young’s AUSTERLITZ is definitely beginning to show its age. However, despite its frustratingly inaccurate map, its generally primitive graphics — Simonsen had yet to really hit his stride at SPI in 1973 — and its obvious lack of period “chrome,” AUSTERLITZ, nonetheless, manages to present an intriguing and surprisingly textured variation on the standard NAW Game System. In itself, the game situation that confronts the players is fascinating. And the combination of unorthodox (for this game system) stacking and cavalry rules makes for a nerve-racking test for both players. The Russo-Austrian Army is powerful, but slow; Napoleon’s Grande Armée is both more flexible and much more nimble. This disparity, not surprisingly, tends to favor the French. On the other hand — unlike their historical counterparts — both players have a perfect view of the enemy’s dispositions. Napoleon’s original plan is obvious; but happily, there really is no reason for the Coalition player to repeat the mistakes of the original Russo-Austrian commanders. In a nut shell, the trick for both players is to maximize the advantages of their own force, while minimizing those of the enemy. In AUSTERLITZ, as in many other titles, this is the central challenge of the game. And the player who solves this puzzle first, will typically be the player who wins.On a slightly different topic: AUSTERLITZ is only one of a large collection of SPI titles that were authored by John Michael Young. His varied game designs span the period from the Napoleonic Wars, through the American Civil War and Franco-Prussian War, and up to and including World War II. Many of them, I still periodically take down and play. I suppose that means that, over the years, I have become a big fan of Young’s many games. Probably because there have been very few of his designs that I didn’t like. His titles — except, maybe, for SEELÖWE — are almost always innovative, interesting, playable, and fun. And despite his tragic and untimely death many years ago, John Young leaves behind a library of some of the very best game designs that, in my opinion, SPI ever published. . Design Characteristics:
Game Components:
Recommended ReadingSee my blog post Book Review of this title; a book that I strongly recommend for those readers interested in further historical background. Recommended ArtworkHere's a Giclee print map of the battle available in various sizes that is great for a Napoleonic themed game room's wall.
SPI, THE ARDENNES OFFENSIVE (1973)
THE ARDENNES OFFENSIVE is an operational simulation — based on the KURSK Game System — of the German attempt to break through a thinly-held section of the American front in December, 1944. The game was designed by James F. Dunnigan, and published in 1973 by Simulations Publications, Incorporated (SPI).
HISTORICAL BACKGROUND
The German plan was a simple one: the Wehrmacht would tear a hole in a weak section of the American line and then rush powerful panzer forces through the newly-formed gap; as soon as the leading panzers had forced a crossing of the Meuse River and gained freedom of maneuver, they would then pivot northwest and drive on the Allied supply port of Antwerp.
Subsequent events would show that von Manteuffel’s men had made a costly mistake. The hasty decision to bypass Bastogne, although the local panzer commanders didn’t realize it at the time, had put the whole German offensive in jeopardy. And it was a lost opportunity that would come back to haunt the Germans as the battle wore on.
DESCRIPTION THE ARDENNES OFFENSIVE is a two-player operational (division/brigade/regiment) level simulation of the decisive period — 16 December, 1944 through 2 January, 1945 — during which the outcome of Hitler’s final desperate gamble — the last great German offensive in the West — was decided. THE ARDENNES OFFENSIVE is a two-player operational (division/brigade/regiment) level simulation of the decisive period — 16 December, 1944 through 2 January, 1945 — during which the outcome of Hitler’s final desperate gamble — the last great German offensive in the West — was decided. The playing area of the game map represents the Ardennes, a forested region where the frontiers of Germany, Belgium, France, and Luxembourg all intersect. This was the area in which most of the major action of the historical battle actually took place. The two-color game map is relatively unambiguous, although a few terrain changes are required; these, however, have been noted in the game errata. In addition, for ease of set-up, the historical positions for all of the starting units are printed on the game map.  THE ARDENNES OFFENSIVE is played in game turns which are further divided into a German and an Allied player turn. One player controls the Germans, and the other player commands the American and British forces that fought to thwart Hitler’s offensive plans. The German player is always the first to act. Each player turn proceeds in the following order: the Reinforcement Phase; the Supply Determination Phase; the Initial Movement Phase; the Combat Phase; and the Mechanized Movement Phase. On the first game turn only, the Allied player may not move any of his eligible units during the Initial Movement Phase. Interestingly, neither player may move any otherwise eligible units during the Mechanized Movement Phase if they fought during the immediately preceding Combat Phase. For this reason, unengaged mechanized reserves are critically important for both sides. THE ARDENNES OFFENSIVE is played in game turns which are further divided into a German and an Allied player turn. One player controls the Germans, and the other player commands the American and British forces that fought to thwart Hitler’s offensive plans. The German player is always the first to act. Each player turn proceeds in the following order: the Reinforcement Phase; the Supply Determination Phase; the Initial Movement Phase; the Combat Phase; and the Mechanized Movement Phase. On the first game turn only, the Allied player may not move any of his eligible units during the Initial Movement Phase. Interestingly, neither player may move any otherwise eligible units during the Mechanized Movement Phase if they fought during the immediately preceding Combat Phase. For this reason, unengaged mechanized reserves are critically important for both sides.  Supply, as it did in the historical campaign, plays a critical role in THE ARDENNES OFFENSIVE; for this reason, the rules governing the determination of supply status for both sides are both detailed and comparatively complicated. Supply effects, on the other hand, are fairly straight forward: “supplied” units operate using their face combat and movement values; “unsupplied” units are halved on attack and in movement; “isolated” units are both halved on defense and in movement, and their attack strength is reduced to zero. Zones of Control (ZOCs) are “rigid” and individual units must halt movement upon entering and may not exit an enemy ZOC, unless stacked with one or more other friendly units. In this case, one unit “absorbs” the enemy ZOC, allowing the other units in the hex to exit or even to infiltrate around the enemy unit’s flanks. Stacking of combat units is limited to one “division equivalent” per hex. There are no artillery units included in the counter-mix; however, the influence of artillery on the battle is neatly reproduced through an abstract but restrictive (for the German player, at least) set of "bridge interdiction" rules. Combat is resolved using an “odds differential” Combat Results Table (CRT), but there are two different CRTs: the Initial German CRT and the Standard CRT. As is typical with the KURSK family of games, combat results tend to be of the “bloodless” variety with most battles producing retreat results (in varying numbers of hexes) for one or the other player. Defender Eliminated and Exchange results do not even appear until odds of 4 to 1, or higher. Terrain Effects are relatively uncomplicated. As might be expected, rivers represent a serious barrier to movement and the “West Wall” hexes multiply the defensive value of defending German units. The most important terrain effect is that of towns: units defending in towns are affected only by DE and Exchange results; all retreat results (whether DR or AR) are ignored. Needless-to-say, this rule has a profound effect on the overall flow of the game. Supply, as it did in the historical campaign, plays a critical role in THE ARDENNES OFFENSIVE; for this reason, the rules governing the determination of supply status for both sides are both detailed and comparatively complicated. Supply effects, on the other hand, are fairly straight forward: “supplied” units operate using their face combat and movement values; “unsupplied” units are halved on attack and in movement; “isolated” units are both halved on defense and in movement, and their attack strength is reduced to zero. Zones of Control (ZOCs) are “rigid” and individual units must halt movement upon entering and may not exit an enemy ZOC, unless stacked with one or more other friendly units. In this case, one unit “absorbs” the enemy ZOC, allowing the other units in the hex to exit or even to infiltrate around the enemy unit’s flanks. Stacking of combat units is limited to one “division equivalent” per hex. There are no artillery units included in the counter-mix; however, the influence of artillery on the battle is neatly reproduced through an abstract but restrictive (for the German player, at least) set of "bridge interdiction" rules. Combat is resolved using an “odds differential” Combat Results Table (CRT), but there are two different CRTs: the Initial German CRT and the Standard CRT. As is typical with the KURSK family of games, combat results tend to be of the “bloodless” variety with most battles producing retreat results (in varying numbers of hexes) for one or the other player. Defender Eliminated and Exchange results do not even appear until odds of 4 to 1, or higher. Terrain Effects are relatively uncomplicated. As might be expected, rivers represent a serious barrier to movement and the “West Wall” hexes multiply the defensive value of defending German units. The most important terrain effect is that of towns: units defending in towns are affected only by DE and Exchange results; all retreat results (whether DR or AR) are ignored. Needless-to-say, this rule has a profound effect on the overall flow of the game.  Victory is determined on the basis of victory points; these points can be amassed by the German player through the capture of geographical objectives, and, for both players, through the destruction of enemy combat strength. Victory is determined on the basis of victory points; these points can be amassed by the German player through the capture of geographical objectives, and, for both players, through the destruction of enemy combat strength. THE ARDENNES OFFENSIVE, besides the Historical Game, also offers nine additional scenarios, each of which allows the players to experiment with different set-up and reinforcement options. Conveniently, these alternative game situations have been scored by the designer as to which side they favor, and so can be used to vary lines of play or to adjust play-balance between unequal opponents. There are no “optional rules.” A PERSONAL OBSERVATION
Design Characteristics:
Game Components:
Recommended ReadingSee my blog post Book Reviews of most of these titles; all six of which are strongly recommended for those readers interested in further historical background.THE WEST POINT ATLAS OF AMERICAN WARS (Complete 2-Volume Set)  ; edited by Brigadier General Vincent J. Esposito; Frederick A. Praeger, Inc. (1959); ASIN: B000MTBTEU ; edited by Brigadier General Vincent J. Esposito; Frederick A. Praeger, Inc. (1959); ASIN: B000MTBTEU
HAPPY THANKSGIVING! As we celebrate this Thanksgiving with our families and friends, let us take a moment to remember all those whose lives and circumstances have been made more precarious by our Nation’s current economic problems. And let us also remember those who presently serve in faraway places on our behalf. This year has been a challenging time for many Americans, but let us hope and pray that the year to come will be better and more prosperous for all of our fellow citizens, both friends and strangers, alike. SPI, SINAI (1973)
SINAI is a historical simulation of the 1956, 1967, and 1973 Arab-Israeli Wars. The game also includes a collection of hypothetical (what if?) scenarios for an Arab-Israeli War that might have occurred (but didn’t) in the mid 1970’s. SINAI was designed by James F. Dunnigan and published in 1973 by Simulations Publications, Incorporated (SPI).
HISTORICAL BACKGROUNDOctober 6, 1973 was Yom Kippur (the Day of Atonement), the holiest day in the Jewish calendar. It was also the day on which Syria and Egypt suddenly attacked an unprepared Israel on two fronts simultaneously. The sudden large-scale offensive by Syrian forces on the thinly-held Golan Heights, in concert with the totally unforeseen, but crushing Egyptian breakthrough of the Bar-Lev Line on the east bank of the Suez Canal rocked the political and military leadership of Israel as few events had before. For the first few days after the initial Arab attacks, the Israeli Prime Minister, Golda Meir, feared for the very survival of the Jewish State. However, it did not take long for the Israeli military leadership to recover its balance and to mount a counterattack. . On 8 October 1973, General Schmuel Gonen, Commander of the Israeli Southern Front, ordered a full-scale armored offensive against the hastily-prepared Egyptian Sinai defenses east of the Suez Canal. His goal was to smash into the advanced Egyptian positions, break through and then push his armor into the enemy rear to rescue any surviving Israeli soldiers still holding out in parts of the Bar-Lev Line. Unlike previous Israeli-Arab engagements, however, the unthinkable happened: Egyptian soldiers held their ground and decimated the attacking Israeli armor with long-range Sagger missiles. General Gonen, shaken and confused by the unexpected failure of his attack, lapsed into a mental fugue; stunned by the defeat of his plan, the Israeli commander was unable to decide what to do next. Clearly, the resilience and defensive skill of the Egyptian Army had been a complete surprise to the Israeli Defense Forces (IDF) High Command, but something still had to be done about Sadat’s army on the east bank of the Suez Canal. A static IDF defense was not the answer; the Israeli tanks tied up against Egypt were desperately needed on the Golan Heights, where the Syrians continued to vigorously press their attack against the out-numbered Israeli defenders. On 10 October, Gonen was quietly replaced by General Chaim Bar-Lev. By 11 October, Bar-Lev and two of his senior commanders, Major Generals Ariel Sharon and Avraham “Bren” Adan, had come up with a completely new plan of action: one that, all three men fervently hoped, would both encircle the Egyptian Third Army and reverse the military situation on the east bank of the Canal. Their plan was based on newly-obtained American reconnaissance photos that had revealed a narrow gap between the Egyptian Second and Third Armies. This audacious Israeli armored offensive was code-named “Operation Stouthearted Men,” and it would begin with Sharon’s division driving through the gap in the Egyptian front, while Adan’s division attacked the exposed flanks of the Second and Third Egyptian Armies. Once Sharon’s unit had slipped through the enemy lines, it would then advance on Deversoir, destroy any Egyptian forces that it encountered there, and then move on to quickly seize bridgeheads on both banks of the Suez Canal. If Sharon was successful in this critical first phase of his mission, a mobile bridging-train would immediately rush to the newly-captured bridgeheads, and once the portable bridge was emplaced, Israeli forces would pour cross the Canal and completely cut the Egyptian Third Army off from food, ammunition, and most importantly, from water. Unfortunately, time was rapidly running out for the IDF. Faced with temporary stalemates in both the Sinai and on the Golan Heights, what Israel now needed more than anything else was a decisive battlefield victory: one that would transform the strategic situation and force the Jewish State’s enemies to seek peace on Israeli terms. And such a victory would have to come soon, before a UN ceasefire resolution could be forced on Israel that would end all fighting and preserve the existing Arab territorial gains. This daring armored operation, General Bar-Lev believed, could produce just such a victory. The jump-off date for “Operation Stouthearted Men” was fixed for 15 October, 1973. The ferocious clash that would result from this Israeli armored operation, however, would — in a matter of a few days — come to be known by a completely different name: the “Battle of Chinese Farm.” DESCRIPTION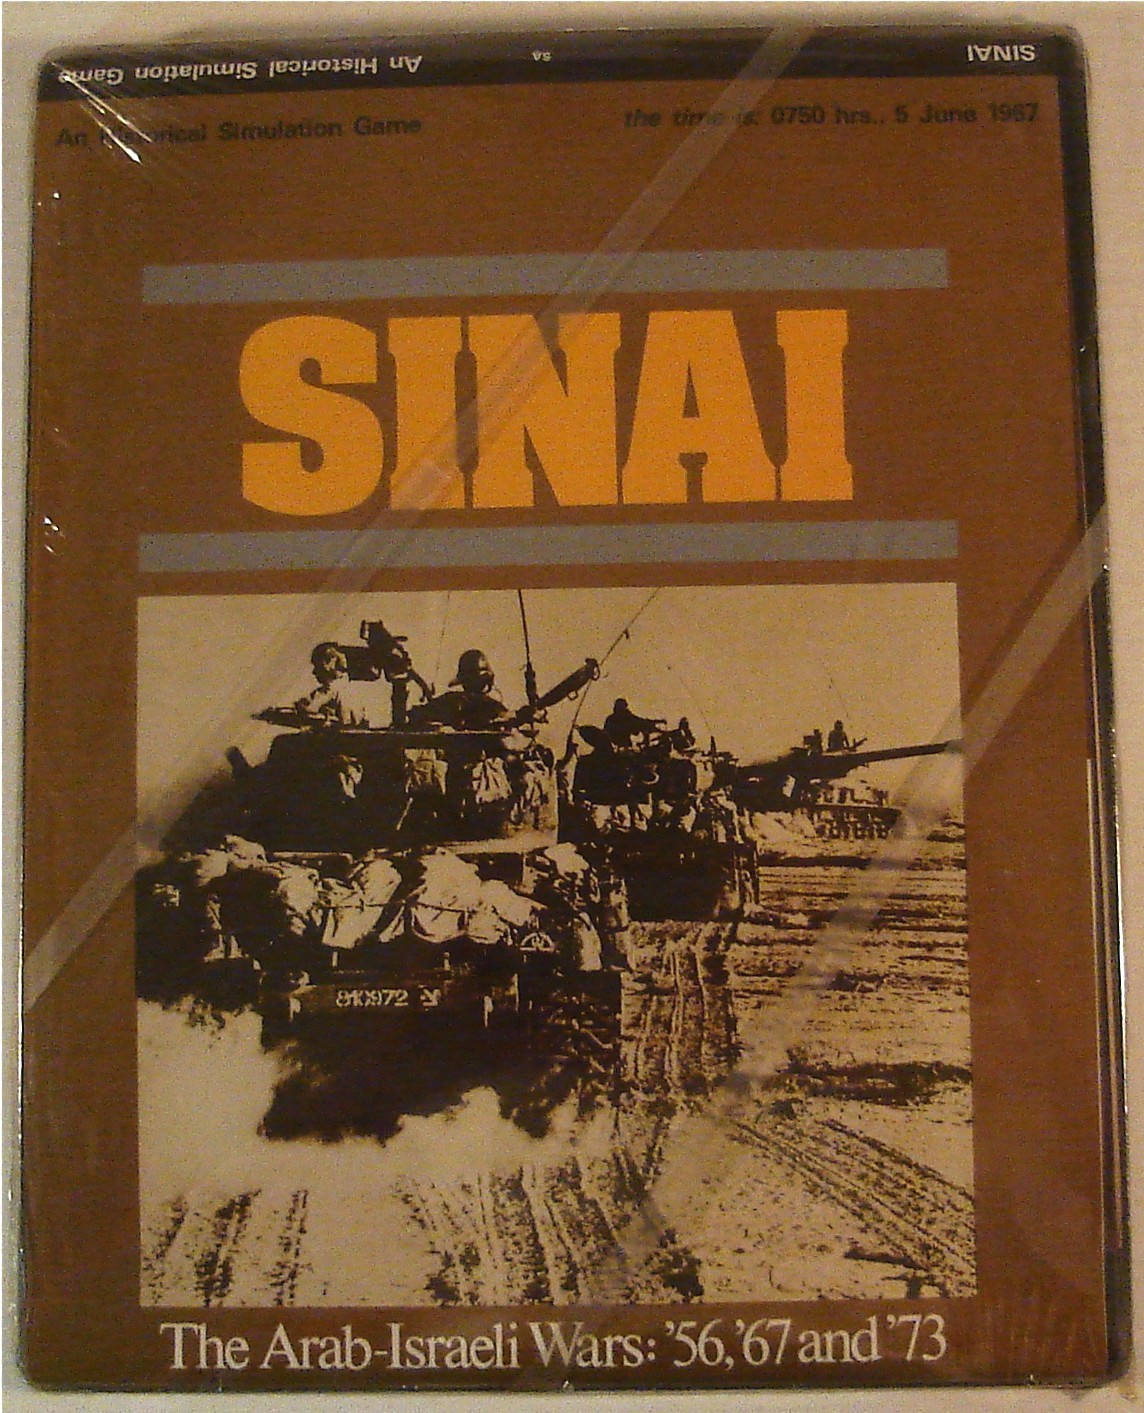 SINAI is a battalion/brigade level simulation of three of the most important wars that have, over the years, periodically erupted in the Middle East ever since the establishment, under UN auspices, of the Jewish State of Israel on 15 May, 1948. The planned centerpiece of this set of games was originally the ’67 War, but in the process of designing SINAI, the Yom Kippur (or Ramadan or October) War broke out. This unexpected development obliged SPI to postpone final publication of the game until the ’73 War had ended, and another set of scenarios based on the (then) latest installment in the chronicle of Arab-Israeli conflicts could be designed, developed, and play tested. The rapidly-changing face of the Yom Kippur War presented an unusual situation for the designer, Jim Dunnigan, who for the first time in his professional life, had to test his design assumptions against daily and sometimes contradictory newspaper stories. The effect on SINAI of these contemporaneous reports is inescapable. It is clear from the similar game systems used for the ’56 and ’67 Wars, and the significantly different system used for the ’73 War (and the hypothetical mid-70’s scenarios) that the unfolding battlefield developments led the designer to conclude that the force structures, doctrines, and weaponry of the belligerents had changed significantly from 1967 to 1973. SINAI is a battalion/brigade level simulation of three of the most important wars that have, over the years, periodically erupted in the Middle East ever since the establishment, under UN auspices, of the Jewish State of Israel on 15 May, 1948. The planned centerpiece of this set of games was originally the ’67 War, but in the process of designing SINAI, the Yom Kippur (or Ramadan or October) War broke out. This unexpected development obliged SPI to postpone final publication of the game until the ’73 War had ended, and another set of scenarios based on the (then) latest installment in the chronicle of Arab-Israeli conflicts could be designed, developed, and play tested. The rapidly-changing face of the Yom Kippur War presented an unusual situation for the designer, Jim Dunnigan, who for the first time in his professional life, had to test his design assumptions against daily and sometimes contradictory newspaper stories. The effect on SINAI of these contemporaneous reports is inescapable. It is clear from the similar game systems used for the ’56 and ’67 Wars, and the significantly different system used for the ’73 War (and the hypothetical mid-70’s scenarios) that the unfolding battlefield developments led the designer to conclude that the force structures, doctrines, and weaponry of the belligerents had changed significantly from 1967 to 1973. The ’56 and ’67 War scenarios in SINAI are played in game turns, each of which represents twelve hours of real time. The (12 hour) turn sequences for both the ’56 and ’67 War scenarios are identical, and follow a rigid sequence of player operations: (Israeli) supply phase; movement phase; combat phase; (Arab) command and control phase; supply phase; movement phase; combat phase; and Jordanian participation phase. Game mechanics for both scenarios are logical and uncluttered. Stacking is limited to three units per hex, and zones of control (ZOCs) are “rigid” but not “sticky.” Combat between adjacent units is voluntary, and “overrun” attacks are possible if the attacker can muster a sufficiently high attack differential against a weakly-defended enemy hex. The Supply Rules are comparatively simple: units are either “supplied” or “unsupplied.” However, the Supply Effects differ for the two sides: “unsupplied” Arab units may not attack, and are halved for movement and defense; “unsupplied” Israeli units, on the other hand, are halved in movement and attack, but their defense strength is unaffected. Interestingly, the game uses a “strength differential” rather than an “odds differential” type of Combat results Table (CRT). Terrain Effects are important both to movement and to combat, and, as might be expected, these rules affect the two sides very differently. The ’67 War scenarios also introduce Air Rules, but these are highly abstracted and, not surprisingly, strongly favor the Israeli player. If all of this wasn’t enough, Special Rules limiting Arab cooperation, command and control, movement, morale (panic), and supply capabilities all operate to further constrain the Arab player’s strategic and tactical options. In short: the Israeli player’s units have greater combat power, better mobility, fewer supply problems, and no command and control restrictions. They also have, in the ’67 War scenarios, absolute air superiority, and an airmobile unit available, as well. The ’56 and ’67 War scenarios in SINAI are played in game turns, each of which represents twelve hours of real time. The (12 hour) turn sequences for both the ’56 and ’67 War scenarios are identical, and follow a rigid sequence of player operations: (Israeli) supply phase; movement phase; combat phase; (Arab) command and control phase; supply phase; movement phase; combat phase; and Jordanian participation phase. Game mechanics for both scenarios are logical and uncluttered. Stacking is limited to three units per hex, and zones of control (ZOCs) are “rigid” but not “sticky.” Combat between adjacent units is voluntary, and “overrun” attacks are possible if the attacker can muster a sufficiently high attack differential against a weakly-defended enemy hex. The Supply Rules are comparatively simple: units are either “supplied” or “unsupplied.” However, the Supply Effects differ for the two sides: “unsupplied” Arab units may not attack, and are halved for movement and defense; “unsupplied” Israeli units, on the other hand, are halved in movement and attack, but their defense strength is unaffected. Interestingly, the game uses a “strength differential” rather than an “odds differential” type of Combat results Table (CRT). Terrain Effects are important both to movement and to combat, and, as might be expected, these rules affect the two sides very differently. The ’67 War scenarios also introduce Air Rules, but these are highly abstracted and, not surprisingly, strongly favor the Israeli player. If all of this wasn’t enough, Special Rules limiting Arab cooperation, command and control, movement, morale (panic), and supply capabilities all operate to further constrain the Arab player’s strategic and tactical options. In short: the Israeli player’s units have greater combat power, better mobility, fewer supply problems, and no command and control restrictions. They also have, in the ’67 War scenarios, absolute air superiority, and an airmobile unit available, as well.  In the ’73 War (and hypothetical mid-70’s) scenarios, the structure of the simulation is altered in a number of important ways. These scenarios increase the time period covered by each game turn from twelve to twenty-four hours, and they also use a variation of the KURSK Game System as the basis for the game’s basic design architecture. The new (24 hour) turn sequence proceeds as follows: (Arab) first supply phase; first movement phase; combat phase; Jordanian participation phase; second supply phase; second movement phase; (Israeli) first supply phase; first movement phase; combat phase; second supply phase, and second movement phase. The increased mobility of both sides along with the two impulse movement system tends to produce a much more dynamic and fluid battle area than in the previous scenarios. The Air Rules for the ‘70s scenarios are also much kinder to the Arab player; the power of the Israeli Air Force, particularly in the early going, is severely curtailed. In addition, the ’73 War scenarios include a number of other important rules changes that benefit the Arab player: the Arab command and control and panic rules disappear; movement capabilities are improved; the Arab player has “surface to air” (SAM) missiles; and the supply rules for Arab combat are less restrictive. In the ’73 War (and hypothetical mid-70’s) scenarios, the structure of the simulation is altered in a number of important ways. These scenarios increase the time period covered by each game turn from twelve to twenty-four hours, and they also use a variation of the KURSK Game System as the basis for the game’s basic design architecture. The new (24 hour) turn sequence proceeds as follows: (Arab) first supply phase; first movement phase; combat phase; Jordanian participation phase; second supply phase; second movement phase; (Israeli) first supply phase; first movement phase; combat phase; second supply phase, and second movement phase. The increased mobility of both sides along with the two impulse movement system tends to produce a much more dynamic and fluid battle area than in the previous scenarios. The Air Rules for the ‘70s scenarios are also much kinder to the Arab player; the power of the Israeli Air Force, particularly in the early going, is severely curtailed. In addition, the ’73 War scenarios include a number of other important rules changes that benefit the Arab player: the Arab command and control and panic rules disappear; movement capabilities are improved; the Arab player has “surface to air” (SAM) missiles; and the supply rules for Arab combat are less restrictive.  SINAI, as already noted, offers three main historical scenario packages (or games within a game): the 1956 War; the 1967 War; and the 1973 War. Given the volatile nature of Middle East politics, however, SINAI also includes — besides the historical games — a set of hypothetical scenarios for renewed conflict between Israel and its Arab neighbors sometime in the mid-seventies. In addition to these historical and hypothetical situations, the game presents a series of “what if?” scenarios for the players to explore. These optional scenarios all benefit the Arab player to one degree or another, and include changes to the historical situation such as, but not limited to: free set-up; Israel napping (caught by surprise); better Syrian and Egyptian officer corps; increased Arab cooperation; and a combination of all of the above in the Arab fantasy “Jihad” scenario. SINAI, as already noted, offers three main historical scenario packages (or games within a game): the 1956 War; the 1967 War; and the 1973 War. Given the volatile nature of Middle East politics, however, SINAI also includes — besides the historical games — a set of hypothetical scenarios for renewed conflict between Israel and its Arab neighbors sometime in the mid-seventies. In addition to these historical and hypothetical situations, the game presents a series of “what if?” scenarios for the players to explore. These optional scenarios all benefit the Arab player to one degree or another, and include changes to the historical situation such as, but not limited to: free set-up; Israel napping (caught by surprise); better Syrian and Egyptian officer corps; increased Arab cooperation; and a combination of all of the above in the Arab fantasy “Jihad” scenario.A PERSONAL OBSERVATION The ’56 and ’67 Wars were quick, decisive Israeli victories; the ’73 “Yom Kippur” War, on the other hand, was clearly different in a number of important ways. Some examples of these important differences are immediately obvious: the Arabs struck first, achieving strategic and tactical surprise; Soviet anti-tank weapons contributed greatly to the defensive combat power of the Arab forces; and heavy concentrations of SAM missile sites were very effective in neutralizing the Israeli Air Force in the early stages of the war. The historical scenarios covering the ’56 and ’67 Wars are, as might be expected, pretty much a romp for the IDF (Israeli Defense Forces), although the victory conditions and optional rules can make these games a lot more competitive. The scenarios for the ’73 War, as well as those for the hypothetical mid-70’s War, make for much more interesting and competitive games. As has already been noted earlier, the Arab Armies improved dramatically between 1967 and 1973. Israel’s enemies came surprisingly close to victory in the Yom Kippur War, SINAI attempts to help its players understand how this happened and why. The ’56 and ’67 Wars were quick, decisive Israeli victories; the ’73 “Yom Kippur” War, on the other hand, was clearly different in a number of important ways. Some examples of these important differences are immediately obvious: the Arabs struck first, achieving strategic and tactical surprise; Soviet anti-tank weapons contributed greatly to the defensive combat power of the Arab forces; and heavy concentrations of SAM missile sites were very effective in neutralizing the Israeli Air Force in the early stages of the war. The historical scenarios covering the ’56 and ’67 Wars are, as might be expected, pretty much a romp for the IDF (Israeli Defense Forces), although the victory conditions and optional rules can make these games a lot more competitive. The scenarios for the ’73 War, as well as those for the hypothetical mid-70’s War, make for much more interesting and competitive games. As has already been noted earlier, the Arab Armies improved dramatically between 1967 and 1973. Israel’s enemies came surprisingly close to victory in the Yom Kippur War, SINAI attempts to help its players understand how this happened and why.Unfortunately, despite its many good points, SINAI — like many of James F. Dunnigan’s early designs — is a disappointment; and, taken as a whole, it can probably best be described as an ambitious and intriguing “near miss.” The ’56 and ’67 historical scenarios both require a lot of fiddling with the victory conditions to produce anything approximating a reasonable amount of play balance; a fact that, not surprisingly, makes it hard for most players to summon up much enthusiasm when it comes to commanding the seriously out-classed Arab armies in these earlier scenarios. The ’73 and mid-’70s scenarios are much more interesting, yet they each seem to lack something intangible, both as games and as simulations. Of course, it is possible that the constant changes in the game’s developmental trajectory forced by the day-to-day news reports coming in from the battlefield were, in 1973, a little more than Dunnigan or SPI could handle at the time. This is not to say that SINAI is a particularly bad game, only that it has a curiously “cobbled together” feel, and that it probably could have been — had it not been rushed into print — considerably better with a little additional effort. Clearly, Dunnigan was in a hurry to publish this title, and it shows. For supporting evidence for this last argument, by the way, one only has to look at John Hill’s excellent and richly-textured treatment of the ’73 War, BAR-LEV, which appeared some time after SINAI, in 1974. The difference in quality between the two games is glaring. Design Characteristics:
Game Components:
SPI, NAPOLEON AT WATERLOO (1971, 1979)
NAPOLEON AT WATERLOO is an grand tactical (division/brigade) level simulation of the climactic clash between the French Army, under Napoleon, and the Anglo-Allied Army, commanded by the Duke of Wellington, near the Belgian Hamlet of Waterloo, on 18 June, 1815. NAPOLEON AT WATERLOO was originally mailed, at no charge, to new subscribers of S&T Magazine. It was intended to be a simple, introductory game for those new to conflict simulations. The game was published in two versions: the original (two-color) brown on tan edition which was offered during the very early days of SPI (beginning in 1971); and a later (1979) edition, in which SPI reformatted the rules, colorized the game map, and added a colored title sheet. NAPOLEON AT WATERLOO was designed by James F. Dunnigan, and first published in 1971 by Simulations Publications, Incorporated (SPI).
HISTORICAL BACKGROUND Emperor Napoleon Bonaparte astride his stallion Marengo at Waterloo. Emperor Napoleon Bonaparte astride his stallion Marengo at Waterloo.The morning of 18 June 1815 dawned cold and overcast, but with the promise of fairer weather as the day wore on. It had rained steadily during the previous day and through much of the night. The change in weather was a welcome relief to the soldiers who were bivouacked in the open. With the morning’s first light, thousands of men stirred and stoked their campfires; those among them who had found food — often no more than a potato — ate, and were happy to have anything at all. Two armies, only a mile or two apart, began the mundane business of preparing for battle. The shambling disorder of milling men and snorting horses gradually gave way to the discipline of the military camp. And, on the commands of their officers and other ranks, men began to assemble: noisy chaos gave way to order; companies came together to become battalions, and then battalions assembled and became regiments. With an unexpected sort of rough grace, the regiments formed into columns and, on the shouted orders of their officers, thousands of grim-faced soldiers gradually began to array themselves across the valley from each other; each in their own carefully-dressed lines.  Arthur Wellesley, Duke of Wellington, inspires his troops at Waterloo. Initially, despite the flurry of preparation on both sides, nothing much happened. The morning sun climbed higher in the sky, and the soldiers of the two armies: 67,000 men under the Duke of Wellington; and 72,000 commanded by Napoleon; all stood in bright, multi-colored ranks facing each other across a shallow valley matted with rain-soaked grass. Movement and even time, itself, seemed to come to a stop; in spite of all of the early morning’s bustle and hurried activity: no one on either side of the valley, except for quartermasters and dispatch riders, stirred from their serried ranks. Hours passed. Both splendidly uniformed hosts stood silently, fixed in place, like insects in amber. Then, abruptly and without warning, the stillness was broken. The soldiers in the ranks of both armies were suddenly startled by the first sounds of canon fire coming from somewhere on the French left. The Battle of Waterloo had begun at last with a French bombardment of the Anglo-Allied outpost that occupied the château of Hougoumont. No one then, or now, can be sure of the exact time of these first canon shots, but the cannonade probably began around 11:30 am. Whenever it was, the French artillery had sounded the overture for the bloody drama to come. The unnatural quiet of the morning had finally ended for the men warily watching each other across a sodden expanse of ryegrass. This tiny corner of Belgium had become a battlefield, and the morning’s unexpected quiet would now — on a patch of muddy ground no more than two miles wide and two-thirds of a mile across — give way to the noisy, cruel, and violent business of war. DESCRIPTION NAPOLEON AT WATERLOO is, as the title implies, a two-player simulation of, quite probably, the most famous single military engagement in history. At Waterloo, the two greatest generals of their age, Napoleon and Wellington, faced each other across a battlefield in Belgium for the first and only time in their long military careers. On the fateful morning of June 18th, 1815, the out-numbered Wellington had decided to offer battle to the French army confident that, unbeknownst to Napoleon, the Prussian army, under Marshal Blucher, planned to march to the Iron Duke’s aid. Thus, NAPOLEON AT WATERLOO is a race to see if Napoleon’s troops can break the poly-glot Anglo-Allied army before the Prussians arrive to turn the tide of the battle against the French. The game is played in game turns, each of which is composed of a French followed by Prussian Anglo-Allied (P.A.A.) player turn. Each player turn follows the same sequence, and is divided into two simple phases: the Movement Phase; and the Combat Phase. NAPOLEON AT WATERLOO is, as the title implies, a two-player simulation of, quite probably, the most famous single military engagement in history. At Waterloo, the two greatest generals of their age, Napoleon and Wellington, faced each other across a battlefield in Belgium for the first and only time in their long military careers. On the fateful morning of June 18th, 1815, the out-numbered Wellington had decided to offer battle to the French army confident that, unbeknownst to Napoleon, the Prussian army, under Marshal Blucher, planned to march to the Iron Duke’s aid. Thus, NAPOLEON AT WATERLOO is a race to see if Napoleon’s troops can break the poly-glot Anglo-Allied army before the Prussians arrive to turn the tide of the battle against the French. The game is played in game turns, each of which is composed of a French followed by Prussian Anglo-Allied (P.A.A.) player turn. Each player turn follows the same sequence, and is divided into two simple phases: the Movement Phase; and the Combat Phase.  NAPOLEON AT WATERLOO presents beginning players with game mechanics that are both simple and intuitively logical. To keep things uncomplicated, stacking is prohibited and terrain effects are minimal. In addition, because of the limited time-scale of the game, there are no supply rules. Zones of Control (ZOCs) are both 'rigid' and 'sticky'. This means that units must stop upone entering an enemy ZOC and may not exit such a ZOC except as a result of combat. In addition, combat between adjacent units is mandatory and is resolved using a traditional 'Odds Differential' Combat Results Table (CRT). Interestingly, although it is an introductory game, NAPOLEON AT WATERLOO does expose players to a number of useful game concepts; these basic concepts include: “locking” Zones of Control, Ranged Artillery, and the importance of Morale. And, while the consensus among experienced players is that the French have a marked advantage, it is still a surprisingly enjoyable game to play for both the French and the P.A.A. players. Player victory depends on the elimination of enemy units. The goal of each side is to inflict sufficient casualties on the other to cause the Demoralization of the enemy army. Each game turn represents one hour of real time, and a complete game is ten turns long. NAPOLEON AT WATERLOO presents beginning players with game mechanics that are both simple and intuitively logical. To keep things uncomplicated, stacking is prohibited and terrain effects are minimal. In addition, because of the limited time-scale of the game, there are no supply rules. Zones of Control (ZOCs) are both 'rigid' and 'sticky'. This means that units must stop upone entering an enemy ZOC and may not exit such a ZOC except as a result of combat. In addition, combat between adjacent units is mandatory and is resolved using a traditional 'Odds Differential' Combat Results Table (CRT). Interestingly, although it is an introductory game, NAPOLEON AT WATERLOO does expose players to a number of useful game concepts; these basic concepts include: “locking” Zones of Control, Ranged Artillery, and the importance of Morale. And, while the consensus among experienced players is that the French have a marked advantage, it is still a surprisingly enjoyable game to play for both the French and the P.A.A. players. Player victory depends on the elimination of enemy units. The goal of each side is to inflict sufficient casualties on the other to cause the Demoralization of the enemy army. Each game turn represents one hour of real time, and a complete game is ten turns long. NAPOLEON AT WATERLOO offers players only the Historical Scenario, and there are no optional rules. However, based on this introductory title’s wide-spread, if unexpected popularity, Dunnigan decided to revisit and upgrade his original design. The result of this second look, by the game’s original designer, was the Advanced NAW EXPANSION KIT. This expansion, which included new, more-detailed rules (stacking was permitted and artillery attacks were resolved separately) and an expanded number of new (brigade-strength) replacement counters, was intended to meet the demands of those players who already owned the basic game, but who wanted to add increased tactical complexity and realism to the original simulation. NAPOLEON AT WATERLOO offers players only the Historical Scenario, and there are no optional rules. However, based on this introductory title’s wide-spread, if unexpected popularity, Dunnigan decided to revisit and upgrade his original design. The result of this second look, by the game’s original designer, was the Advanced NAW EXPANSION KIT. This expansion, which included new, more-detailed rules (stacking was permitted and artillery attacks were resolved separately) and an expanded number of new (brigade-strength) replacement counters, was intended to meet the demands of those players who already owned the basic game, but who wanted to add increased tactical complexity and realism to the original simulation. A PERSONAL OBSERVATION Every once in awhile, I still dig out and set-up my old, much-worn, brown on tan copy of NAPOLEON AT WATERLOO, and whenever I do, I still feel a momentary rush of nostalgia for the early days of wargaming. This was not my first wargame, but it was the first of Dunnigan’s designs that I actually liked. I suspect that in this regard, I am probably not alone. It is also one of the best 'introductory' conflict simulations ever published, and it still holds up as an enjoyable “beer and pretzels” game, even today. But over and above all that, this simple little game also turned out, quite unexpectedly, to be a ground-breaking design. Ironically, the basic game system first introduced in NAPOLEON AT WATERLOO has proven, over time, to be one of the most popular and durable game platforms ever devised. Clean, simple, and eminently playable, the NAW Game System became the standard design architecture for most of SPI’s subsequent Napoleonic games, many of its Civil War games, and even a few titles that dealt with more modern combat situations. Thus, this game system appears in a broad array of later SPI titles such as BORODINO, AUSTERLITZ, the NAPOLEON AT WAR Quadrigame, the NAPOLEON’S LAST BATTLES Quadrigame, the BLUE & GRAY I and II Quadrigames, ROAD TO RICHMOND, 6th FLEET, and BATTLE FOR GERMANY, just to name a few. Every once in awhile, I still dig out and set-up my old, much-worn, brown on tan copy of NAPOLEON AT WATERLOO, and whenever I do, I still feel a momentary rush of nostalgia for the early days of wargaming. This was not my first wargame, but it was the first of Dunnigan’s designs that I actually liked. I suspect that in this regard, I am probably not alone. It is also one of the best 'introductory' conflict simulations ever published, and it still holds up as an enjoyable “beer and pretzels” game, even today. But over and above all that, this simple little game also turned out, quite unexpectedly, to be a ground-breaking design. Ironically, the basic game system first introduced in NAPOLEON AT WATERLOO has proven, over time, to be one of the most popular and durable game platforms ever devised. Clean, simple, and eminently playable, the NAW Game System became the standard design architecture for most of SPI’s subsequent Napoleonic games, many of its Civil War games, and even a few titles that dealt with more modern combat situations. Thus, this game system appears in a broad array of later SPI titles such as BORODINO, AUSTERLITZ, the NAPOLEON AT WAR Quadrigame, the NAPOLEON’S LAST BATTLES Quadrigame, the BLUE & GRAY I and II Quadrigames, ROAD TO RICHMOND, 6th FLEET, and BATTLE FOR GERMANY, just to name a few.Design Characteristics:
Game Components:
Recommended ReadingSee my blog post Book Reviews of Waterloo, Day of Battle, and The Campaigns of Napoleon and Face of Battle; books that I recommend as highly-readable sources for those visitors who are interested in further historical background.For decorating the game room with a Napoleonic theme:
Subscribe to:
Posts (Atom)
Subscribe To
 Posts
All Comments
Posts
All Comments
Popular Posts
About Me
My Nephew Joe and Three Marine Buddies
|


