|
Showing posts with label articles. Show all posts
Showing posts with label articles. Show all posts
SINCEREST BEST WISHES FOR A SUCCESSFUL AND HAPPY NEW YEAR!With 2009 Coming to an End, It is Time to look forward to 2010 “Map and Counters,” was launched — pretty much on a whim — in April of this year, and thus far, over one hundred and ninety separate posts have been published on its pages. The steady growth, over time, in the numbers of new and repeat visitors — currently, the site averages about six hundred unique visits and over 2,100 page views per month — has been both a tremendous source of encouragement and the main justification for my decision to continue with this effort in 2010. That being said, I want to take the occasion of the end of the old year, and the beginning of the new, to thank all of you who have taken the time to visit “Map and Counters” and have stayed long enough to read my often eccentric and sometimes frivolous musings. Your interest is deeply appreciated. “Map and Counters,” was launched — pretty much on a whim — in April of this year, and thus far, over one hundred and ninety separate posts have been published on its pages. The steady growth, over time, in the numbers of new and repeat visitors — currently, the site averages about six hundred unique visits and over 2,100 page views per month — has been both a tremendous source of encouragement and the main justification for my decision to continue with this effort in 2010. That being said, I want to take the occasion of the end of the old year, and the beginning of the new, to thank all of you who have taken the time to visit “Map and Counters” and have stayed long enough to read my often eccentric and sometimes frivolous musings. Your interest is deeply appreciated.From its start, this Blog’s essays have centered on presenting highly-detailed game profiles and operational analysis of traditional board-style wargames. However, in addition to these regular, game-related posts, the site has also occasionally offered commentary on other subjects as diverse as movie and book reviews, our national Holidays, convention announcements and updates, and even a few posts to cover important breaking hobby-related news. This basic format will not change appreciably with the advent of the New Year. On the other hand, what really matters is which subjects you, the “Blog’s” visitors, really want to see featured in the coming year. And for that reason, I have listed a number of topics that I have either begun work on, or that I expect to write about, in the next few months. If any of these or other subjects are of particular interest, please let me know via the comments section of this post. Possible Topics for Future Posts
Any comments or suggestions about the preceding list or about the future direction of this Blog in the coming year are welcome. Hopefully, “Map and Counters” will continue to be a site worth visiting regularly in 2010. That, at least, is my sincere wish. The year that is now ringing to a close has, for a variety of reasons, been a difficult one; let us all pray that 2010 will be a much better time, in every possible way, for us all!  TRICKS OF THE TRADE: THE GENERAL LOOKS AT 'MIDWAY'An Exhaustive List of the Good, Bad, and Indifferent 'MIDWAY' Articles that Appeared from 1964-79 in the Avalon Hill GeneralMIDWAY is a historical simulation of the crucial carrier battle between the naval forces of Imperial Japan and the United States that occurred in the Central Pacific near Midway Island, on June 4, 1942. In this aircraft versus ship engagement, the Japanese advance across the Pacific was decisively defeated and turned back by a few hundred intrepid American naval airmen. More than any other single fleet action in the long Allied struggle against Japan, this battle — in which the surface vessels of the two opposing fleets never came into view of each other — represented the strategic turning point in the Pacific War. In the course of a single day’s combat, four of Japan’s best fast carriers were sunk at the cost of a single American flat top. It was a blow from which the Imperial Japanese Navy would never recover. MIDWAY was designed by Larry Pinskey and Lindsley Schutz and published by the Avalon Hill Game Company (TAHGC) in 1964. * * *  I still remember, after almost four decades, my first attempt at playing MIDWAY. It was during my Junior Year at college. A Friday marathon session of DIPLOMACY had just broken up at about 11:00 pm in the student “commons” and, since I still had a couple of hours to kill before I had to pick my girlfriend up from work, I was pretty much at loose ends. One of the other DIPLOMACY players — who also happened to be both a regular opponent and a friend — suggested that we try something completely different. When I agreed, he trotted off to his dorm room and returned a few minutes later with four Avalon Hill games under his arm: ANZIO, BISMARCK, GUADALCANAL, and MIDWAY. Since I had never played any of these titles before, it took a few minutes for me to decide on a game; but, after briefly looking over the different rules and game boards, I quickly chose MIDWAY as the least offensive of the four. I still remember, after almost four decades, my first attempt at playing MIDWAY. It was during my Junior Year at college. A Friday marathon session of DIPLOMACY had just broken up at about 11:00 pm in the student “commons” and, since I still had a couple of hours to kill before I had to pick my girlfriend up from work, I was pretty much at loose ends. One of the other DIPLOMACY players — who also happened to be both a regular opponent and a friend — suggested that we try something completely different. When I agreed, he trotted off to his dorm room and returned a few minutes later with four Avalon Hill games under his arm: ANZIO, BISMARCK, GUADALCANAL, and MIDWAY. Since I had never played any of these titles before, it took a few minutes for me to decide on a game; but, after briefly looking over the different rules and game boards, I quickly chose MIDWAY as the least offensive of the four.  In our first match, I took the Japanese. My American opponent effortlessly dodged my searches and, with my planes readied but sitting on their flight decks, I saw all four of my carriers sunk before the end of the first day of action. This first game, I reassured myself was just a learning experience. So, having so far spent more time sorting the game pieces than playing, I took the Americans in the rematch. This game turned out to be a little more interesting, if only because it was a little longer; the end result, however, was pretty much the same: by mid-morning on the second day, all three American flat tops had been bottomed and only the Japanese Hiryu had been sunk. And so it went. I think, all told, that we played four games, and I got (deservedly) shellacked in every one of them. Naturally, at the end of this session, I was completely hooked and, with a freshly-kindled desire for cardboard vengeance burning in my heart, I couldn’t wait to get my own copy of MIDWAY. However, since revenge was my ultimate goal, I also decided that it might be a good idea for me to read every article in the General about the play of the game that I could get my hands on. And that is what I proceeded to do. In our first match, I took the Japanese. My American opponent effortlessly dodged my searches and, with my planes readied but sitting on their flight decks, I saw all four of my carriers sunk before the end of the first day of action. This first game, I reassured myself was just a learning experience. So, having so far spent more time sorting the game pieces than playing, I took the Americans in the rematch. This game turned out to be a little more interesting, if only because it was a little longer; the end result, however, was pretty much the same: by mid-morning on the second day, all three American flat tops had been bottomed and only the Japanese Hiryu had been sunk. And so it went. I think, all told, that we played four games, and I got (deservedly) shellacked in every one of them. Naturally, at the end of this session, I was completely hooked and, with a freshly-kindled desire for cardboard vengeance burning in my heart, I couldn’t wait to get my own copy of MIDWAY. However, since revenge was my ultimate goal, I also decided that it might be a good idea for me to read every article in the General about the play of the game that I could get my hands on. And that is what I proceeded to do.Interestingly, in the course of my study of the game, I quickly discovered that the usefulness of the different articles presented in the General tended to vary inversely with their publication dates. The early pieces were usually of little real value, and occasionally even counterproductive. The later articles, on the other hand, were, with a few notable exceptions, much more instructive. The writings from acknowledged MIDWAY experts like Harold Totten and William Searight were particularly valuable in helping me to grasp the nuances of this classic title. And even Don Greenwood — who, before he decided to specialize in losing at BREAKOUT: NORMANDY, was a fearsome and diabolical MIDWAY player — provided many useful insights into the finer points of evasion and maneuver on the search board. And the end result of all my study? I freely admit that I didn’t win every one of my subsequent games, but I did win quite a few; and most importantly, I never again suffered the types of crushing defeat that I had endured during my first late-night attempts at MIDWAY. Which brings me, finally, to the purpose of this list: my hope is that some of my readers will be inspired to revisit this great old title; and further, that they will benefit, as I did many years ago, from the expert analysis contained in the insightful articles written by some of the best players to ever sit on one or the other side of a MIDWAY search board. So, for those of you who still have a pile or two of old issues of the General gathering dust somewhere around the house, or who have a friend who has a lifetime’s stash of gaming magazines stacked up in his game room, this list is for you. Even if you read all or most of these General articles a very long time ago, I encourage you to go back and give them another look. You might even find it hard to put some of these old Generals down, once you start turning through their pages! For no particular reason, I have arranged this rather long list in chronological order, from the oldest (1964) to the most recent (1979).
I should probably note, by the way, that in addition to this batch of articles, there are actually a number of other MIDWAY essays and “Series Replays” that appeared in the General after 1979 but that — because of a lack of time (read: motivation) on my part — did not make it onto this particular list. On the other hand, who knows? I may yet get around to cataloging these remaining pieces at some later date. In the meantime, this compendium of early articles on one of Avalon Hill’s first naval games should be complete enough to satisfy most of the long-time gamers who, like me, still have a “soft spot” for this classic design. Sadly, MIDWAY, like a number of the other great old games, has been out of popular favor for some years now; which is really too bad because this title — despite its dated graphics, and its “baby” blue and “frou-frou” pink counters — was, besides being a fast-moving and exciting game, actually a ground-breaking design in its day; and, I may be old-fashioned, but I still enjoy playing it whenever I have the opportunity. Finally, for those gamers who are relatively new to the hobby but who would, none-the-less, still like to check out some of these early MIDWAY articles, your situation is far from hopeless. Happily, there is an internet site (see my “helpful links” sidebar) that offers reprints from the General; alternatively, for those who insist on getting the “real thing,” there are also almost always old copies of the General and other hobby publications surfacing in the “board wargame section” on eBay. So, one way or another and with a little patience, interested gamers should still be able to track down quite a few, if not all of these early pieces, given enough time. THE 2009 WORLD BOARDGAMING CHAMPIONSHIPS CONVENTION BEGINS TOMORROW IN LANCASTER, PAWBC Pre-Convention events begin on 1 August while the Regular Week-Long Tournament Events begin on the 3rdIt is finally that time of year again: the WBC Convention kicks off in Amish Country on Saturday morning with a number of pre-convention events for those die-hards who don’t want to wait for the formal convention start on Monday, August 3rd.  This year, I will be with those dedicated grognards in spirit, if not in person. Much as I wanted to make the trek back to Lancaster, family issues have prevented me from attending this year. None-the-less, I still want to take this opportunity to wish everyone, from attendees to organizers, the very best of luck. Don Greenwood and the many, many others who devote a great deal of their time and effort to this once-a-year, premier hobby get-together deserve a lot of credit for organizing and running a great convention and tournament. This year, I will be with those dedicated grognards in spirit, if not in person. Much as I wanted to make the trek back to Lancaster, family issues have prevented me from attending this year. None-the-less, I still want to take this opportunity to wish everyone, from attendees to organizers, the very best of luck. Don Greenwood and the many, many others who devote a great deal of their time and effort to this once-a-year, premier hobby get-together deserve a lot of credit for organizing and running a great convention and tournament. Have a GREAT TIME, everybody! For the unlucky stay-at-homes like me, I’m afraid that we will just have to settle for the “after action” event reports — once they finally show up on the BPA web site — to get the details of this year’s tournament goings on. For my own part, I can hardly wait. THE COMPLETE TOURNAMENT PLAYER, PART THREESitting Down to Play: Tips on Surviving Tournament CompetitionYou’ve finally arrived at the convention site, checked in, and unpacked your luggage. Since you were smart enough to arrive a little early, you’ve had the opportunity to wander around the convention site and learn the layout of the tournament venue, and maybe even line up a few “pick-up games” with other attendees for later in the week. Before you know it, the afternoon has passed, so you grab an early meal and head to your room to get some sleep. You rise early in the morning, eat a light breakfast, and then amble over to the convention hall where your first tournament round is going to be conducted. With your game under your arm, you find the tournament Game Master and receive the final instructions and game assignments for the first round of competition. The big day has finally arrived. You draw your first round tournament opponent, and then, after finding some open table space, the two of you set up the game board and counters and prepare to play. Now, what do you do? 1. The first thing that a brand new convention attendee must understand is the concept of tournament “seeding.” In virtually all types of tournaments, whether they use a Single Elimination, Swiss, or some other organizing format, experienced players will always be matched against inexperienced or unknown players during the initial rounds. This means that, as a first-time participant, you are almost certainly going to be sitting across the game table from a very experienced, tough adversary in your very first game. Don’t worry about it. The game is the thing, and anyone, no matter how experienced or talented can be beaten; that is why there are tournaments, in the first place! So, focus on the current game, and not on the previous record of your opponent.  2. The second thing that a first-time attendee needs to be ready for is that unlike your home games, many present-day tournaments require the opposing players to bid (typically victory points) for sides. Since bidding will influence which side each player ultimately controls, recognize the strengths and weaknesses in your own play. If you are better on the attack than on the defense, then bid accordingly. But don’t get carried away. Treat tournament bidding the same way that you would treat a trip to a casino: set limits, in advance, on your bidding, and then stick to them. 2. The second thing that a first-time attendee needs to be ready for is that unlike your home games, many present-day tournaments require the opposing players to bid (typically victory points) for sides. Since bidding will influence which side each player ultimately controls, recognize the strengths and weaknesses in your own play. If you are better on the attack than on the defense, then bid accordingly. But don’t get carried away. Treat tournament bidding the same way that you would treat a trip to a casino: set limits, in advance, on your bidding, and then stick to them.3. Approach the match with a positive, upbeat attitude. Be friendly and courteous to everyone you meet during the convention, both inside and outside of the “pressure cooker” of tournament competition. Leave the obnoxious “mind games” for the jerks on the World Poker Tour. You’re playing for fun, not for money; so make a real effort to keep it fun. Do so even if your die-rolling is crummy or you do something stupid, and even if your current opponent seems to have checked his (or her) manners at the front desk. Most of the players that you will meet at a convention are friendly, generous, and fun; so remember that fact when you start to feel your temperature rise. This is only one game; there will be many more before the tournament is over. 4. Be prepared for surprises in your adversary’s play. Tournament competition is often as much about psychology as it is about the actual play of the game. For this reason, an expert tournament player will occasionally try to shake a less experienced competitor’s confidence or concentration by springing an unusual or unorthodox line of play on them. Be prepared for it, and don’t let an opponent’s surprise move rattle you. Take your time and be methodical. Stick to the pace you are comfortable with; do this even if the other player finishes his own move at warp speed, and especially if he seems impatient or exasperated with the pace of your play. There’s usually plenty of time in the early tournament rounds, so use it. 5. Expect to make an error or two in the course of your tournament games. If a mistake doesn’t immediately beat you, then you always have the opportunity to battle back. Whatever you do, though, don’t focus on a past screw-up; there’s nothing you can do about it, anyway. So, keep your mind on the game and in the present. War games are — in this case, at least — a little like the real thing: neither is won by the side that makes no mistakes at all, but, almost always, by the side that makes the fewest mistakes. Remember, even very highly-paid professional athletes occasionally make errors, and this is despite the fact that they practice constantly. 6. Do not attempt to go for an early knockout. Most of the tournament games are fairly long; AFRIKA KORPS, for example, runs for thirty-eight game turns, so don’t expect to establish a winning advantage in the first ten. Too many Axis players — sticking with AFRIKA KORPS as our example — think that they have to establish a dominating position before the Commonwealth reinforcements enter the game in November. If they fail to capture the British Home Base before that game turn, they typically race back to Tobruch. When they get there, they immediately launch a “Hail Mary” series of attacks against the fortress in a desperate attempt to seize the Allied port before the new British units start flooding onto the map. This approach is both foolish and wrong. Play to win, but play with patience. In most games, and in most tournament formats, it doesn’t matter whether you win on the first turn, or the last: a win is still a win; so play accordingly. One other interesting aspect about playing for the “long” game is that many players, because of their own styles of play or approach to the game, have very little real experience in playing through the later game turns. Sometimes, just hanging on, can get a less-experienced player to a stage in the match where his higher-seeded opponent’s experience is no greater than his own. 7. Finally, know when to quit. This doesn’t mean that you should give up the minute that you screw up or catch a bad die-roll or two, but it does mean that, at the point in a match when you can no longer see any possibility of a win, you should promptly and graciously concede. And I emphasize the word graciously. Don’t carp about the role luck played in the game. Just to be clear, this means: don’t point out the good luck of your opponent, or complain about your own bad luck; even if his luck really was good, and yours really was bad. It happens; besides, you knew that luck was a factor when you sat down to play. And speaking of graciousness: be gracious in defeat, but be especially gracious in victory. No one likes a bad loser, but everyone really despises a bad winner! Of course, even if you follow all of this advice, I cannot guarantee that you will end up bringing a tournament plaque or two with you when you head home after the convention. You may, for the reasons already mentioned, not even get past the first round. But being prepared for the special circumstances and pressures of tournament competition certainly won’t hurt your prospects, and, whether you win or lose, it should significantly improve your chances of having a truly enjoyable time. Perhaps the best feature of major conventions is that, even if you do get knocked out of all of your tournaments early on, you will still be able to line up lots of opportunities for open gaming.  This is the last of three installments on tournament play that I am publishing in advance of the World Boardgaming Championships Convention in Lancaster, PA, on 3 August of this year. I hope that the suggestions that I have offered in this series of posts will help prospective convention goers, both in preparing for, and then in handling, the sweat-inducing stress that inevitably comes with the face-to-face tournament experience. For the dedicated gamer, there is probably no experience quite as enjoyable or exciting as participating in a well-run tournament; for that reason, I strongly recommend — for any of you who have never attended a convention in the past — that you give it a try. I’m virtually certain that if you do, you will end up being glad that you did. A PERSONAL ASIDE ON MILITARY SERVICE: THE HIGH PRICE THAT THOSE WHO PROTECT US WILLINGLY PAYARE WE CREATING A NEW GENERATION OF “TOMMY ATKINS?”

The Marine scout-snipers that operate as part of MarSOC are much like the Navy SEALs or the Army Special Forces; they are the “tip of the spear” in the new type of warfare currently being waged all around the world against our nation’s enemies. Unlike other combat units that are assigned a geographical objective, or an area of responsibility, these “special ops” people are only sent to where things are hot. Typically they arrive at their objective — sometimes having travelled halfway around the world to get there — and go right into the fight. It is probably one of the toughest jobs that any combat soldier can ever have. By the very nature of these operations, “uncommon valor” is not only a common virtue, it is an essential requirement for success. The commanders who send these elite troops into action expect them to accomplish near miracles. They are, after all, the very best that we have. But these types of missions also mean that losses are inevitable and, if things go wrong, can be very high. TRICKS OF THE TRADE: MORE RULES FOR SPI'S 'LA GRANDE ARMÉE'Some Tips for Adding a Little More "Chrome" to 'LA GRANDE ARMÉE'
YET ANOTHER PREVIEW OF THINGS TO COMEA Momentary Change in “Wind” DirectionSince the initial articles and essays that have appeared in this blog have all been about “ground forces” type games, I thought that it might be time to change things up by introducing a few posts on naval titles. This is not, I confess, an area of gaming to which I have devoted a lot of time; none the less, I have, over the years, somehow acquired a number of naval simulations that I believe should get their fair share of recognition. I hope that you, my visitors, find these game profiles and related posts interesting. GAME ANALYSIS: GRENADIER: Tactical Warfare 1680-1850HISTORICAL BACKGROUNDThe Emperor Napoleon stared across the shallow valley of trampled-down rye grass that separated his exhausted French troops from the tattered British line that still occupied the low slope beyond the walled Belgian châteaux known locally as La Haye Sainte. Marshal Ney had finally taken the châteaux barely thirty minutes before, and now, after eight hours of fighting, the center of Wellington’s line finally lay exposed.  A half hour earlier, the Emperor had refused Ney’s frantic plea to support his attack against the ragged and jumbled British, Dutch, and Belgian battalions with fresh reinforcements from the Imperial Guard; then the Anglo-Allied ranks were wavering, and the Guard might well have marched half way to Brussels without serious opposition. In the interim, Wellington had seen his danger and rushed what reinforcements he still had towards his center. And only now did Napoleon decide that his last remaining chance for victory was to send forward the best troops that he had, five battalions of the Old Guard. Blücher’s Prussians were pressing against the French right flank, but Wellington’s army seemed on the verge of breaking; one more massive French blow might yet win the victory that had eluded him all day. It was 7:30 PM on 18 June 1815, and the Emperor Napoleon had finally decided to gamble his throne and perhaps his life, on one more throw of the dice; he would order his last available reserves, the still-fresh “immortals” of the Imperial Guard to smash through Wellington’s line. A half hour earlier, the Emperor had refused Ney’s frantic plea to support his attack against the ragged and jumbled British, Dutch, and Belgian battalions with fresh reinforcements from the Imperial Guard; then the Anglo-Allied ranks were wavering, and the Guard might well have marched half way to Brussels without serious opposition. In the interim, Wellington had seen his danger and rushed what reinforcements he still had towards his center. And only now did Napoleon decide that his last remaining chance for victory was to send forward the best troops that he had, five battalions of the Old Guard. Blücher’s Prussians were pressing against the French right flank, but Wellington’s army seemed on the verge of breaking; one more massive French blow might yet win the victory that had eluded him all day. It was 7:30 PM on 18 June 1815, and the Emperor Napoleon had finally decided to gamble his throne and perhaps his life, on one more throw of the dice; he would order his last available reserves, the still-fresh “immortals” of the Imperial Guard to smash through Wellington’s line. "Wellington at Waterloo" by Ernest Crofts. Directing deployment of reserves from his famous position under the tree. GAME DESCRIPTION GRENADIER is a tactical (company/squadron/battery) level simulation of warfare during the years when the smoothbore musket dominated the battlefield: an era that extended from the seventeenth century, through the eighteenth, and into the nineteenth century. As such, it is a wide-ranging examination of various European military engagements during the long period of transition from the first introduction of the socket bayonet, which allowed an infantryman armed with a musket to participate effectively in both fire and shock combat, to the years just before the Crimean War, and the dawn of modern industrialized warfare. GRENADIER is the second installment, historically-speaking, (although it was the first to be released in 1971) of SPI’s series of small unit (company/squadron/battery) level games dealing specifically with the development of firearms and their evolving tactical use on the battlefield. It was also the only installment in this three title series to be designed by James F. Dunnigan. Despite the game’s crude graphics, it is an interesting, and very challenging simulation that, in terms of basic game mechanics, has held up surprisingly well over the years. Components and Game SystemThe accordion-fold game rules are reasonably well-organized and clearly-written, and rules corrections and errata are not extensive. Beside the Rules Booklet and Errata Sheet, the only other “player aide” included with the game is a back-printed sheet which includes a list of scenario descriptions, the Combat Results Table, and the Terrain Effects Chart. Noticeably missing from the game’s published components is a Turn Record/Reinforcement Track and a Move/Fire Phase Record Track, both of which — based on my own fairly extensive experience with the game — would be extremely useful during play.The game design is detailed, but intuitively logical; hence, it is relatively easy to learn. The overall game platform is organized around a large collection of different scenarios, covering a variety of historical periods, combatants, and battles. Each scenario is played using game turns, and each game turn is further divided into interwoven player turns that give the game a simultaneous 'feel' without the time-consuming requirement of keeping written records. A typical GRENADIER game turn proceeds using the following sequence of player phases: First Player Offensive Fire Phase; Second Player Defensive Fire Phase; First Player Movement; First Player Shock Combat Phase; Second Player Offensive Fire Phase; First Player Defensive Fire; Second Player Move; Second Player Shock Combat Phase; end of Game Turn.  The 22” x 28” two-color GRENADIER game map is austere even by the hobby standards of 1971. There are no roads, tracks, rivers, lakes, marshes, plowed fields, or streams anywhere to be seen. Instead, the only hex types displayed on the playing surface are clear terrain, woods, slope, and village hexes. Clear hexes cost all types of units one movement point to enter; all other types cost infantry units two movement points, and cavalry-type units three movement points to enter. Artillery units must pay three movement points to enter villages, four to enter slope hexes, and woods hexes are completely prohibited. Woods hexes triple the defender against fire and shock attacks, and villages quadruple a unit’s defense strength. Each hex is 50 meters across, and each game turn represents ten minutes of real time. Because of the time scale of the game, there are no supply rules. The Combat Results Table (CRT) is virtually “luck free” in the sense that the attacker can almost always determine the outcomes of key battles by precisely controlling the odds of those battles. Combat can occur in one of two ways: either through fire attacks, or through shock assault. Fire combats are always executed first and are resolved in the following rigid order based on type of fire: shot (artillery); canister (artillery); and musket (all others). Units of the same type firing from the SAME range at a single target may combine fire strengths; otherwise fire attacks must be resolved separately. The effectiveness of fire attacks is cleverly handled, not by adjustments in odds, but through 'range attenuation': the closer the target unit is to the attacker, the more damaging the fire attack. However, fire attacks may not be conducted against adjacent units. Shock combat — basically the cavalry charge or the bayonet assault — is the most decisive type of attack, but it is also the most dangerous for the attacker. Shock combat will typically leave both attacking and defending units disrupted and mutually pinned. If these units are attacked again — either by fire or shock — before they can be rallied, either a DD or a D Elim result will destroy them. Cavalry units, although they have the greatest movement range and best shock values on the battlefield, are always disrupted after a charge, whatever their effect on the target unit or units.  The 400 game counters, while certainly not eye-grabbing, are clearly printed and easy to read. The various Allied (British/Prussian/Spanish) units are printed black on a tan backing; French counters are light blue with black print. The counters for both armies typically represent various types of infantry companies, cavalry squadrons, artillery batteries, and leaders. Each infantry and cavalry counter will be designated as to its type, and to its Fire Attack Strength, Range, Fire Defense Strength, Shock Combat Strength, and Movement Allowance. Artillery units will show the gun type (8 pounder, 10 pounder, etc.), Fire Attack Strength-Shot, Range Allowance-Shot, Fire Attack Strength-Canister, Range Allowance-Canister, and Movement Allowance. In addition, artillery units must be “limbered” to move, and “unlimbered” to fire; to this end, each artillery unit includes, besides the gun, an artilleryman (to man the gun), and a caisson unit. All three artillery elements count as only one unit for stacking, and both sides may stack up to four units per hex. Finally, certain types of infantry units may be broken down to form “skirmisher” units which have a lower Shock Combat Strength, less Fire Attack Strength, and a shorter Range Allowance, but which defend against fire attacks with a defense strength of two. These units are primarily employed to screen a player’s main forces from enemy fire until they can advance to shock combat. One source of frustration with the game’s counter sheet, however, deserves comment. During the course of the game, units will constantly be disrupted as a result of combat. Despite this fact, there are no disruption counters included with the game to help players keep track of the exact phase in which these disruptions occur. This is not a fatal design defect, but it is, nonetheless, an aggravating and unnecessary lapse. The 400 game counters, while certainly not eye-grabbing, are clearly printed and easy to read. The various Allied (British/Prussian/Spanish) units are printed black on a tan backing; French counters are light blue with black print. The counters for both armies typically represent various types of infantry companies, cavalry squadrons, artillery batteries, and leaders. Each infantry and cavalry counter will be designated as to its type, and to its Fire Attack Strength, Range, Fire Defense Strength, Shock Combat Strength, and Movement Allowance. Artillery units will show the gun type (8 pounder, 10 pounder, etc.), Fire Attack Strength-Shot, Range Allowance-Shot, Fire Attack Strength-Canister, Range Allowance-Canister, and Movement Allowance. In addition, artillery units must be “limbered” to move, and “unlimbered” to fire; to this end, each artillery unit includes, besides the gun, an artilleryman (to man the gun), and a caisson unit. All three artillery elements count as only one unit for stacking, and both sides may stack up to four units per hex. Finally, certain types of infantry units may be broken down to form “skirmisher” units which have a lower Shock Combat Strength, less Fire Attack Strength, and a shorter Range Allowance, but which defend against fire attacks with a defense strength of two. These units are primarily employed to screen a player’s main forces from enemy fire until they can advance to shock combat. One source of frustration with the game’s counter sheet, however, deserves comment. During the course of the game, units will constantly be disrupted as a result of combat. Despite this fact, there are no disruption counters included with the game to help players keep track of the exact phase in which these disruptions occur. This is not a fatal design defect, but it is, nonetheless, an aggravating and unnecessary lapse.To determine who wins, players must refer to the specific victory requirements for each of the different scenarios. In most cases, winning the game will require one army to exit the map edge, while the opposing army attempts to check this maneuver. Happily, the clear-cut victory conditions and the limited number of game turns prescribed in each of the scenarios virtually guarantees an exciting and bloody tactical clash whichever scenario is selected for play. SITTING DOWN TO PLAYGRENADIER offers sixteen different scenarios or mini-games, each of which is a completely independent game. Most will require no more than two to three hours to play. Some of the scenarios cover actions that are famous, while others present engagements that are at the very least obscure, if not virtually unknown. Nonetheless, while it is understandably tempting to go straight to the later scenarios which simulate famous actions from the better known battles like Marengo, Austerlitz, and Waterloo, I strongly recommend that players begin with the earlier, less well-known scenarios: those with fewer units and no “skirmishers.” It is very important that players get a feel for the “combined arms” aspect of the GRENADIER game system, before they attempt the bigger, more complex actions. Considering everything, I am convinced that beginning with these earlier, simpler scenarios is probably the best way for players to quickly develop an understanding of the mechanics of the game system, and of the probable flow and tempo of play.NOTES ON TACTICSThe GRENADIER game system is clean, generally logical, and comparatively easy to learn. So what follows are a few tips, based on many hours spent playing the various scenarios that make up this title, on using the nuances of this particular game system to help new players become more comfortable with a few of the tactical niceties of GRENADIER.The Use of TerrainAlthough terrain types in GRENADIER are limited and their varying effects are comparatively simple, terrain is not inconsequential when it comes to play. All units, except for skirmishers, defend in clear terrain with defensive value of 'one'. This means that the defensive multiplier effects of villages (quadrupled) and woods (tripled) are particularly important for sheltering important units — such as artillery and cavalry — from both enemy artillery fire and shock attacks. Typically, if an artillery battery (only one per hex, artillery units may not stack together) is positioned in a village, it will be stacked with an infantry unit with a strong Shock Combat Strength. This precaution will not make the artillery unit invulnerable to an enemy cavalry charge, but it will make the 'opportunity cost' in disrupted (and probably eliminated) attacking cavalry squadrons very high. On a slightly different note, to avoid having one's attacking units dangerously pinned, shock assaults against villages should only be conducted either when the village can be cleared in one attack, or alternatively, when the defending force has no reinforcements available in the immediate vicinity of the village. If neither of these conditions are present, then the attacker can quickly find himself entangled with a defensive “tar baby” in his unequal fight with the units in an enemy-occupied village. One need only think back to the day's events at Waterloo, and to the fightling at the Châteaux of La Haye Sainte and Hougoumont, to see the probable outcome of this type of situation. Woods hexes can be especially useful for staging infantry and cavalry in preparation for a final rush against an enemy position or line. And while village hexes are too valuable to waste on individual skirmisher units (which cannot stack except to reform or to rally), skirmishers will often present the leading edge of an advance through a forest because of their formidable Fire Defense Strength.Villages, woods, and all combat units (even unmanned guns) block fire 'line of sight' for all units shooting from ground level. Units firing from slope hexes (usually artillery) DO NOT have their fire blocked by intervening combat units, but only by obstructing village and woods hexes. Interestingly, artillery units on ground level MAY NOT fire over obstructing combat units even at target units on slopes. This rule makes slope positions particularly powerful (and intimidating) sites for an army’s artillery. This rule also means that an advancing force, confronted by enemy artillery on a slope, must make skillful use of blocking terrain (occasionally villages, but usually woods hexes) to create 'curtains of maneuver' behind which the attacking forces can advance without being shot to pieces. The Use of ArtilleryIf infantry is the “Queen” of battle, then artillery is the “King”. For this reason, players will probably face no more crucial set of choices before they start a match, than where they are going to position their artillery, and whether it should start the scenario limbered (ready to move) or unlimbered (ready to fire). Putting aside the weight differences between the different cannons present in the game, a player will really command only two types of artillery units: those that can limber—move—unlimber and fire in the same turn (essentially, the galloper guns); and those that cannot. The less mobile guns will usually be sited in villages or on slopes (when possible), while the more nimble artillery pieces will typically advance aggressively when attacking, often accompanied by cavalry. When these 'gallopers' are on the defensive, they will usually serve as the core of a 'ready reserve', deployed so as to be able to dash forward to meet an unexpected enemy threat.Artillery really has only two enemies on the GRENADIER battlefield: cavalry and other artillery. The cavalry issue, in so far as it is possible, has already been addressed. Artillery counter-battery fire is another thing all together. At the beginning of a scenario, the quantities and types of artillery units possessed by an opponent may well determine how aggressive a player can afford to be with his own guns. Occupying a village hex is fine defensively, but if the enemy can draw his guns up wheel to wheel and blast the village into rubble on the first game turn, then a more circumspect deployment may be in order. And in some scenarios, there simply isn’t anywhere to position artillery where, if it can fire, it won’t be vulnerable to enemy attack. In these situations, the best that can be hoped for may well be for a player to position his less mobile cannons safely behind his own front line, particularly where he expects a major enemy assault, and then hope to greet any enemy breakthrough with a large dose of canister. The real key to success with artillery, however, is to get it into the fight, and to do so as quickly as possible. One approach that I have always found useful is to use the different types of artillery in a 'leapfrog' sequence of coordinated advances. That is: position the long range guns where they can fire on the enemy artillery but, because of range allowance differences, cannot be fired upon; then dash forward with the medium range artillery and galloper guns in an effort to swamp the enemy artillery units with shorter range fire. If the guns that are being rushed, fire, then they will probably be disrupted or eliminated by the attackers’ counter-battery fire; if they retreat, then the long range guns can relimber and prepare to advance. The idea behind this tactical approach is to risk some initial losses among the attacking guns, in order to achieve long-term artillery superiority. Finally, an unlimbered and crewed artillery unit can fire either shot or canister. Unfortunately, players often become mesmerized by the large Canister Attack Strengths when they are compared to the smaller Shot Attack Strengths. Nonetheless, despite its lower combat power, an attack using shot may still be the better choice because the shot will attack every unit in an enemy stack, while canister only affects the topmost unit. The Use of CavalryThe best use of cavalry in GRENADIER is probably not to use the cavalry at all, at least not until the final few turns of a scenario. This, unfortunately, is easier said than done. The primary appeal of the cavalry lies with its movement range and its power on the attack: fresh cavalry can always charge twelve hexes across the map, and they all have powerful Shock Combat Strengths. The problem is, once they have charged they will end the Shock Combat Phase disrupted and a very inviting target for any undisrupted enemy units in the immediate vicinity. Since the local enemy forces will now have two Fire Phases and one Shock Combat Phase of their own, before the spent cavalry can withdraw, it is very unlikely that any of the charging horsemen will ever make it back to the safety of their own lines. In short, the brittleness of the cavalry arm, once committed, means that to use one's cavalry is usually to lose one's cavalry.Sadly, what this implies for all you closet Murats out there, who are just itching for a major mounted action, is that the cavalry is usually much more useful as a "threat in being" than as an actual attacking force. The cavalry’s best use in the game, as it was historically, will typically be to cover the army’s flanks, observe and shadow enemy cavalry, and whenever possible (and tactically prudent), threaten enemy artillery units. Charges are best reserved for finishing off enemy infantry that is already disrupted and reeling from fire and shock attacks, or when the opportunity presents itself, for smashing into enemy cavalry that has strayed too far from friendly supporting units. The Use of InfantryInfantry, of course, is the backbone of the game’s tactical system. At close range, good quality infantry (line, improved, or grenadiers) can deliver lethal fire, and their Shock Combat Power can come close to that of cavalry on the attack and is superior on the defense. The trick, for the players in GRENADIER, is getting undisrupted infantry close enough to the enemy line to deliver either fire or shock attacks. This is the central challenge of the game system, and it is a real beauty. Of course, in those scenarios in which they are permitted, both armies can send out swarms of skirmishers to screen their respective main bodies. This is the course recommended in the game’s “Player’s Notes,” and, in the case of a frontal attack, it is undoubtedly the best option. This approach, unfortunately, is not without its flaws. The problem with skirmishers, it turns out, is that they are slow, weak in both Fire and Shock Combat, and, if that weren’t bad enough, even their fire Range Allowance is pathetically low. Certainly, skirmishers have their place in the game, but their numbers are not unlimited, and both sides inevitably give up some combat power when they convert infantry to skirmishers.For my own part, I prefer to approach the use of infantry in GRENADIER from the “combined arms” perspective. Frontal attacks are almost always a loser in this game system. To attack successfully, infantry must be allowed to close with the enemy without sustaining unreasonable losses. Usually, this means advancing against one or the other flank, while using long-range artillery to fix the enemy's center. Skirmishers are typically deployed one to three ranks deep depending on the fire attack threat posed by the defender. Cavalry follows along behind the advancing infantry companies, ready to charge any enemy guns that are brought forward by the defender. If the attacker can move his cannons up onto slope hexes, so much the better. But it is more likely that the defender will control slope firing positions. If the defender has positioned his artillery on slope hexes, avoid them like the plague, even if this means lengthening the entire attacking force’s line of march. This type of situation will typically occur when the defender controls the ridgeline near the hamlets of Sohr and Mack; when this is the case, the attacking force can counter by using the copse of trees between Frimont and Longmont as a barrier to enemy fire while positioning a gun, with leader and infantry support, in Frimont to prevent the defending player from being too careless with his own forces. At some point, the infantry battle is almost always going to come down to Shock Combat. When it comes to organizing my own assaults, I usually stack attacking French units (usually two line and two grenadier companies, if available) so that the first attack can achieve a 4 to 1 against the topmost unit in the enemy stack, and then a 2 to 1 against the remaining units in the defending stack, assuming that there is more than one unit remaining. If the enemy stack is too powerful (four undisrupted improved infantry companies, for example), then a second 4 to 1 is conducted, followed by a 1 to 1 against the remaining two units. These assaulting stacks will always have an infantry leader (bottom of the stack). The topmost unit in the attacking stack is typically a line or conscript infantry company and is disrupted first; the third (line infantry) and fourth (grenadier infantry) units in the stack are then disrupted to meet the requirements of the other two attacks. The second unit in the stack, a grenadier company, is left undisrupted to defend against a (hopefully) weak enemy Shock counterattack. The topmost unit will probably be dispatched by enemy fire. The key to ultimate success in these Shock Combats is the proximity of reserves. This is why it is crucial for the attacker to position his advancing artillery so that he can use both shot and canister fire to quarantine the battle area around the main infantry attack. I cannot promise that using the infantry companies to power indirect flank attacks will always work, but I can say that it will typically work a lot better than a straight-up-the-middle frontal attack. The Use of LeadersGRENADIER is the only one of the SPI “gunpowder” tactical series to actually continue the PRESTAGS tradition of using leader units. By the time that MUSKET & PIKE was published in 1973, leaders and command and control had all disappeared down the “playability” design hole, never to be seen again. I seem to remember that, at the time, SPI’s — or maybe it was John Michael Young’s — explanation for ditching the leader counters in the newer games was that the designer needed those counters for other game functions. This, I think, was a mistake. Leaders add some elements to this earlier title that are just not present in the later games: a realistic set of limitations on an individual unit’s initiative and combat effectiveness.In GRENADIER, the organization of the combat forces is restricted, as it was historically, by the physical limits of individual leaders. A single commander can only shout so loud or be in one place at a time. At the tactical level of this game, players are assigning battalion, regimental, and brigade commanders to their forces so that their units can move and engage in combat. Artillery leaders command and rally artillery; cavalry leaders command and rally cavalry and horse artillery (4 pounders); infantry leaders command and rally infantry; and the GHQ leader commands and rallies everybody. If a leader is himself disrupted, then he must, in turn, be rallied by a higher ranking officer; this senior commander, however, need not be from the same combat arm. Thus, an artillery leader could rally a lower ranked infantry or cavalry officer. The use of the lower-level commanders usually becomes critical when the opposing armies engage in shock combat. Adjacent enemy units pin each other, thus a unit may not move away from an enemy unit (think weak ZOC) without becoming disrupted. Cavalry is the one exception; assuming it survives long enough and is in command, then it may withdraw from a hex adjacent to an enemy unit without suffering anything but a movement cost penalty. In any case, once shock combat begins and attackers and defenders have become and are continuing to become disrupted, neither side is going anywhere until one or the other group of adjacent units is eliminated. This means that, as noted earlier, to continue the shock assault long enough to really break an enemy line, the attacker must throw some of his leaders forward directly into the assault. A leader stacked with the assaulting force, so long as the leader is not disrupted too, may rally the infantry units stacked with it, and thus continue the mêlée until the enemy units are (hopefully) finally eliminated. CONCLUSION "Battle of Blenheim" painting in Hochstadt Palace depicting the victory of the Duke of Marlborough and Prince Eugene of Savoy, August 13, 1704 "Battle of Blenheim" painting in Hochstadt Palace depicting the victory of the Duke of Marlborough and Prince Eugene of Savoy, August 13, 1704GRENADIER, despite its age and disappointingly bland graphics, offers an interesting, innovative, and very challenging simulation of warfare during the age of the musket and highly-mobile artillery. I have already cataloged the several frustrating problems with this game: the lack of disruption counters, and the inexplicable absence of a Turn Record or Player Phase Track1. In the end, these issues are irksome, but little more. Needless-to-say, no game is perfect, but in so far as a tactical simulation is able to, this title helps bring to life the built-in drama of some of the historically critical turning points during this period of evolving battlefield tactics. From Marlborough at Blenheim, to Napoleon in Egypt, Italy, Moravia, Prussia, and finally face-to-face with Wellington in Belgium, this title gives players a tactical look at some of the great battles of history. Moreover, the game’s large number of scenarios means that a player can experiment for many hours with this title and never exhaust the possibilities offered by the game. And even for players that ordinarily do not play tactical-level games, GRENADIER could make them change their minds. Whatever else can be said about Dunnigan’s design, it certainly has enough competitive excitement to make it enjoyable to the tactical specialist and to the regular gamer who is just looking for a fun, exciting, and interesting challenge. _____ 1 My own GRENADIER Player Fire and Move Turn Phase Record Game Track is available for download here as an Adobe Acrobat .PDF document. Related Map and Counters Blog PostsSPI, GRENADIER (1971)TRICKS OF THE TRADE: TURN PHASE TRACK FOR SPI'S 'GRENADIER' REFLECTIONS ON 2009 'MEMORIAL DAY' OBSERVANCES
In Memory of Marine Cpl. Javier Figueroa, killed 1/28/68 in Quang Tri
Province, Republic of South Vietnam In Memory of Marine LCpl. Clement Johnston, Jr., killed 4/28/66 in Quang Ngai Province, Republic of South Vietnam . By honoring the sacrifice of those who have, in the words of Abraham Lincoln, already “given the last full measure of their devotion,” we also honor all those who, like my young Marine nephew, are currently fighting in some hard, unfriendly place, half a world away. A Few Additional Thoughts on This, the First “Summer” Holiday of the Year The Vietnam War Memorial, "The Wall", Washington, D.C. Today is “Memorial” Day. It is supposed to be a day of remembrance. And I like to think that there was a time, not that long ago, when most ordinary Americans understood and honored this day and its purpose. Now, for many, if not the majority of our fellow citizens, Memorial Day seems to be little more than an excuse for a three-day holiday weekend, or a backyard barbeque, or even for a “blow-out” electronics sale. I hate to admit it, but I understand how this change could happen: memories are tricky things, and they fade surprisingly quickly. I was recently brought to this sad truth, myself.
 WWII U.S. Cemetery, Normandy, France, view of the graves from the memorial. During the first week of April of this year, my wife talked me into visiting the touring reproduction of the Vietnam War Memorial: The Wall. She had already visited the real monument in Washington, but she knew that— despite the fact that I had served two and a half years in Vietnam — I had not; so she thought that it might be nice for us to finally visit the touring “Wall” display together. I agreed to make the trip, but under protest: I have to admit that I have always had mixed feelings about “war” memorials. Unlike a military cemetery or a former battlefield — I still get a lump in my throat when I see pictures of Arlington or of the American Cemeteries at Normandy or Lorraine, in France — most of these types of monuments have always struck me as being more like “guilty” afterthoughts than anything else. Statues or marble structures that actually say more about the “memorializers” than about the “memorialized.” None the less, I finally agreed to make the trip; so on a sunny, windy Saturday morning, we drove all the way out to Buckeye, Arizona to visit the touring reproduction of the “Wall.”  WWII U.S. Cemetery, Normandy, France, The Gardens of the Missing WWII U.S. Cemetery, Normandy, France, The Gardens of the Missing I don’t know what I expected. But I can honestly say that no sudden, intense wave of emotion washed over me when I saw the monument. Nor do I think that my reaction would have been any different, had I been looking on the real thing for the first time. I had served in Vietnam from February 1966 to August of 1968, so over four decades separated the “old man” from the young soldier that had gone to Southeast Asia so many years before. Also, I was never a grunt. I spent my time in Vietnam either helping to intercept, analyze, or process intelligence gathered from enemy communications. My various jobs took me all over the country, but only rarely did I even have to carry my rifle or do any hard slogging. So, all things considered, I had it pretty good. So, the first unpleasant fact that I realized in Buckeye that day was that the young soldier of my dim past could almost have been someone else. But even that wasn’t the worst of it. As I walked along, I found myself scanning the “Wall.” Finally, when I reached the area of the monument that covered the period of my own service — for those who have not seen it, the names on the Wall are organized by date — I was surprised to discover that my mind had gone almost completely blank. Despite having spent some thirty months in Southeast Asia, I suddenly discovered that, somewhere during the march of years, I had forgotten many, if not most, of my old comrades’ names. In a lot of cases, if I could remember a name, I couldn’t match it with a face, or vice versa. This effect was particularly pronounced when it came to the soldiers and marines that I had served with in I Corps (Quang Tri Province) near the DMZ, during my first year in Vietnam. But it spilled over into other situations and locations, as well. Guys I had had the odd beer with, or played poker with, or had met on R&R in Bangkok or Malaysia, or Taiwan. These were just regular Americans; not really so much friends, as the typical GIs that you bump into and get to know when you’re in a place long enough. This wasn’t to say that I had forgotten everyone, but only that I had forgotten far too many. And the most troubling thing of all was that I had somehow forgotten the names or the faces of those I knew who had been killed. Now, none of my closest friends had been killed or even wounded. Others that I knew, however, had not been so lucky, and as I walked along the mock-up of the “Wall,” I couldn’t help feeling that these others deserved better. And not just from me, but from everyone. I couldn’t shake the sense that, somehow, I had let these young men down. And this idea brings me, finally, to the dedication at the beginning of this piece.  WWII U.S. Cemetery, Lorraine, France - View of the memorial from the graves In the end, I and the wonderful, helpful people who volunteer with the monument tour tried our best to identify at least a couple of individuals from a number of young men that I had known who had been killed in various operations from “Davy Crockett” to the “Tet” Offensive. It had suddenly become important to me, that I at least make the effort. The two young marines memorialized at the start of this essay — one forever 18 and the other 22, who died so long ago in Vietnam — may or may not be the men I remember, I will never be sure. But what I do know is that even if they are not, they deserve to be remembered on Memorial Day by someone, and I am proud for that someone to be me. And having finally visited the “Wall,” I also now know something else: I realize, at last, that if we who served with them do not make the effort to remember those who fell, then who will? May you, my readers, and those you care about, all have an enjoyable and safe Memorial Day Holiday. And may those who wear our country’s uniform and who daily go into harm’s way, in dangerous, far-off places, also have a safe Memorial Day! TRICKS OF THE TRADE: THE GENERAL LOOKS AT 'WAR AND PEACE'
A Short list of some of the best articles on WAR AND PEACE to appear, over the years, in the General
WAR AND PEACE, while not a bad game, is just not one of my personal favorites when it comes to Napoleonic grand-tactical simulations. It is not that I actively dislike the game, it is just that there are other titles that, for whatever reason, I like better. However, in the course of rummaging through my old Generals, I couldn’t help but notice that, based on the number of articles appearing on this title, that more than a few readers of the General disagreed with me. And, quite honestly, some of their essays made for pretty interesting reading. So, in deference to the many fans of this (perhaps underappreciated) game, I have decided to list some of the best of the articles on WAR AND PEACE to have appeared in the pages of the General. I hope that some of you find these write-ups interesting. Also, let me repeat my previous strong recommendation, yet again: To those of you who still have a collection of Generals gathering dust somewhere in your closet, or who have a friend who has a lifetime’s stash of old gaming magazines stacked up in his game room, this list is for you. Even if you read these articles a long time ago, I urge you to go back and give them another look. You might even find it hard to close the covers of some of these old Generals once you start turning through their pages! As is my custom, I have arranged this list in chronological order, from the oldest to the most recent.
As is always the case when you try to compile one of these “compendia,” there are pieces and writers that didn’t make it onto this list, but that probably should have. Nonetheless, I believe that this varied collection of articles displays a representative cross-section of the different types of essays to be found on this, or any Avalon Hill game, within the pages of the General. These articles should also show why these old game magazines rarely get thrown away: a player can return to the same issue again and again, and still find something new and interesting. And by the way, for those of you who don’t have any old Generals lying around, there are always copies surfacing on eBay so, given a little time, you should still be able to track most, if not all, of these gems down. TWO GAME APPROACHES TO THE ’43 BATTLE OF KURSKSPI designers look at Operation “Zitadelle” in 1971 and again in 1980One of the interesting things about having been in this hobby almost from its beginning is that it gives a person a unique perspective when it comes to the evolutionary progress of game design. Time and again, a curious observer can find experiments that were tried and then abandoned in favor of some other game mechanism or design approach: proverbial game design “dead ends” that, while intriguing, somehow ended up leading nowhere. The best and most obvious example of this evolution in game design can probably be found with SPI’s KURSK Game System. Originally offered in 1971 in the games KURSK and later, FRANCE ’40, this design architecture became the foundation of a whole generation of SPI World War II games. In 1973, EL ALAMEIN was published, which added “sticky” zones of control to the basic KURSK package, but was otherwise very similar to its East Front cousins. Three years later PANZERGRÜPPE GUDERIAN — with its “sticky” zones of control, step reduction, divisional bonuses, and more complicated supply rules — appeared as an S&T magazine insert game. This event clearly showed that the KURSK Game System had veered off in a new, more detailed and interesting direction. In 1977 the PGG Game System made another evolutionary jump from operational (divisional/regimental-level) games, to grand tactical (regiment/battalion-level) games with the publication of WACHT AM RHEIN. In 1980, the Battle of Kursk was revisited by SPI in ERIC GOLDBERG’S KURSK; this edition presented a still more richly-detailed version of the original game system. The irony, of course, is that surprisingly little real additional progress has been made since this one incredibly innovative burst of design creativity in the 1970s and early 1980s. The personal computer has, unfortunately, changed the gaming landscape forever. The other aspect of the hobby that is interesting to examine critically, over time, is the graphic presentation and design of games. While a number of artists and designers certainly contributed to the steady and dramatic improvement in game graphics during this “golden age” of game design, I think it is fair to say that Redmond Simonsen was the dominant influence on the entire process. Redmond may have been a terrible game designer — DIXIE and AFTER THE HOLOCAUST are ample proof of this assertion, I think — but he was a truly inspired graphic designer. It is difficult to imagine what war games and their components would look like today without Simonsen’s often brilliant and inventive graphics touch. A fellow gamer, only partially in jest, once observed years ago that Simonsen played Albert Speer to Jim Dunnigan’s Hitler: he managed to make almost everything that Dunnigan designed, look better than it actually was. A little strong as criticisms go, maybe, but I am not convinced even now that it was completely inaccurate. Perhaps no better example of the rapid burst of “Simonsen sparked” progress in game graphics can be found than in a comparison of SPI’s WAR IN THE EAST (1974) with the follow up version of the same game, WAR IN THE EAST, 2nd Edition, which appeared only two years later in 1976. Every aspect of the second edition game’s graphics represented a significant improvement over its predecessor. The maps were vastly improved, the counters more colorful and varied, and the rules and game charts better organized and easier to use. In short, the dramatic differences between the two versions of the same game were nothing short of stunning. Given my own personal interest in these several design themes, I am going to be offering posts over the next few weeks, off and on, which should clearly illustrate some of these evolutionary design changes. I only hope that some of my visitors find this short detour down memory lane both informative and diverting. For my first attempt at one of these comparative examples, I am going to publish a game review of ERIC GOLDBERG’S KURSK. Other comparisons will follow from time to time, as I continue to review my personal collection of old games. In the meantime, I invite those of my visitors who are interested, to contrast Mr. Goldberg’s 1980 version with the original KURSK (1971) which was reviewed on this blog at the beginning of April. GAME ANALYSIS: EARLY MOVES IN 'AFRIKA KORPS,' CHAPTER TWO: THE BATTLE FOR EGYPTTobruch to El Alamein, Part 1: The Matruh 'Line'In my previous essay on AFRIKA KORPS, I focused on the “first” battle of Tobruch, and the competing goals of the two opposing armies as they maneuvered and fought during the late spring and early summer of 1941. These initial Axis attacks are virtually preordained because of our determined, but imaginary Rommel’s absolute need to push the Commonwealth off of the escarpments that both parallel the Coast Road (Via Balbia) and closely ring the fortified port city of Tobruch. Thus, the overriding purpose of these initial Axis attacks is simple: to bring the British fortress under siege and, by so doing, to release the bulk of the Deutsches Afrika Korps for further offensive operations. Rommel’s strategic options after completing this first operation, however, are limited. Once Tobruch has been successfully invested by Axis forces, the Desert Fox really has only two choices as to his next course of action: reduce Tobruch, or drive east towards Alexandria. Rommel’s Dilemma: Tobruch First? If Rommel chooses the first option, then the Afrika Korps can — assuming adequate supplies in the battle area — immediately begin the “second” battle of Tobruch, with a series of attacks intended to reduce the British garrison and capture the fortress. This option, although risky, has several appealing arguments in its favor. First, it guarantees that the assault on the fortress begins when Axis forces are at their strongest, and the Commonwealth army is at its weakest. Moreover, the hypothetical General Wavell will actually have only three major units upon which to anchor his defense of the fortress: the two 4-4-7s and the single 3-3-7. Obviously, if the Axis attacks are successful, and they do not severely cripple the Deutsches Afrika Korps with losses, then Commonwealth prospects for victory decline significantly. For Rommel, the first attack is usually the “big” attack; if it succeeds in eliminating one of the British armored brigades without an exchange, the British commander has a real problem. If he reinforces Tobruch with the 3-3-7 mechanized unit, then the Desert Fox will simply attack it at 5 to 1, and take his chances with either a 1 to 5 or a 1 to 6 soak-off. This means that, after the first Axis attack, the Tobruch garrison will typically be composed of two 2-2-6s and a 4-4-7. Unfortunately, the methods for profitably attacking this weakened garrison are too numerous to catalog. Second, if the one surviving 4-4-7 is also eliminated without an exchange, not only will the fortress fall, but the Commonwealth player will have great difficulty in achieving combat odds against the powerful Axis armored units for the rest of the game. Finally, the several important advantages that the Axis possession of Tobruch would confer on Rommel, in terms of increased replacements, and in the accelerated arrival of supply convoys and reinforcements are too obvious to require elaboration. If Rommel chooses the first option, then the Afrika Korps can — assuming adequate supplies in the battle area — immediately begin the “second” battle of Tobruch, with a series of attacks intended to reduce the British garrison and capture the fortress. This option, although risky, has several appealing arguments in its favor. First, it guarantees that the assault on the fortress begins when Axis forces are at their strongest, and the Commonwealth army is at its weakest. Moreover, the hypothetical General Wavell will actually have only three major units upon which to anchor his defense of the fortress: the two 4-4-7s and the single 3-3-7. Obviously, if the Axis attacks are successful, and they do not severely cripple the Deutsches Afrika Korps with losses, then Commonwealth prospects for victory decline significantly. For Rommel, the first attack is usually the “big” attack; if it succeeds in eliminating one of the British armored brigades without an exchange, the British commander has a real problem. If he reinforces Tobruch with the 3-3-7 mechanized unit, then the Desert Fox will simply attack it at 5 to 1, and take his chances with either a 1 to 5 or a 1 to 6 soak-off. This means that, after the first Axis attack, the Tobruch garrison will typically be composed of two 2-2-6s and a 4-4-7. Unfortunately, the methods for profitably attacking this weakened garrison are too numerous to catalog. Second, if the one surviving 4-4-7 is also eliminated without an exchange, not only will the fortress fall, but the Commonwealth player will have great difficulty in achieving combat odds against the powerful Axis armored units for the rest of the game. Finally, the several important advantages that the Axis possession of Tobruch would confer on Rommel, in terms of increased replacements, and in the accelerated arrival of supply convoys and reinforcements are too obvious to require elaboration. The British commander is, of course, probably not going to sit passively by waiting for the Desert Fox to methodically grind down the Tobruch garrison. The problem is that the Commonwealth field army is not really capable of direct offensive action against the Afrika Korps, even after the arrival of July and August reinforcements, so long as Rommel makes sure that his interior flank is covered. In this situation, the best option available to Wavell is probably to attempt to slip the 2SA/7 Recce around the Axis southern flank as soon as possible, but this cannot occur before August I, at the earliest. In addition, moving the small British field force forward to put pressure on the Afrika Korps also means moving it within range of an attack by the same Afrika Korps. One nasty Axis tactic is to switch attacks back and forth between the Tobruch garrison and the British relief army as supplies reach the battle area. The British commander is, of course, probably not going to sit passively by waiting for the Desert Fox to methodically grind down the Tobruch garrison. The problem is that the Commonwealth field army is not really capable of direct offensive action against the Afrika Korps, even after the arrival of July and August reinforcements, so long as Rommel makes sure that his interior flank is covered. In this situation, the best option available to Wavell is probably to attempt to slip the 2SA/7 Recce around the Axis southern flank as soon as possible, but this cannot occur before August I, at the earliest. In addition, moving the small British field force forward to put pressure on the Afrika Korps also means moving it within range of an attack by the same Afrika Korps. One nasty Axis tactic is to switch attacks back and forth between the Tobruch garrison and the British relief army as supplies reach the battle area.The single crucial aspect of the “Tobruch first” strategy that discourages most Axis players from pursuing it, is the substantial risk attached to the attacks against the two 4-4-7s. Although individually, each of these combats has only a one-third chance of a doubled exchange, when considered as a pair of attacks, the chances of at least one exchange result occurring increase to more than fifty per cent. For this reason, most experienced Axis commanders will not attempt to reduce the fortress during the first summer, unless the British commander has already lost one of his armored brigades prior to Tobruch being brought under siege. Rommel’s Dilemma: Egypt First?As tantalizing as the prospect of the early fall of Tobruch is to the typical Axis commander, he will usually postpone initiating the “second” battle of Tobruch until he has, at least, attempted an offensive drive into Egypt and against the Allied Home Base in Alexandria. The arguments for this line of action are at least as compelling as those supporting the “Tobruch first” strategy. First, once the British block has been cleared from the Salum Pass, the front will open up, forcing the Commonwealth commander to sacrifice either combat units or terrain as he maps out his defense of Egypt. Initially, the east-west escarpment line will provide the British player with a small amount of defensive relief, but the greater range of the German panzer divisions means that the British forces will be hard-pressed to maintain strength at the front while still adequately covering their steadily-lengthening flanks. Second, if the Italian supply convoys can get past the Royal Navy during this critical period, and if the Axis offensive develops according to Rommel’s plan, then the Commonwealth troops will probably experience heavy attrition. Moreover, in the process they will be pushed back into the El Alamein Line by November of 1941. At this point in the campaign, Rommel will have four and a half months (nine game turns) remaining to either capture the Allied Home Base, or to double back for an assault against Tobruch. If the Desert Fox fails to do one or the other, however, then the Allied “three to one” advantage in replacements — beginning in March ’42 — will quickly swamp Axis prospects for victory in North Africa. Thus, the “Egypt first” Axis strategy offers one signal advantage that the “Tobruch first” strategy does not: that of flexibility. If the offensive peters out in Egypt, Rommel can always race back to attack Tobruch with the Afrika Korps. If, on the other hand, the Axis commander has burned his army out in reducing the fortress, then it may be a long time, if ever, before the Deutsches Afrika Korps resumes its march towards the Suez. The Wild Card: German SupplyFrom July I ’41 through November II ’41, the fate of Rommel’s offensive into Egypt will depend almost entirely on the results of the Axis convoy die rolls. If four to six convoys manage to reach North Africa — the most probable set of outcomes — then the Deutsches Afrika Korps may have a real opportunity to inflict some serious damage on Wavell’s out-numbered forces. The date on which these convoys arrive, however, is also very important during this stage of the game. Any convoys arriving after the September II game turn will not reach the El Alamein battle area before November II ’41. So, if the Royal Navy is particularly adept at finding and sinking the July and August convoys, then Rommel is simply going to have to settle in for a long war. Whatever else happens, the Desert Fox can at least take comfort in the knowledge that the supply table will, beginning on the December I game turn, have only a one-sixth chance of a “sunk’ result for the remainder of the game. The Battle for Egypt BeginsThe balance of this essay will focus on the Axis drive into Egypt, and the several tactical and strategic challenges it poses for both the Axis and the Commonwealth players along the way. It will present a set of illustrative, but quite plausible, moves on the part of a hypothetical Axis commander and his make-believe Commonwealth adversary. It is assumed that the reader already has a thorough knowledge of the game rules and of the general flow and tempo of a typical AFRIKA KORPS match between two experienced and knowledgeable opponents. Allied GoalsThe imaginary General Wavell, having preserved — for the time being, at least — Commonwealth possession of Tobruch, must now set his mind to the much more complicated, but no less important problem of defending British Egypt. To accomplish this task, Wavell can draw upon the survivors from his starting forces (now thirteen factors) plus ten factors of June reinforcements already on the map; in addition, eight additional combat units (nine factors) will enter play on July I, and a final contingent of four 1-1-6s will be in a position to land on Aug I. All of these soon to arrive Commonwealth reinforcements would seem to suggest that the British commander could look forward to a point of rough equilibrium between the Afrika Korps and Allied forces by August of 1941. This, however, is an illusion. Wavell simply has too many critical demands on his meager army to attempt to attain even temporary battlefield parity with Rommel before November of 1941. To see why this is so, it is only necessary to consider the British general’s several, sometimes conflicting goals. First, and always most uppermost in the mind of the British commander, is the defense of the Allied Home Base in Alexandria. Following this, his second major priority is the continued Commonwealth possession of Tobruch; the early fall of the fortress, unless accompanied by truly appalling Axis losses, usually represents a lethal blow to British prospects in North Africa. Third, Wavell must attempt to control as much of the map as he can prudently manage; however, he can accomplish this only by maintaining his front line as far west as possible. While risky, this British strategy offers important benefits: the wider the front, the more difficult it will be for Rommel both to concentrate his combat power and to seal off the western desert from Allied raids. Moreover, the escarpment line that parallels the Via Balbia between the Salum Pass and Mersa Matruh, is an excellent “curtain of maneuver” for the British forces. If the Desert Fox masses along the Coast Road, then there will be few long-range German combat units left to straddle the escarpment and threaten Commonwealth forces probing around the southern end of the Axis line. The constant danger to the British, of course, is the longer reach of the German panzer divisions; one British mistake, and the Commonwealth forces could find themselves enveloped and out of supply. Thus, extreme caution must be exercised by the Allied player, particularly as the front moves east towards the end of the coast escarpment line. Fourth, Wavell should always attempt to maximize Rommel’s expenditure of supplies while minimizing British losses. The Deutsches Afrika Korps will typically be in a position, given average supply rolls, to make four or five attacks between June II and the British phase of the November I game turn. Supply convoys arriving after September II will probably not be able to reach the front line before November II. This represents a lot of potential damage. For this reason, it will be the British commander’s goal to try to keep Allied losses down to about two factors per Axis supply. The final objective of our hypothetical General Wavell is — as was the case during the First Battle of Tobruch — to conserve as many of his major (2-2-6s and larger) units as he can in the face of a determined Axis attacker. To add still further to the British commander’s problems is the fact that he must both maintain an adequate force in Tobruch at all times, and sufficient ready reserves to immediately reinforce the garrison, if the Axis suddenly switch their attention to an assault on the fortress. Axis GoalsRommel’s objectives are, as might be expected, the exact opposite of Wavell’s. The “make-believe” Desert Fox wants to drive east into Egypt as quickly and economically as possible. If possible, Rommel would like to push past the east-west escarpment line, before substantial additional Commonwealth reinforcements arrive and, by so doing, to seal in all of the British field forces east of the narrow El Alamein gap. Once on this shorter line, Rommel’s goal will be to methodically destroy exposed Commonwealth units while preserving his own. With Bologna already gone, and only eight units able to maneuver, the Afrika Korps can afford very few, if any, additional combat losses. Still, the Desert Fox hopes to eliminate three or four factors per game turn during the last few attacks right before November and, with a little luck, to be able to seize and occupy the Ruweisat Ridge before the arrival of the substantial Allied winter reinforcements. Thus, Rommel will plan his campaign against Egypt and the Allied Home Base so as to minimize supply expenditures and Axis casualties; while, at the same time, he attempts to inflict the greatest possible damage on the Allied defenders both in terms of combat losses and in terms of their defensive position. Setting the Scene: Commonwealth and Axis positions at the End of the June I 1941 Game TurnThe following photo (photo #3) shows a section of the AFRIKA KORPS game map along with the Axis and Allied unit positions at the end of the Commonwealth phase of the June I game turn. The Germans have assaulted the Tobruch perimeter at H25 and have eliminated 9A/20 at 6 to 1; Bologna, however, was lost in the accompanying 1 to 5 soak-off. Because a supply convoy arrived at the Axis Home Base on June I, Rommel still has two supply units on the map (one in the immediate battle area); even though he used supply #2 to sustain his attacks this turn. Wavell’s response to the Axis assault is again dictated by circumstances: he orders all but one of the surviving British defenders either into Tobruch or through the port and out to sea. The first battle of Tobruch is essentially over; now Rommel turns his gaze eastward: the battle for Egypt is about to begin. The final positions, after combat, of all Axis units are as follows: Rommel – G14; 21/5, 21/104 & Ariete – I25; 21/3 – L46; Trenta - J26; Brescia – J28; Pavia – I28; Savena – W3; 15/8 & 15/115 – H24; 15/33 – K35; Supply #1 – O39; Supply #3 – K11. Surviving British units, including June reinforcements, occupy the following hexes: 4I/7 – H26; 4I/11, 2/3, 7/4 & Supply #2 – G25; Pol/Carp – M49; 7A/1 – J37; 7A/2 – J36; 22 Gds & 7/3I Mot – At Sea; Supply #1 – I48; 7/7 S.G. – Q55; 7/7 – J46; 7/4SA Mot – O52; 4I/23 – J47; Supply #3 – P55; Supply #4 – J62. .  . Click on the image to display the full size version. June II ’41, Rommel Drives EastRommel receives his first piece of disappointing news: he learns that the Royal Navy has intercepted and sunk the June II Axis supply convoy. This is particularly unfortunate timing, as it is critically important to Rommel’s operational plans that the summer convoys arrive so that the Afrika Korps can launch a sustained offensive against the British before their powerful November reinforcements arrive in the El Alamein battle area. In spite of the supply sinking, however, the Desert Fox wastes no time in clearing away the two blocking Commonwealth brigades at Tobruch and the Salum Pass. In the Axis commander’s view, the sooner these units are removed, the sooner his army can begin to drive east. And if he delays, he suspects that the British commander will simply shift the unit in the Salum Pass east a few hexes so that it would require not one, but two Axis supplies to clear both H26 and the Pass. If, as the Desert Fox expects, General Wavell leaves an infantry brigade to delay Axis movement through the Salum Pass, then the Afrika Korps will bypass and surround the Allied block while Rommel waits for additional supplies to land and come forward. The British RiposteGeneral Wavell is also a little disappointed, given the Axis supply sinking, that Rommel still continued with the attack against the two British blocking units. The Commonwealth commander had already issued orders for 7A/2 to withdraw a few hexes to the east if the Axis did not attack at the end of June. As things now stand, another small infantry brigade must be sacrificed to keep Rommel’s one supply unit from moving far enough to the east to create problems for the British around Mersa Matruh. Rommel could, of course attack the two brigades covering the ends of the Via Balbia, but that would mean that the Afrika Korps — assuming it received supply on July I — would not be able to attack Wavell’s Egyptian army until the August I game turn at the earliest. Besides, our imaginary Wavell has begun to make plans of his own. The ground between Sidi Barrani and Mersa Matruh offers interesting possibilities for an opportunistic defense. It is precisely the type of terrain that General Wavell is looking for. Because the coastal plain narrows just to the west of Mersa Matruh and the escarpments curve in to form a nice defensive shoulder, the Commonwealth commander has decided to make Rommel fight for this last precious section of the escarpment line. The front is narrow and the ridges divide the battlefield along the east-west line of the escarpments. So, regardless of Rommel’s plans, Wavell has concluded that, with the additional British reinforcements landing on July I, this stretch of coast is a perfect place for a battle. Moreover, with at least three of Rommel’s mobile units tied up isolating the Allied unit near the Salum Pass, it may be possible for the Commonwealth to create a situation in which the British reconnaissance battalion can slip around the Axis right flank. Commonwealth and Axis June II Final PositionsThe following photo (photo #4) shows a section of the AFRIKA KORPS game map along with the Axis and Allied unit positions at the end of the Commonwealth phase of the June II game turn. The Germans have destroyed the British blocking units at H26 and J36 with AVs, but have used Supply #1 to sustain the two attacks. In addition, the Axis supply convoy for June II was sunk, so Rommel currently has only one supply unit on the map. The British have responded by continuing to block the Salum Pass at J37, and by occupying terrain as far west as possible on the Coast Road and escarpment while still deploying just out of range of Rommel’s one remaining supply unit. The Desert Fox has completed arrangements for the Axis siege of Tobruch and has also succeeded in prying open the Salum Pass; despite these attacks, however, it appears that General Wavell intends to form a line somewhere near Mersa Matruh . The final positions, after combat, of all Axis units are as follows: Rommel – N13; 21/5 – L40; 21/104 & 15/115 – H27; 21/3 – M43; Ariete & Pavia – L37; Trenta – H25; Brescia – I26; Savena – W3; 15/8 – J35; 15/33 – L39; Supply #3 – J27R. Surviving British units occupy the following hexes: 4I/11, 2/3, 7/4 & Supply #2 – G25; Pol/Carp – J45; 7A/1 – J37; 22 Gds – K50; 4I/23 & Supply #1 – K51; 7/3I Mot – N51; 7/7 S.G. – Q55; 7/7 – M49; 7/4SA Mot – O52; Supply #3 – P55; Supply #4 – J62. .  . Click on the image to display the full size version. July I, Rommel’s Offensive Stalls: Shadowboxing with WavellThe news from the Axis Home Base is disappointing again: another Italian convoy has been lost to the Royal Navy. Given his current logistical difficulties, the Desert Fox can do little but maneuver, and plan for happier times. Rommel returns to the Axis Home Base so as to be able to speed supplies east, and also to release Savena for combat duty at the front. On the main front, the encirclement and isolation of 7A/1 is the one small bit of mischief the Afrika Korps can accomplish while it waits for additional supplies to reach North Africa. Of course, given Axis logistical problems, it is difficult to be sure of real British intentions. Wavell may intend to contest the Coast Road around Mersa Matruh, or he may be bluffing; just biding his time and waiting for additional Axis supplies to come forward before falling back to either the El Daba or the El Alamein line. The British Dig inWhile the Desert Fox ponders the future of his stalled offensive, General Wavell has focused his attention equally on both the calendar and the map. Rommel’s supply situation, while not yet desperate, is beginning to hold out promise for the British commander. With the way things now stand, if the Afrika Korps receives every supply convoy possible between July II and November I, the Desert Fox will only be able to launch a maximum of five additional supplied attacks before the Commonwealth reinforcements arrive in November. Moreover, because Rommel’s advancing force has only eight units, the loss of even one Italian division or German reconnaissance battalion would create problems for Rommel around El Alamein. Given these two facts, Wavell decides to form a line running along the eastern escarpment and onto the narrow coastal plain west of Mersa Matruh. General Wavell will not allow the Desert Fox to open the door to El Alamein without a fight. The British commander’s plan is a simple one. While he does not have the combat power to directly attack the Afrika Korps if it remains concentrated near the coast, Wavell can make it difficult for Rommel, in his turn, to attack without risking Axis soak-off losses. In addition, if Rommel commits his panzers on the northern side of the escarpment, then the Afrika Korps might well have a difficult time blocking deep Allied raids into the southern desert. The key to this defensive arrangement is a combination of sacrificial screening units and British force concentrations that, because of the limitations of German stacking, are difficult for Rommel to attack efficiently. While “stronger” in this situation would certainly be better, because his powerful armored brigades are tied down defending Tobruch, Wavell must make do with his smaller units. The key to his defensive strategy is for any undoubled defending British stacks to all total five defense factors, and to be vulnerable to Axis attack from only one hex. This arrangement means that the entire stack cannot be attacked by the Axis player at greater than 3 to 1 odds. Given that Rommel will probably be disinclined to exchange a 7-7-10 for a few 2-2-6s and a lone 1-1-6, assaults against such a stack will undoubtedly be split into two combats. The most likely Axis attacks will probably take the following form: 7 to 1 against a single 2-2-6, and either a 1 to 2 or a 1 to 1 against the remaining three Allied factors. While the guaranteed destruction of the 2-2-6 is unfortunate, the one-third chance of the A elim , and the one-sixth chance of an exchange combine to impose a fairly hefty opportunity cost on the Axis player who chooses to make the attack. Certainly, Wavell would admit that Rommel’s attacking units might be lucky; but they also might not be, and every attack would be exactly the same “coin toss” for both commanders. The other, more subtle, benefit for the British in choosing to defend west of Mersa Matruh, is that any Axis attack against the units on the coastal plain will inevitably require both German panzer regiments, as well as three other combat units to be committed north of the escarpment line. Assuming that at least five Axis units are required for the northern battles, Rommel is going to have very little remaining rifle strength with which to cover his southern flank. Commonwealth and Axis July I Final PositionsThe following photo (photo #5) shows a section of the AFRIKA KORPS game map along with the Axis and Allied unit positions at the end of the Commonwealth phase of the July I game turn. Axis supply luck continues to be poor, so Rommel accomplishes what he can. The Allied blocking unit near the Salum Pass is encircled and isolated. The Desert Fox also orders uncommitted elements of the Afrika Korps to advance east and deploy astride the escarpment. In addition, Rommel has returned to the Axis Home Base so that incoming supplies can be sped east, and so that Division Savena can be released for front line duty. British reinforcements stream west from Alexandria to the front. Wavell has now made his intentions clear: the British Army has dug in around Mersa Matruh and gives no sign of abandoning this position without a fight. The final positions of all Axis units are as follows: Rommel – W3; 21/5 – I43; 21/104 & Ariete – M42; 21/3 – L44; Trenta – H24; Brescia – H26; Pavia – L39; Savena – N5R; 15/8 & Supply #3 – M41; 15/115 – K36; 15/33 – I39. Commonwealth units, including the July reinforcements, occupy the following hexes: 4I/11, 2/3, 7/4 & Supply #2 – G25; Pol/Carp – J46; 7A/1 (1st Isol) – J37; 22 Gds, 50/69 & 9A/18 – J47; Supply #1 – J49; 7/3I Mot & 7/7 – K47; 7/7 S.G. – Q54; 7/4SA Mot & 4I/23 – M49; 50/150 & 50/151 – N51; 50/6SA Mot – Res; 2SA/6 & 2SA/4 – O52; 2SA/7 Recce – T55; Supply #3 – T56; Supply #4 – J62. .  . Click on the image to display the full size version. July II, Rommel Receives Good News At LastAfter waiting a full month, our patient, but imaginary Desert Fox is finally rewarded with good news: an Italian convoy has arrived at the Axis Home Base and has already begun off-loading supplies for his front line troops. At last the Deutsches Afrika Korps can begin to move again. Fortunately, the isolated Commonwealth brigade near the Salum Pass will be gone before the new Axis supplies reach the front. In anticipation of the coming operations, the Desert Fox orders his Italian divisions to the Coast Road, and then sets about making preparations for a renewed drive on Alexandria. The main enemy strength appears to be heavily committed to the coastal plain; therefore, Rommel decides to shift his panzer divisions inland towards the south in an effort to unhinge the British left flank. Although the Axis commander does not actually want to attack without a store of additional supplies in the battle area, he hopes that just the threat of his advancing panzers will induce Wavell to abandon the Mersa Matruh position and retreat back towards El Alamein where both armies will have shorter, more defensible fronts. Rommel also makes certain that the Allied reconnaissance battalion has no way of slipping past his front and into the Axis rear. Given his current supply situation, the last thing the Desert Fox wants to have to do is waste a supply on a single raiding British battalion. No Retreat! Wavell’s Troops to Fight for the “Matruh Line”Rising dust clouds in the west alert the British to the fact that German and Italian columns are on the move. Very quickly Wavell surmises that Rommel is moving against the weak British left flank. Despite recommendations from a number of his staff to begin a gradual and orderly withdrawal to the east, the British commander instead orders the left flank to be reinforced by what few mechanized units can be scraped up. He explains to his staff: “We can’t be strong everywhere and neither can Rommel; if he is moving against our left, then he has undoubtedly stripped strength away from the Coast Road sector. If he can do it, so can we.” The British commander adjusts to Rommel’s move by reinforcing the area near the southeastern shoulder of the escarpment line. Wavell rightly guesses that, if Rommel does attack in this sector, he will be unable to adequately cover his flanks and still attain good odds against the most likely target units. Even the two Allied sacrifice units are carefully positioned so that they cannot be attacked using the same Axis supply. The British commander is also convinced that the Desert Fox is not going to want an Allied recce unit roaming about in the Axis rear, particularly with the front line now so close to the El Alamein bottleneck. For this reason, Wavell is sure that Rommel will maintain his southern line all the way to the Qattara Depression. Even Tobruch is momentarily safe from a serious attack because of the Axis armor’s movement into the desert. For this reason, the British commander can even afford to temporarily deplete his ready reserve in order to put all of his larger brigades into the fight for the Coast Road. Now that his dispositions are made, General Wavell can only wait. If the Afrika Korps receives another supply convoy, then the British commander knows that an Axis attack will be inevitable. Time is short, and Rommel is certainly not going to give the Royal Navy a “free” sunk after the Italian convoys that have already been lost. The only real question remaining is not whether Rommel will strike, but where: Which part of the British line will the Afrika Korps finally attack? The Commonwealth and Axis July II Final PositionsThe following photo (photo #6) shows a section of the AFRIKA KORPS game map along with the Axis and Allied unit positions at the end of the Commonwealth phase of the July II game turn. Rommel finally receives a supply convoy and wastes no time in speeding the new supplies toward the front. The Australian 7A/1 is eliminated due to isolation at the end of the Commonwealth portion of the turn. With additional supplies coming forward, the Desert Fox can again turn his attention to renewing his offensive against Alexandria. In an effort to conserve supplies, Rommel decides to try to maneuver Wavell out of his Matruh position; by threatening heavy pressure against the British left flank, Rommel hopes that the British commander can be induced to withdraw back towards El Alamein without a fight. He soon has his answer; Wavell strengthens the southern part of his line, but makes only a few limited, local withdrawals to the east. It is now clear to Rommel that if the Axis commander wants the British Army to retreat, then he will have to actually attack and drive it back. Wavell, it would appear is no mood to be bluffed. The final positions of the Axis units are as follows: Rommel – W3; 21/5 – L46; 21/104 – R51; 21/3 – U54; Ariete – I44; Trenta – H24; Brescia – H26; Pavia – I39; Savena – D7; 15/8 – O49; 15/115 – K36; 15/33 – L39; Supply #1 – J12R; Supply #3 – M44. Commonwealth units occupy the following hexes: 4I/11, 2/3, 4/7 & Supply #2 – G25; Pol/Carp – J46; 22 Gds & 2SA/4 – P56; Supply #1 – J49; 7/3I Mot & 50/6SA Mot – J47; 7/7 S.G. & 7/7 – O54; 7/4SA Mot & 4I/23 – N50; 50/69 & 9A/18 – K48; 50/150 & 50/15 – O52; 2SA/6 – R58; 2SA/7 Recce – R59; Supply #3 – Q59; Supply #4 –J62. .  . Click on the image to display the full size version. Tobruch to El Alamein, Part 2: On to the Ruweisat (Future Post)Coming in Part 2 will be the conclusion to the “Battle for Egypt” and an analysis of Rommel’s first big push towards Alexandria and the Suez.
Subscribe to:
Posts (Atom)
Subscribe To
 Posts
All Comments
Posts
All Comments
Popular Posts
About Me
My Nephew Joe and Three Marine Buddies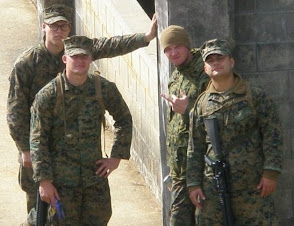
|


