REFLECTIONS ON 2010 “MEMORIAL DAY” OBSERVANCESToday’s post is, with only a few minor changes, a reprint of an earlier essay that I first published on this blog in 2009. This year, my original intention was to commemorate Memorial Day, 2010, with an essay celebrating the extraordinary heroism of two different Medal of Honor recipients: Marine Gunnery Sergeant “Manila” John Basilone and Army Colonel Lewis L. “Bayonet” Millett. However, the more I thought about it, the more it became clear to me that Memorial Day really isn’t about celebrating our famous heroes; instead, it is about honoring the countless ordinary men and women who have served in our armed forces over the centuries and who, when duty required it, gave up the most valuable thing that they possessed: their lives. Thus, like last year, this Memorial Day essay honors two U.S. Marines who fell as a result of enemy action a long time ago in Vietnam; just as importantly, however, it is also a salute to all of those who, through the ages, have made the supreme sacrifice in the service of their country: from the first violent birth pangs of the new American Republic, to the faraway battlefields of the present day. May their sacrifices never be forgotten.  In Memory of Marine LCpl. Clement Johnston, Jr., killed in action 4/28/66 in Quang Ngai Province, Republic of South Vietnam The Vietnam War Memorial, Washington, D.C. When we honor the memory of those who have, in the words of Abraham Lincoln, already “given the last full measure of their devotion,” let us also honor all those who, like my young Marine nephew, currently fight in a long and arduous war against a fanatical enemy whose leaders, even now, plot attacks against the American homeland from half a world away. A Few Additional Thoughts on This, the First “Summer” Holiday of the YearToday is “Memorial” Day. It is supposed to be a day of remembrance. And I like to think that there was a time, not that long ago, when most ordinary Americans understood and honored this day and its original purpose. Now, for many, if not the majority of my fellow citizens, I fear that Memorial Day has become little more than an excuse for a three-day holiday weekend, or a backyard barbeque, or even for a “blow-out” electronics sale. I hate to admit it, but I understand how this change could happen: memories are tricky things, and they fade far too quickly. I was reminded of this sad truth, myself, only a year ago.  During the first week of April of last year, my wife talked me into visiting the touring reproduction of the Vietnam War Memorial: The Wall. She had already visited the real monument in Washington, but she knew that— despite the fact that I had served two and a half years in Vietnam — I had not; so she thought that it might be nice for us to finally visit the touring “Wall” display together. I agreed to make the trip, but under protest: I have to admit that I have always had mixed feelings about “war” memorials. Unlike a military cemetery or a former battlefield — I still get a lump in my throat when I see pictures of Arlington or of the American Cemeteries at Normandy or Lorraine, in France — most of these types of monuments have always struck me as being more like “guilty” afterthoughts than anything else. Too often the statues or marble structures that are erected, usually long after the fact, actually seem to say more about their well-intentioned builders than they do about those being memorialized. Nonetheless, I finally agreed to make the trip; so on a sunny, windy Saturday morning in 2009, my wife and I drove all the way out to Buckeye, Arizona, to visit the touring reproduction of the “Wall.” 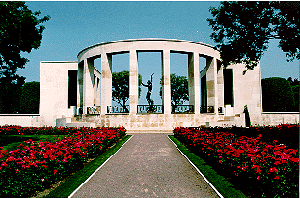 I don’t know what I expected. But I can honestly say that no sudden, intense wave of emotion washed over me when I saw the monument. Nor do I think that my reaction would have been any different, had I been looking upon the real thing for the first time. I had served in Vietnam from February 1966 to August of 1968, so over four decades separated the “old man” from the young soldier that had gone to Southeast Asia so many years before. Also, I was never a grunt. I spent my time in Vietnam either helping to intercept and analyze, or, alternatively, to process intelligence gathered from enemy communications. In the course of my time in the Republic of Vietnam, my various jobs took me all over that war-ravaged country, but only rarely did I even have to carry my rifle or do any hard slogging. In short, all things considered, I had it pretty good. Of course, that was then and this is now. The first truly disconcerting fact that I discovered in Buckeye that day was that the young soldier of my dim past could almost have been someone else. But even that wasn’t the worst of it.  As I walked along, I found myself scanning the “Wall.” Finally, when I reached the area of the monument that covered the period of my own service — for those who have not seen it, the names on the Wall are organized by date — I was surprised to discover that my mind had gone almost completely blank. Despite having spent some thirty months in Southeast Asia, I suddenly discovered that, somewhere during the march of the intervening years, I had forgotten many, if not most, of my old comrades’ names. In a lot of cases, if I could remember a name, I couldn’t match it with a face, or vice versa. This effect was particularly pronounced when it came to the soldiers and marines that I had served with in I Corps (Quang Tri Province) near the DMZ, during my first year in Vietnam. But it spilled over into other situations and locations, as well. The young men that I had had the odd beer with, or played poker with, or had met on R&R in Bangkok or Malaysia, or Taiwan had all, to varying degrees, disappeared into the mists of a half-remembered, distant past. These men were just regular Americans; not really so much friends, as the typical GIs that you bump into and get to know when you’re in a place long enough. This wasn’t to say that I had forgotten everyone, but only that I had forgotten far too many. And the most troubling thing of all was that I had somehow forgotten the names or the faces of those I knew who had been killed. Now, none of my closest friends had been killed or even wounded. Others that I knew, however, had not been so lucky, and as I walked along the mock-up of the “Wall,” I couldn’t help feeling that these others deserved better. And not just from me, but from the rest of their countrymen, as well. I couldn’t shake the guilty feeling that, somehow, I had let these young men down. And this idea brings me, finally, to the dedication at the beginning of this piece.  In the end, I and the wonderful, helpful people who volunteer with the monument tour all tried our best to identify at least a couple of individuals from a number of young men that I had known who had been killed in various operations from “Davy Crockett” to the “Tet” Offensive. Guilt is a powerful spur, and it had suddenly become important to me that I at least make the effort. The two young marines memorialized at the start of this essay — one forever 18 and the other 22, who died so long ago in Vietnam — may or may not be the men I remember, I will never be sure. But what I do know is that even if they are not, they deserve to be remembered on Memorial Day by someone, and I am proud for that someone to be me. And having finally visited the “Wall,” I also now know something else: I realize, at last, that if we who served with them do not make the effort to remember those who fell, then who will? May you, my readers, and those you care about, all have an enjoyable and safe Memorial Day Holiday. And may those who wear our country’s uniform and who daily go into harm’s way, in dangerous, far-off places, also have a safe Memorial Day! TAHGC, THIRD REICH, 4th Ed. (1974/1981)HISTORICAL BACKGROUND At 04:40am on September 1, 1939, waves of Luftwaffe aircraft swept down to strike airfields all across Poland. Almost simultaneously, 44 German infantry divisions and 14 armored divisions surged across the frontier catching Poland’s thirty-odd infantry and cavalry divisions almost completely by surprise. Without bothering with the inconvenient formality of a declaration of war, Hitler had ordered the invasion and subjugation of his smaller neighbor to the east. England and France, although incapable of providing the Poles with any immediate direct assistance, quickly demonstrated their support for Poland by declaring war on Hitler’s Germany on 3 September. Seventeen days after the initial German onslaught, Soviet troops crossed a nearly-prostrate Poland’s eastern border to help the Germans complete the Polish nation’s final dismemberment. Poland was the first European nation to succumb through direct military conquest to Hitler’s dream of a modern German Empire, but it would not be the last.  In both London and Paris, British and French heads of state were confronted with the unthinkable: despite repeated concessions by the western democracies to Hitler’s never-ending territorial demands, all hope for preserving peace in Europe had evaporated. Churchill had been proven right: the German Führer’s ambitions were too great even for the most craven of appeasers to satisfy. Thus, for the second time in a generation, Europe’s Great Powers had stumbled into war. Tragically, the greatest military conflict in human history, seemingly almost by accident, had begun without any of its participants fully understanding its future geographical reach, its ultimate magnitude, or its unbelievable human and material cost. DESCRIPTION         Over and above the standard body of rules governing regular turn-by-turn play, THIRD REICH also includes a collection of specialized rules that contribute important historical detail to the strategic flow and direction of the game. These special rules include, among other things: limitations on Anglo-French and German-Italian Cooperation; restrictions on Axis Forces in Africa and British Forces in Malta; rules for Allied Lend-Lease and Murmansk Convoys; special rules for Poland/East Europe; restrictions on Russo-Allied Cooperation; Airborne Operations; and the effects of the Russian Winter on Axis combat operations. In addition, other rules are included in the game which cover important issues such as: Switzerland and Swiss neutrality; Spain and Spanish Colonies; the effects of Axis control of the Suez Canal and/or Gibraltar; the creation of Vichy France and the operational limits on Vichy French units; and Partisans.  THIRD REICH, as noted previously, can be played by two to six players; moreover, it also lends itself very well to solitaire play. Interestingly, regardless of whether the two-player or the multi-player version of the game is chosen, the players still have the option of beginning their contest at any of three critical junctures in World War II: 1939 (Fall of Poland); 1942 (Axis ‘High Water’ Mark); and 1944 (Germany at Bay). Moreover, in the case of all three of these Basic Scenarios, players have two additional game options: they can continue a particular game up to and including the last turn of the specific scenario, or, alternatively, players can continue to slug it out until either the Axis wins or until Berlin falls to the Allies. For those players who want to refight the entire war in Europe, the Campaign Game begins in the same fashion as the 1939 Scenario and continues through summer, 1945. In addition to the different ‘starting’ scenarios, the game also includes another intriguing design feature: randomly-chosen 'Variant' counters. Just before the start of play, both the German and the British players blindly select one numbered chit from an available pool of 10 different Variant counters. Also, the pool of available Variant counters can also be increased, at the players’ option, to include additional ‘experimental’ game variants. These secret (until played) game variants — because they can affect everything from starting BRP levels, to minor country alliances, to changes in national unit force pools — multiply the opposing players’ strategic options and, at the same time, also introduce the ‘fog of war’ into the game. Thus, between the different possible scenarios and the potentially significant effects of variant counters, it is no exaggeration to say that, given the many built-in strategic alternatives that the game design makes available to the two opposing coalitions, an individual player could start a hundred different THIRD REICH games and never see any two of them develop along exactly the same lines. A PERSONAL OBSERVATION When I reflect on the nearly half-century that I have been personally involved with conflict simulations, 1974 stands out as a watershed year for wargaming. During that heady, twelve month period, Simulations Publications Inc. (SPI) published the First Edition of WAR IN THE EAST, and the Avalon Hill Game Company (TAHGC) published both PANZER LEADER and the first edition of the RISE AND DECLINE OF THE THIRD REICH. All three of these games — at least, in my view — were exciting new additions to a rapidly growing body of commercially-produced conflict simulations. However, as good as the first two titles were, THIRD REICH still stands out as the one truly “ground-breaking” game to appear in 1974 or, for that matter, in any other year. This is because, just like PANZERBLITZ (1970) before it, THIRD REICH truly rocked the hobby when it first burst onto the conflict simulation scene; and every gamer that I knew, myself included, literally rushed out to buy Avalon Hill’s new strategic game of World War II in Europe. Even more importantly, once all of us had purchased our own copies of THIRD REICH, we all played it — a lot.  The immediate success of THIRD REICH was, in some ways, a little surprising because, at first glance, it seemed to have three obvious shortcomings when it came to winning wide-spread acceptance among gamers. First, the rules — at least by the standards of 1974 — were very long and very complicated. Second, the heavy emphasis on the economic factors that drove events in World War II meant that players had no choice but to keep carefully-written records of their turn-by-turn expenditures of BRPs (and convenient, standardized forms for this record-keeping were not included with the game). Third, the simulation architecture of the game represented a major, even radical departure from virtually every other game system that was in the marketplace at the time. Despite these factors, however, THIRD REICH became an almost instantaneous hit: the game system was simply so richly-textured, so challenging, and so exciting that players, almost universally, accepted the game’s peculiar foibles without complaint. After all, it seemed to include almost everything a player could hope for; among the THIRD REICH game counters were air wings, fleets, infantry, armor, airborne, and partisans. But, there was more: there were German U-Boats and Allied escorts, Allied bombers and German fighters; there were Murmansk convoys and amphibious landings; and most importantly, there was a workable game system for simulating the effects of Blitzkrieg within the context of a strategic-level game.  Interestingly, the real genius of the THIRD REICH game system was not that it combined air, ground and naval operations together in a single simulation platform: Larry Pinsky and Thomas Shaw, with BLITZKRIEG (1965); and Jim Dunnigan and company, with STRATEGY I and USN (both in 1971), had already done something at least somewhat similar. The design elements that really set THIRD REICH apart from its predecessors were two-fold: first, it offered a game system that seamlessly wove together the different actions of the various combat arms into a unified whole; second, it presented an economic ‘game-within-a-game’ that both emphasized the importance of industrial productivity to the conduct of modern (20th Century) military operations, and that also clearly illustrated the limits that the differing industrial capacities of the various Major Powers placed on their ability to wage war. Modern warfare is expensive and THIRD REICH showed this aspect of industrialized, total war as no other title had ever done before it. Armies, air forces, and fleets were destroyed and rebuilt as the game progressed; not once, but over and over again. In addition, besides the unavoidable costs of conventional combat, the economic effects of the German U-Boat campaign against England, and the Allied bomber offensive against Germany were also both finally incorporated into a conflict simulation in such a way that they made strategic sense and yet did not bog down the flow of the game. In terms of its overall conceptualization and design, THIRD REICH had all the earmarks of a masterpiece; in terms of the game’s pre-publication development and play-testing, however, it very quickly became apparent that everybody’s favorite new game had more than a few playability issues.  Among my circle of friends, the first major problem with the game’s design surfaced in only our second or third outing, and it was a real jolt to all of us around the game table. What happened was that — once France was conquered and the B.E.F. had been driven from the Continent — instead of turning east to attack Russia in 1941, the German player instead launched a surprise airborne assault against London. The combination of the Italian Air Force and Luftwaffe allowed the Germans to swamp the London garrison and the badly-outnumbered, supporting RAF. Even worse was the realization by the Allied players that because London was now in German hands, there were no remaining Allied supply sources left from which to support a British counterattack against the German paratrooper in the English capital. This was a real (and non-trivial) defect in the game’s design, and it was not the only one. Because the game was so widely popular, the questions just kept coming. Not surprisingly, a steady stream of fixes and outright rules changes quickly began to flow back out of Baltimore. To solve the ‘London’ problem, English stacking (only) was adjusted to allow three British units to garrison the British capital, and the ‘rules editor’ at the General also imposed new limits on the number of air strength points that could be added in support of ground forces, both on attack and defense. Unfortunately, this was only the “tip of the ice berg.” THIRD REICH rules questions were rapidly turning into a ‘whack a mole’ situation for Avalon Hill; as soon as one problem was solved, another popped up to take its place. For example, in the first edition of the game, it turned out that the Germans could — with careful planning — actually win the U-Boat War against the Allies. And then there was the ‘Gibraltar’ problem: an early Axis conquest of Spain followed by the seizure of Gibraltar made possible a joint invasion of England by a massive combined force of Italian and German fleets and air wings. Even if the invasion failed, the air and naval battles that resulted from the Axis seaborne assault usually left the Royal Navy so weakened that an Allied return to the European mainland, even with American help, became highly problematical later in the war. And then there was the question of Sea Transport to and from small islands; and what happened if a Major Power’s BRP level was reduced by enemy action to below zero? The questions and rules disputes just kept cropping up. Thus, it steadily became more and more obvious that it was only a matter of time before the rule book would have to get a major facelift; and, sure enough, faced with a commercially successful but flawed product, Avalon Hill finally succumbed to popular pressure and published a Second Edition version of the rules.  Unfortunately for the boys in Baltimore, the THIRD REICH rules odyssey didn’t end there; and as yet more rules problems came to light, a third and finally, a Fourth Edition version of the rules was brought out to, hopefully, clear away the last few bits of confusion that still surrounded the game. Interestingly, besides the game rules, the original game map also underwent a facelift; and even the Scenario Cards were modified two more times before Avalon Hill was finally satisfied with their third and final version. These final fixes seemed, at last, to solve most of the problems that had plagued earlier versions of the game. It had taken seven long years, and the input of thousands of dedicated players, but THIRD REICH had finally become the game that had been promised back in 1974. In the eyes of many of its fans, the wait was worth it.  Of course, 1974 was a long time ago, and popular tastes inevitably change. In 1992, Avalon Hill brought out a ‘super-sized’, expanded replacement for the original game, ADVANCED THIRD REICH. And, although a number of diehard fans immediately moved on to the bigger, still more detailed game, a substantial number of us stayed with the 4th Edition of the original. Nowadays, a brief walk through the ‘open-gaming’ area of any of the major wargaming conventions will show that THIRD REICH, even after thirty-six years, still retains a loyal following within the hobby. In fact, in the eyes of many traditional, long-time players (myself, included), John Prados’ design is still the best ‘tabletop’, strategic-level treatment of the European Theater of World War II ever published. Doubtless, a number of contemporary players will disagree with this opinion, but it is, nonetheless, a tough proposition to refute: the game, in spite of its age, is still just that good. And whatever else one may think of this title, given its colorful history of modifications, rules changes and design tweaks, probably no other conflict simulation has gone through — or, ever will again — as thorough a game design process, based on post-publication feedback, as has THIRD REICH.  This all leads to the obvious question: Who should own a copy of THIRD REICH, 4th Edition? After all, Prados’ design is not the only game to cover World War II in Europe; in fact, quite a few other strategic-level, normal-sized (non-monster) games have attempted to tackle the same subject over the years — WORLD WAR II (1973), HITLERS’S WAR (1981), WORLD WAR II: EUROPEAN THEATER OF OPERATIONS (1985), AXIS & ALLIES: EUROPE (1999) and WORLD WAR II: BARBAROSSA TO BERLIN (2002), just to name a few — and all of them, to varying degrees, are successful games. So, what really sets this aging Prados design apart from its many competitors? The short answer, I think, is that, as interesting and enjoyable as some of these other titles are, none of them — not even an exciting ‘card-driven game’ (CDG) like WORLD WAR II: BARBAROSSA TO BERLIN — can really match THIRD REICH when it comes to its historical sweep, the competing strategic options (both operational and economic) that the multi-layered simulation platform makes possible, or the tense, nail-biting action that this game produces, turn after turn, particularly when played by evenly-matched experts.  Of course, the richness and density of the THIRD REICH game system, in spite of its many virtues, also pretty much guarantees that it will not be a suitable choice for every type of player. Thus, given the fact that the 4th Edition Rule Book — counting charts and designer’s notes — is thirty-six pages of small print, it is probably a good bet that most novice or casual gamers would find the simulation too detailed and much too complicated to really be engaging or enjoyable. In short, THIRD REICH is really not a game for dabblers. On the other hand, both for experienced players and for serious collectors, I believe that this title is absolutely a MUST OWN. There may be better ‘tabletop’ treatments of the Second World War in Europe and North Africa, but if there are, I have yet to encounter them; and until I do, THIRD REICH, despite its age, will remain my personal favorite. For those players with one of the earlier editions of THIRD REICH, the 4th edition rules are available for download, thanks to the yeoman efforts of Lewis Goldberg, at http://www.boardgamegeek.com/filepage/50134/error/expired/3r-4th-edition-rules. Please note, however, that the 4th edition rules should be used along with the 2nd edition map boards and the 3rd edition scenario cards. Design Characteristics:
Game Components:
Recommended ReadingSee my blog post Book Reviews of these titles; all of which are strongly recommended for those readers interested in further historical background.THE WEST POINT ATLAS OF AMERICAN WARS (Complete 2-Volume Set) TRICKS OF THE TRADE: ‘AFRIKA KORPS’ PBeM PLAY AIDMOVEMENT & COMBAT TURN RECORD TEMPLATE FOR THE TAHGC GAME, ‘AFRIKA KORPS’ (1964/1980) There is really nothing like face-to-face competition when it comes to playing wargames. Unfortunately, most players will find — particularly, once they leave college and get on with their lives — that local opponents who share the same gaming interests can often be hard to find, and once found, hard to stay in touch with over the long haul. Circumstances change: gaming clubs break up, opponents move or even, heaven forbid, drop out of the hobby completely. Thus, one of the great benefits to traditional board wargaming conferred by the internet age — speaking as a long-time competitive player — has been the now almost universal ability of modern players to substitute ‘Play by Electronic Mail’ (PBeM) for its tiresome precursor, traditional ‘Play by Mail’ (PBM). This has meant that most games between geographically separated opponents can now — if both players are conscientious in their move-making — be completed in a matter of months or even weeks, instead of the year or more that postal play used to require.  Finally, there are still a few modern ‘Luddites’ like me who just don’t much care for the ‘point and drag’ method of moving counters on a screen; gamers who, instead, would actually rather have the real map and counters in front of them when they play. For this type of player, using a ‘spreadsheet’ format for internet gaming is a convenient alternative. And it is also, not surprisingly, the online gaming format that I personally prefer. The Excel ‘spreadsheet’ file offered with this post is for the 3rd Edition version (1980) of the Avalon Hill classic game, AFRIKA KORPS (1964). This file has been set up to permit competing players to exchange new game moves via email attachments and, at the same time, to keep an accurate and detailed, ongoing record of all of the various game operations that can potentially occur in the course of a complete thirty-eight turn match. Excel Spreadsheet AFRIKA KORPS PBeM PLAY AID Additional Resources:HexwarsVassal Cyberboard created by Dale Larson The Play by Email Emporium Walt O’Hara Boardgame Players Association World Board Gaming Championships® TAHGC, FRANCE, 1940 (1972)
FRANCE, 1940 is a historical simulation — based on the KURSK Game System — of the German Blitzkrieg of France in spring, 1940. The game spans the crucial first twenty days of the invasion during which the outcome of the campaign was decided. FRANCE, 1940 was designed by James F. Dunnigan and was originally published as the magazine ‘insert’ game for S&T #27 in 1971. The rights to the design were purchased by the Avalon Hill Game Company (TAHGC) and the game was reissued, in the sleeved-box format profiled here, in 1972.
HISTORICAL BACKGROUND Fortress of the Maginot Line As the sun rose on 9 May, 1940, the “no-man’s-land” that separated Germany and France was still, as it had been for over eight months, eerily quiet. Hitler’s two remaining enemies, France and England (at this time, still called the Entente), had been at war with Nazi Germany since 3 September, 1939; but, except for a shallow five kilometer incursion into German territory in the region of the Saar in September-October 1939, the front had been largely inactive since the outbreak of hostilities. In fact, the noticeable absence of offensive operations from both the Germans and the Allies during the fall and winter of 1939-1940 had prompted newspapers in the west to sarcastically dub this protracted period of inaction: the Sitzkrieg or “Phony War.” Moreover, the one Allied attempt to interfere with German offensive plans — the ill-fated expedition to support Norway — had been a humiliating debacle, particularly for Britain. Thus, as the days turned longer and the weather improved, all eyes were fixed expectantly on the Franco-German border.  General von Manstein General von Manstein This was not to say, it should be noted, that either the Allies or the Germans had been idle during the months that followed Poland’s capitulation. Both sides had worked feverishly to amass huge numbers of men and materiel in anticipation of the inevitable fighting that was bound to come. In the case of the Entente, by spring of 1940, the combat forces that the Western Allies had managed to build up along France’s frontier with Belgium and Germany were — at least by conventional reckoning — quite formidable. In fact, if the manpower of neutral Belgium and Holland were added to the forces of France and England — a reasonable supposition given previous history — the combined Allied armies now numbered 144 front line and reserve divisions, 13,974 pieces of artillery, 3,383 tanks and 2,935 aircraft, for a total of approximately 3,300,00 men. Opposing this impressive host, the Germans had, by early May, assembled nearly 3,350,000 troops on the western front. These German fighting men comprised a force of 141 divisions, 7,378 guns, 2,445 tanks and assault guns, and 5,638 aircraft. Thus, at least on paper, German prospects for victory did not look particularly promising. The Allies possessed rough parity in total manpower and enjoyed a significant numerical advantage in both artillery tubes and tanks. Only in the category of airpower did Hitler’s forces have a distinct edge. Besides a more powerful air force, however, the Germans also had two other less obvious, but important advantages: a proven and well-honed, ground-air doctrine for mechanized warfare; and Lieutenant-General Erich von Manstein’s audacious plan, code-named Fall Gelb (Case Yellow), to pierce the Allied front at its weakest point near Sedan and, once a breakthrough had been achieved, to then send the bulk of the Wehrmacht’s mechanized forces racing west to the Channel Coast. This surprise stroke, the German Führer hoped, would produce another stunning victory like that which his army had achieved, only months earlier, against Poland. The 'Manstein Plan' was simple in concept, but breathtaking in its daring. It was also controversial because the Führer had personally chosen it over what appeared, at least on its face, to be the safer, more conventional operational blueprint preferred by many in the German Army’s senior leadership, the Oberkommado Des Heeres (OKH). Both plans had their advocates, but only one offered any prospect, however small, of a rapid and successful end to the campaign in France.  The plan of campaign preferred by the OKH was known as the ‘Halder Plan’, a title it had acquired because it had been prepared under the direction of General Franz Halder. It called for the German Army to direct its major offensive effort through the Low Countries and into France as far as the River Somme. The German attack against France, Halder suggested, could then be resumed in 1941! In essence, this was an unimaginative replay of the ‘Schlieffen Plan’, but with armor and air power now used to support the broad front advance of the German infantry. Hitler, having personally been in the trenches of the Western Front during World War I, was not impressed by Halder’s cautious proposal. Neither was General Gerd von Rundstedt who took it upon himself to instruct his chief of staff, Erich von Manstein, to produce a more creative and, it was hoped, more decisive alternative. In January 1940, a copy of the ‘Halder Plan’ fell into Allied hands when a plane carrying a Luftwaffe major made an emergency landing in Maasmechelen, in Belgium. This event, known as the "Mechelen Incident" is popularly thought to have been the reason that the Germans abandoned the ‘Halder Plan’; but, in point of fact, Hitler had already signaled that he was ready to reject the OKH plan in favor of the alternative proposed by Generals von Rundstedt and von Manstein well before January, 1940.  Lieutenant-General von Manstein’s version of Fall Gelb called for a multi-stage offensive: in the south, the nineteen divisions of Army Group ‘C’ would demonstrate in front of the Maginot Line to prevent French forces from shifting to reinforce other sectors, once the offensive actually began; Army Group ‘B’, with thirty divisions, would push into the Low Countries and hopefully draw substantial Allied forces north and east into Belgium; the third and most critical phase of the offensive called for the forty-five divisions of Army Group ‘A’ to rapidly push through the Ardennes and to breach the Meuse River defenses before they could be reinforced. This meant, however, that for the ‘Manstein Plan’ to succeed, the senior panzer commanders of Army Group ‘A’ would have to be audacious, almost to the point of foolhardiness, because the pace of the armored drive would have to be maintained no matter what. Such a rapid rate of advance in turn would mean that the mechanized forces would inevitably leave the regular, non-motorized forces farther and farther behind as the offensive progressed. Thus, the plan’s success would also depend on the near-flawless coordination of the fast-moving panzer forces and the Luftwaffe. This seamless ground-air ollaboration would be essential because, as the German armor raced ahead, it would be impossible for the artillery to keep up. Therefore, the dive bomber pilots of the Luftwaffe, by working and communicating directly with the panzer commanders on the battlefield, would have to take over the role of the armored forces’ (airborne) artillery.  The Allied high command, of course, could only guess at the broad operational outlines and intermediate goals of the German plan of campaign. The pronounced numerical superiority in the Luftwaffe fighter arm made Allied aerial reconnaissance flights over German territory difficult, if not impossible. Nonetheless, despite the clear signs of an ongoing enemy build-up to their front, the Allies remained confident that the section of France that directly bordered Hitler’s Third Reich was secure. Any German attack that came in this sector would have to breach the Maginot Line: a twenty-five kilometer deep belt of strongly-garrisoned fortifications, strong points and anti-tank barriers that covered the French border for approximately 145 kilometers. Unfortunately, these powerful fixed fortifications only extended from the Swiss border in the south, as far north as the city of Montmedy near the Belgian frontier. This meant that the rest of the Franco-Belgian border, which meandered some 435 kilometers, was more-or-less exposed to a German attack. And, in 1914, it had been through Belgium that the Kaiser’s troops had stormed, seizing vast tracts of French territory and, in the process, laying waste to many of the French Republic’s northern cities and towns. Moreover, a whole generation of Frenchmen had been maimed or killed in the four bloody years of the “Great War.” When it finally ended, it had been the fervent hope in both London and Paris that the just-ended conflict would, because of the terrible toll it had taken on all of its belligerents, be the "War to End All Wars." And yet now, barely twenty-years later, the unbelievable prospect of a new German invasion of France seemed immanent.  Not surprisingly given the lessons of the previous war, the very real threat posed by Germany was not lost either on the Belgian people or their government. Thus, although officially neutral, Belgian civilian and military leaders had, in the period following the fall of Poland, already made secret arrangements for Allied troops to enter Belgian territory at the first sign of a German move against the Low Countries. The leaders of the Entente had been quick to accede to Belgium’s confidential request; however, their willingness to come to Belgium’s aid was rooted in more than their altruistic impulse to help a weaker neighbor. From the standpoint of London, a rapid Allied move into the Low Countries would deny Hitler advanced airfields from which to launch bombing raids against England; for the French, such a northern advance would, it was hoped, shift the sites of the heaviest fighting away from French and into Belgian territory; in addition, both British and French military leaders believed that a powerful Allied lodgment in the Low Countries would pose a direct threat to Germany’s industrial heartland, the Ruhr. Thus, given the several strategic advantages of a military move to help the Belgians, preparations were immediately begun for just such an advance; and the final operational plan for the rapid Allied redeployment into Belgium was codenamed the ‘D’ (for Dyle) Plan, in honor of the Belgian River east of Brussels behind which the Allies hoped to form their line against the advancing Germans. Hitler’s attack might fall anywhere, but, based both on sound military principles and on past history, the majority of the Allied generals expected the Germans to again come through Flanders, as they had in 1914.  By late spring, the Allied high command considered that its forces were generally ready to meet a German blow wherever it might fall. The southern section of the Allied front was rendered secure by the Maginot Line, while the northern section of the French border — that part that ran from the North Sea along the Belgian frontier to the northern edge of the Ardennes — was now manned by the First Army Group: a powerful, largely-motorized force composed of the British Expeditionary Force (B.E.F.), under General Lord Gort, and many of the best, most mobile formations of the French army. Only the central part of the front was, compared to the northern and southern portions of the Allied line, relatively weakly-held; a situation that raised worries even within the Allied High Command, itself. However, General Maurice Gamelin, the Supreme Commander of the Allied Army, countered these concerns by pointing out that, although this central sector looked vulnerable when examined on a map, it was actually much safer from German attack than it appeared, primarily because it was shielded by the forests, streams and broken ground of the Ardennes. Moreover, not only did the bad terrain and primitive road net make even unopposed motorized movement awkward and slow in this area, but the paucity of east-west roads wide enough for two-way traffic would make resupplying a large attacking force once it had traversed the Ardennes exceedingly difficult, if not impossible. During the Polish campaign, Gamelin reminded his fellow generals, the Wehrmacht had demonstrated its heavy reliance on its mechanized forces to spearhead its offensive operations; thus, it seemed obvious to the Allied Supreme Commander that the lack of paved roads, the numerous (easily destroyed) bridges that crossed the many streams in the area, along with the generally poor off-road tank terrain that characterized much of the Ardennes, ruled it out as a possible site for the main German attack. [Interestingly, General Gamelin’s appraisal of the limitations of the Ardennes road net was actually quite accurate: in the case of the 41,000 vehicles that were assigned to Kleist’s Panzer Group, for example, only four roads could actually be allocated by Army Group ‘A’ headquarters to Kleist’s entire command for its passage through the Ardennes.] And finally, even if the Wehrmacht did make the colossal blunder of attempting a major armored thrust through the Ardennes, the Meuse River just inside the French border was fortified with pill boxes and field fortifications to a depth of over six kilometers. For this reason, the Allied commander was convinced that, in the unlikely event that an attack did fall here, the Germans would be unable to attempt a cross-river assault until supporting infantry and artillery could be brought forward: a process that would require a minimum of seven to ten days. In the meantime, General Gamelin and his staff were confident that the Meuse river defenses would be more than strong enough to hold back a hastily-organized German attack until Allied reinforcements could be transferred by rail to the threatened battle area. Thus, although far from perfect, the Allied defensive arrangements — when viewed as a whole — appeared both solid and sensible. And because the Allied high command believed that their own forces would not be ready for a sustained offensive against Germany before 1941, they bided their time and waited for Hitler to make the first move. And, after eight months, that move finally came.  At dusk on 9 May, 1940, word reached Allied headquarters that German units had begun rolling unopposed into Luxembourg; moreover, a noticeable jump in the number of infantry patrols, as well as other military movements along the Dutch and Belgian frontiers, indicated an unusual amount of German activity; but what all these enemy movements actually meant, no one at Gamelin’s headquarters could be sure. Sudden spikes in German patrol activity had occurred before, and nothing had come of it. In any case, while the Allied high command was far from unanimous in their estimate of German intentions, the senior officers of both the French and British armies were nonetheless confident that the combat power of the Allied forces and their plan of battle would, together, be sufficient to stop the Wehrmacht if it did attack on this day, or on any other. Unbeknownst to these Allied officers and their men, however, these last few hours were the calm before the German storm.  In the early hours of 10 May, Hitler’s Luftwaffe began ferocious airstrikes against airfields in France, Belgium and Holland, and the Wehrmacht soon followed-up with attacks of its own. These early German air and ground operations initially served to confirm Allied expectations: strong German attacks had quickly swamped the border defenses of both Holland and Belgium; while, at the same time, the Wehrmacht appeared content to maintain a mainly defensive posture in front of the Maginot Line. Thus, to meet these initial German moves, the “Dyle” Plan was put into effect, and the Allied First Army Group began to rapidly advance north into Belgium. It was soon depressingly obvious, however, that several important elements of the German plan had not been anticipated. The first unexpected shock arrived when disturbing news gradually began reach Supreme Allied headquarters that certain key objectives in Belgium and Holland, and even the powerful Belgian fortress of Eben-Emael, had been captured by German airborne troops; this was unsettling, to say the least. In fact, the unwelcome and premature loss of Eben-Emael was a major jolt to the Entente planners. But also worrisome to the Allied high command was the flurry of confused and sometimes contradictory reports beginning to come in from the central part of the front. These communiques, given battlefield developments farther to the north, were both unexpected and unsettling. A sizeable number of German mechanized units had already been encountered in the early fighting in Belgium and Holland; yet, in spite of this fact, several advanced Allied detachments deployed farther to the south were reporting that a very large German force, accompanied by armor, was slowly pushing its way, against light resistance, through the tangled forests and narrow lanes of the Ardennes. General Gamelin, although still convinced that a German armored attack in this sector was highly improbable, nonetheless issued orders on the 12th for several reserve infantry divisions to begin moving to reinforce the Meuse defenders; then, satisfied that events were generally proceeding as expected, the Supreme Commander and his staff sat back to allow time for the battlefield situation to develop. As it turned out, neither he nor his staff had long to wait.  On the evening of the 12th, the first elements of the XIXth corps of Kleist’s Panzer Group debouched out of the Ardennes near Sedan. By the afternoon of 13 May, a full seven days sooner than anyone in Allied headquarters had thought possible, the unbelievable happened: motorized infantry from the 1st, 2nd and 10th Panzer Divisions and from the SS Grossdeutschland Regiment — without waiting either for supporting artillery or for additional infantry to come up — attacked and fought their way across the Meuse at Houx, Monthermé and Sedan. In these river battles, the Luftwaffe, as Manstein had intended, was crucial to the success of all three of the German crossings. Moreover, in spite of often tenacious initial French resistance, the momentum of the German advance did not slacken. Instead, sappers immediately began building pontoon bridges as soon as both river banks had been secured and, within hours, the first vehicles from seven panzer divisions and four motorized divisions were streaming across the Meuse and into the Allied rear.  The successful crossing of the Meuse was the decisive moment in the entire campaign. Once the Germans had broken the river defenses near Sedan, panic quickly spread to other French units near the point of the breakthrough. With local morale crumbling, an immediate French counterattack could not be organized, and the breach in the Allied center steadily widened. It would never be closed. In desperation, the increasingly frantic Entente high command ordered planes to bomb the German crossings. However, repeated Allied bombing attacks, despite heavy aircraft losses, failed to destroy the temporary bridges, and German troops continued to pour across the Meuse. On 16 May, General Maxime Weygand was appointed to replace General Gamelin as Allied Supreme Commander, but the change in command had little effect on the Entente's fortunes on the battlefield. With Kleist’s mechanized units now loose in their rear, the Allied position deteriorated rapidly. Just five days after Gamelin’s dismissal, on 21 May, 1940, Guderian’s panzers — after beating back repeated Allied counterattacks on both flanks — reached the Channel Coast near the mouth of the Somme not far from Abbeville. To the north and east of Guderian’s panzers, the survivors of the once-powerful Allied First Army Group, along with several Belgian units, now found themselves with their backs to the Channel, encircled by the Germans and under constant air attack from the Luftwaffe. Even worse, a breakout by these trapped Allied soldiers was no longer militarily possible; it appeared that, given their predicament, only a miracle could save them from annihilation or capture. However and against all odds, between 26 May and 4 June, 1940, just such a miracle actually took place. In the space of nine days and nights, a fleet of over 850 naval and civilian vessels took part in the Royal Navy’s “Operation Dynamo” and, by making trip after trip to and from the French coast, succeeded in rescuing over 338,000 British, French, Canadian and Belgian troops from the harbor and beaches of Dunkirk. The British Expeditionary Force was forced to abandon its heavy equipment and artillery in France, but its soldiers, thanks to the success of "Dynamo," had managed to avoid German captivity and, instead, would live to fight another day. DESCRIPTION         In a much-needed effort to expand both the game’s variability and its playability, FRANCE, 1940 offers, besides the Allied and German Orders of Battle (OoBs) presented in the Historical Game, ten additional Allied OoBs and five alternate German OoBs for players to experiment with. These optional orders of battle suggest historically plausible ‘might-have-beens’ to the pre-war policies actually adopted by the belligerents. For example, several of the alternate Allied OoBs posit a French decision not to construct the Maginot Line, but, instead, to pursue alternative pre-war armament policies aimed at increasing the combat power of the regular French army and air forces by building more tanks and planes. For the Germans, one example of a hypothetical Wehrmacht OoB rests on the possible choice, by Hitler, not to invade Denmark and Norway. Each of these several alternate OoBs is rated by the designer in terms of its relative strength and, based on this numerical rating, can be matched against one another according to the relative experience and skill of the opposing players. In addition to this collection of different orders of battle, the game also offers a set of additional ‘Optional’ rules for those players who would like to add a little additional simulation detail to their games at the cost of increased complexity. These optional rules include: German Paratroops and air-landing units (the German player may conduct airborne assaults against Allied positions); Mild Winter Fortifications (posits a less severe 1939-40 winter than occurred historically; permits the construction of stronger Allied field fortifications from the Maginot Line to the coast); Variable Victory Conditions (this rule stipulates different levels of player victory); and Sea Evacuation of Allied Units (allows the Allies to conduct a ‘Dunkirk’ style naval rescue of Allied coastal units). A PERSONAL OBSERVATION Any discussion of FRANCE, 1940 always carries with it the temptation to join the ‘pig-pile’ of previous criticism that has already been heaped on this title. Even Dunnigan acknowledged, pretty early on, that he had basically ‘whiffed’ when it came to simulating the 1940 battle for France. Of course, in the eyes of many of his most determined critics, Dunnigan did more than ‘swing and miss’ when he designed FRANCE, 1940; instead, quite a few disgruntled players have argued that, when it came to this title, he actually let go of his bat completely and let it ‘brain’ the TAHGC team mascot. That, I think, is just a bit overblown. And although I am certainly not a big fan of this game, some of the criticism that has been directed over the years at FRANCE, 1940 still seems a little too harsh. Besides, back when the game first appeared, I personally found the hopelessness of the Allied position in the Historical Game quite interesting and — much to the delight of my regular opponents — almost always volunteered to command the out-classed Allies. That being said, nostalgia will only carry a title so far, and even after thirty-eight years, a game that was disappointing when it was originally published, is most likely still going to be disappointing, today. Such, alas, is the case with FRANCE, 1940.  Part of the problem with FRANCE, 1940, when looked at purely from the designer’s vantage point, is that the totality of the historical situation is extremely difficult to simulate. In fact, a large share of the blame for the very real shortcomings of Dunnigan’s design can probably be traced directly to the facts surrounding the conduct and outcome of the actual battle. The speed and lop-sidedness of the German victory over an Allied force that was technologically equal and numerically equal or superior to the attacking Germans in every category except that of airpower is, viewed in retrospect, almost incomprehensible. Not surprisingly, since the appearance of FRANCE, 1940 other designers have attempted to model this campaign, and a few of them have even succeeded a little better than Dunnigan in meeting the challenge posed by this historical puzzle. I would argue, for example, that John Prados’ THIRD REICH (1974) and Frank Chadwick’s 1940 (1980) both do a better job of reproducing some aspects of the German blitzkrieg than does FRANCE, 1940; however, neither of these two design alternatives, despite their cleverness, is really any more likely to match the actual battlefield events of the historical campaign than is Dunnigan’s botched turn at "at bat." Thus, the main difficulty with this game, and, in fact, with almost all simulations of the 1940 German campaign against France and the Low Countries, is that the historical result — barring the imposition of arbitrary ‘idiocy’ rules on the Allied player — is exceedingly difficult for a game designer to replicate. I personally believe that the wheels came off of FRANCE, 1940 because the final game design ended up being the result of a decision, by a frustrated Jim Dunnigan, to work backwards from the historical outcome to a plausible starting point, rather than from beginning to end. And while this ‘reverse-engineering’ approach might be useful for mapping out design solutions for some simulation problems, it clearly did not work for this one.  One of the characteristics of the games from the 1970s and 1980s that I have always admired is that the designers of that era approached their simulations with a distinct point-of-view. An individual player might agree or disagree with the designer’s take on a specific battle or campaign, but at least the player usually had a clear understanding as to what the designer considered to be the critical elements that led to the ultimate historical outcome. In the case of FRANCE, 1940, I don’t think that Dunnigan was able to come up with a simulation narrative that really worked in conveying the essence of the historical campaign. And his default position — the Germans were simply unbeatable in 1940 — sounds, when one reads the "Designer’s Notes" an awful lot more like an excuse from someone suffering from designer’s block, than it does a carefully reasoned historical judgment about the 1940 campaign. This oddly-deterministic conclusion, by the way, also makes Jim Dunnigan the only serious student of history that I have ever run across who actually argues that the ‘Halder Plan’ would have produced a better result for the Germans than the historical ‘Manstein Plan’! I suspect that this eccentric historical judgment may, however, actually explain a few (if not, most) of the design problems that surfaced in FRANCE, 1940. Thus, it could be that when it came to this game, the designer’s creative well had temporarily run dry. It is abundantly clear, for example, that the regular KURSK game platform (with its relatively bloodless CRT) didn’t work for this situation; so, in the end, I think that it is possible that a desperate designer latched onto the concept of the compulsory Counterattack — perverse and unrealistic though it might be — as a way of artificially producing the outcome that he wanted. After all, this pernicious little design ‘slight of hand’, particularly when combined with the carefully-chosen disparity in the combat strengths of the German and French infantry corps, accomplished what Dunnigan set out to do: it virtually guaranteed that the Germans couldn’t lose. Sadly, this trick on the designer’s part meant that clever play was made as irrelevant to the outcome of the game for the German player as it was for his hapless Allied opponent. Since virtually any German plan will work; why even bother to set the game up? Needless-to-say, both from a simulation and from a gaming standpoint, this choice by the designer was not well-received by the more skeptical members of the hobby when the game first appeared. And it still isn’t, today.  In the end, the story that Jim Dunnigan chose to tell with FRANCE, 1940 turned out, I believe, to be both fundamentally flawed and woefully unsatisfying. Thus, the most important reason for the game’s failure as a simulation — in the view of most critics, myself included — is that his design solution actually has no logical connection to the main factors that most students of military affairs generally accept as having led to the Allied catastrophe in 1940. The Allies did not lose the 1940 battle for France because their troops were cowardly or inept; nor did they lose because the French poilu (ordinary soldiers) insisted on throwing themselves against the advancing Germans in wave after wave of suicidal frontal attacks. On the contrary, the Allied defeat was rooted in other, more commonplace and readily identifiable causes; some of the most notable of which were: the impossibly optimistic (and militarily lethargic) view that Germany might be defeated through the imposition of a naval blockade without any major Allied ground fighting even being necessary; a strategic emphasis — at least until significant additional forces could be mobilized by spring of 1941 — on static, defensive battle; an inflexible, painfully-slow and poorly-coordinated system of command and control; an underdeveloped air doctrine that made the effective coordination of ground and air operations virtually impossible; and a senior leadership with only the most rudimentary understanding or appreciation of the true shock value — both psychological and military — of massed armor formations, particularly when those powerful, fast-moving units were closely supported by air power. Finally and perhaps most importantly, the Allies lost in 1940 because the Germans, although they made their share of mistakes, got almost all of the major things right; while the Allies seemed to get most of the same things terribly and tragically wrong.  Perhaps, the kindest thing that can be said about FRANCE, 1940 is that the graphic design of the game — given when it was published — is really top-notch. The map is a little plain, but unambiguous, and the rules booklet, unit counters and other play aids are all very nicely done. Moreover, FRANCE, 1940 was one of the last titles published by the Avalon Hill Game Company to use the ultra-sturdy, sleeved-box packaging format. Nonetheless, as either a historical simulation or simply as a game of the 1940 battle for France, Dunnigan’s creation offers very little of real value to the contemporary gamer. The design elements that make it unique, also, unfortunately, make it unsatisfactory as a game. For this reason, I believe that this title, while it may be of some interest to serious collectors of World War II games, is probably a poor choice for either casual or experienced gamers. Finally, for those readers who are interested in a very nice, after-market redesign of the map and counters for FRANCE, 1940, upgraded versions of these game components are available for download (in PDF file format) at: http://www.jrcooper.com/france1940.htm. Design Characteristics:
Game Components:
Recommended ReadingSee my blog post Book Reviews of these titles; all of which are strongly recommended for those readers interested in further historical background.THE WEST POINT ATLAS OF AMERICAN WARS (Complete 2-Volume Set)
Subscribe to:
Comments (Atom)
Subscribe ToPopular Posts
About Me
My Nephew Joe and Three Marine Buddies
|


